
In the realm of photography, achieving sharp focus is often the goal right from the moment you capture an image with your camera lens. Image sharpness is crucial for bringing out details and making your photos visually appealing. However, even with the steadiest hands and best equipment, sometimes photos can turn out slightly soft or blurry. Thankfully, Adobe Photoshop offers a range of powerful tools to help you sharpen your images and rescue those almost-perfect shots.
This tutorial will guide you through various techniques to sharpen images in Photoshop, from basic filters to more advanced methods, ensuring you can enhance your photos effectively.
To better illustrate the sharpening techniques, we will focus on a specific section of the image. Use the Zoom Tool in Photoshop to magnify a part of the picture you want to work on.
Before we dive into sharpening, remember a golden rule of photo editing: always work non-destructively. This means avoiding direct changes to your original image layer. The best practice is to duplicate the Background layer and apply all sharpening adjustments to the duplicate layer. This way, your original image remains untouched. To duplicate a layer, simply press Ctrl + J (Cmd + J on Mac) or drag the Background layer to the New Layer icon at the bottom of the Layers panel.
Simple Sharpen Filters: Sharpen, Sharpen More, and Sharpen Edges
Photoshop offers a few straightforward sharpen filters under the Filter menu, in the Sharpen submenu: Sharpen, Sharpen More, and Sharpen Edges.
To see how these work, duplicate your Background layer multiple times. Apply each of these filters to separate duplicate layers. These are one-click filters, meaning they apply a preset sharpening effect without any adjustable parameters.
These basic sharpen filters are among the oldest sharpening tools in Photoshop. While they are incredibly simple to use, they might not be the most effective for high-resolution images common in modern photography. In terms of intensity, Sharpen is the weakest, followed by Sharpen Edges, and then Sharpen More being the strongest.
You can observe the subtle differences in sharpness in the animation below, showcasing the effect of each simple sharpen filter.
Unsharp Mask: Precision Sharpening
For more control over the sharpening process, Unsharp Mask is a significantly better option. You can find it under Filter > Sharpen > Unsharp Mask.
In the Unsharp Mask dialog box, you’ll see a preview window. Click within this preview to change the area you’re inspecting, allowing you to compare the before and after sharpening effects on different parts of your image.
The term “Unsharp Mask” might sound counterintuitive, but it’s named after the technique it employs. It works by first blurring the image slightly using a Gaussian Blur, and then it enhances the contrast along the edges, which creates the perception of sharpness. Essentially, Photoshop’s sharpening process increases the contrast between dark and light pixels, making dark pixels darker and light pixels lighter.
The Unsharp Mask filter provides three key parameters to adjust: Amount, Radius, and Threshold. Start by adjusting the Amount. This slider determines the intensity of the contrast enhancement between the dark and light pixels. Higher values lead to more aggressive sharpening.
Next, adjust the Radius. Sharpening can sometimes create bright halos around the edges of objects, known as “halo effect.” The Radius setting controls the width of these halos, or more technically, the number of pixels around the edges that are affected by the sharpening. A smaller radius sharpens finer details, while a larger radius sharpens more prominent edges.
Finally, Threshold controls the minimum brightness difference between adjacent pixels that will be sharpened. A lower threshold value sharpens more pixels, including areas with subtle contrast variations, which can sometimes increase noise. A higher threshold value restricts sharpening to areas with significant contrast, reducing noise but also potentially missing subtle details.
Camera Raw Filter for Advanced Sharpening
For even more sophisticated sharpening, Photoshop’s Camera Raw Filter offers excellent tools. Go to Filter > Camera Raw Filter. This filter is more advanced than Unsharp Mask and provides finer control. Make sure to zoom in on your image to accurately assess the sharpening effect.
In the Camera Raw dialog, navigate to the Detail tab on the right-hand side. Here, you’ll find the Sharpening panel with adjustable sliders.
The parameters here are similar to Unsharp Mask but with added refinements. You have Amount, Radius, and Detail, which are comparable to Amount, Radius, and Threshold in Unsharp Mask. However, Camera Raw adds a Masking slider, which is similar to Threshold but offers a more intuitive way to control where sharpening is applied. Detail slider controls how much high-frequency detail is sharpened, effectively managing noise introduced by sharpening.
The Masking slider is particularly useful for preventing sharpening in areas where you don’t want it, such as smooth backgrounds or skin. If you hold the Alt key (Option on Mac) while dragging the Masking slider, you’ll see a black and white mask overlay. White areas indicate where sharpening will be applied, and black areas are protected from sharpening.
Smart Sharpen: Intelligent Sharpening
Lastly, Smart Sharpen, found under Filter > Sharpen > Smart Sharpen, is another powerful tool. What sets Smart Sharpen apart is that it allows you to choose different blur methods. While Unsharp Mask always uses Gaussian Blur, Smart Sharpen lets you select Lens Blur or Motion Blur, depending on the type of blurring in your image. It also includes a Reduce Noise slider to minimize any noise introduced during the sharpening process.
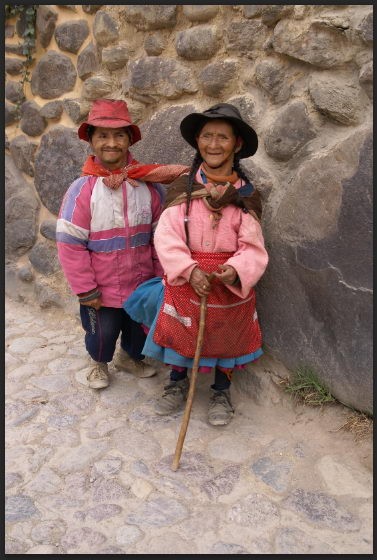
In this example, comparing Smart Sharpen with Sharpen More, you can see how Smart Sharpen effectively enhances the details in the white fabric of the man’s shawl, demonstrating its ability to preserve and enhance finer details.
Conclusion
Photoshop provides a variety of tools to sharpen your images, catering to different needs and levels of control. While basic filters like Sharpen, Sharpen More, and Sharpen Edges offer quick solutions, they lack precision. For more refined and effective sharpening, Unsharp Mask, Camera Raw Filter, and Smart Sharpen are superior choices, giving you the ability to fine-tune the sharpening effect and achieve professional-looking results. Experiment with these techniques to find the best approach for enhancing the sharpness and clarity of your photographs.