
Are you eager to dive into the world of graphic design with Photoshop? Understanding the fundamental tools is your first step to creating stunning visuals. Photoshop, a powerhouse software in digital art, offers a vast array of tools, and among them, selection tools are crucial for manipulating images effectively. This guide will focus on one of the most versatile selection tools: the Lasso Tool. We’ll explore how to use the Lasso Tool in Photoshop to precisely select parts of your images, unlocking a world of editing possibilities.
Understanding Selection Tools in Photoshop
Before we zoom in on the Lasso Tool, it’s helpful to understand the broader context of selection tools in Photoshop. These tools allow you to isolate specific areas of an image, enabling you to apply edits, effects, or adjustments to only those selected portions, leaving the rest of the image untouched. Photoshop offers various selection tools, each with its strengths for different selection scenarios:
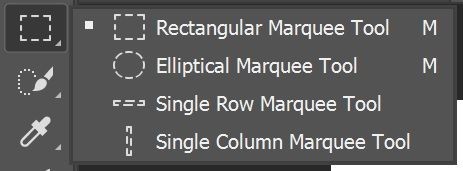
- Marquee Tools: For selecting rectangular, elliptical, or single-pixel rows and columns. These are great for geometric shapes and straight lines.
- Quick Selection Tool & Magic Wand Tool: These tools are designed for quick and intuitive selections based on color and tonal similarities. They excel at selecting objects with well-defined edges or areas of uniform color.
While these tools are valuable, the Lasso Tool stands out for its freeform selection capabilities. It provides a level of precision and flexibility that is unmatched when you need to select irregular shapes or intricate details.
Deep Dive into the Lasso Tool
The Lasso Tool in Photoshop is your go-to tool when you need to draw a selection boundary freehand. Unlike the Marquee tools that are constrained to geometric shapes, the Lasso Tool lets you create selections of any shape you can imagine, simply by dragging your mouse or pen. This makes it incredibly useful for selecting objects with complex or organic outlines.
What is the Lasso Tool and its Purpose?
The primary function of the Lasso Tool is to create freehand selections. This means you manually draw the selection boundary around the area you want to isolate. This tool is particularly effective when:
- Selecting objects with irregular shapes.
- Isolating specific details within an image.
- When you need more control over the selection boundary than automated tools can offer.
Types of Lasso Tools
Photoshop offers three variations of the Lasso Tool, each catering to different selection needs and preferences:
-
Lasso Tool (Freehand Lasso Tool): This is the standard Lasso Tool. You click and drag to draw a freehand selection. It’s ideal for when you have a steady hand and need maximum control over the selection path.
-
Polygonal Lasso Tool: This tool allows you to create selections using straight lines. You click to set anchor points, and Photoshop connects these points with straight lines to form your selection. The Polygonal Lasso Tool is perfect for selecting objects with straight edges or geometric forms.
-
Magnetic Lasso Tool: This intelligent tool tries to “snap” the selection boundary to the edges of objects in your image. As you drag the Magnetic Lasso Tool along an edge, it automatically detects and adheres to the contours, making it faster for selecting objects with well-defined edges against contrasting backgrounds.
How to Use Each Lasso Tool
Let’s explore how to use each type of Lasso Tool to make selections in Photoshop:
1. Freehand Lasso Tool:
- Select the Lasso Tool: Find the Lasso Tool icon in your Tools panel (it looks like a lasso). If you see one of the other Lasso Tool variations, click and hold on the icon to reveal a flyout menu and choose the standard Lasso Tool.
- Start Drawing: Click and hold down your mouse button on the starting point of your selection.
- Trace the Outline: Drag your mouse to draw freely around the object or area you want to select. Keep the mouse button held down as you draw.
- Close the Selection: To complete the selection, release the mouse button. The selection will automatically close by connecting the endpoint back to your starting point. For precise closure, you can also bring your cursor back to the starting point; a small circle will appear next to the lasso icon, indicating you can click to close the path exactly at the start.
2. Polygonal Lasso Tool:
- Select the Polygonal Lasso Tool: Choose the Polygonal Lasso Tool from the Tools panel (or the Lasso Tool flyout menu).
- Set Anchor Points: Click to set the first anchor point of your selection.
- Continue Clicking: Move your mouse to the next point along the edge of your desired selection and click again to set another anchor point. Photoshop will draw a straight line between these points. Continue clicking to create a series of connected straight lines outlining your selection.
- Close the Selection: To close the selection, you can:
- Click on the starting anchor point. A small circle will appear next to the lasso icon when you hover over the start point. Click to close.
- Alternatively, you can close the path at any point by double-clicking. Photoshop will automatically connect the last anchor point to the starting point with a straight line.
3. Magnetic Lasso Tool:
- Select the Magnetic Lasso Tool: Choose the Magnetic Lasso Tool from the Tools panel (or the Lasso Tool flyout menu).
- Start Tracing: Click once on the edge of the object you want to select to set the starting point.
- Drag Along the Edge: Move your mouse along the edge of the object. You don’t need to hold down the mouse button. The Magnetic Lasso Tool will automatically try to snap to the edge, placing fastening points along the way to define the selection boundary.
- Adjust Settings (Optional): In the Options Bar at the top, you can adjust settings like Width (detection range), Contrast (edge sensitivity), and Frequency (fastening point spacing) to fine-tune the tool’s behavior.
- Correct Mistakes: If the Magnetic Lasso Tool snaps to the wrong edge, you can:
- Press the Backspace or Delete key to remove the last fastening point and backtrack.
- Click manually to add fastening points in specific locations to guide the selection.
- Close the Selection: Similar to the Polygonal Lasso Tool, you can close the selection by:
- Clicking on the starting anchor point (circle icon appears).
- Double-clicking to close the path automatically.
Example: Selecting a Strawberry with the Lasso Tool
Let’s say you want to select a strawberry from an image, similar to the example in the original article. The Lasso Tool is perfect for this because of the strawberry’s irregular shape. You can use any of the Lasso Tool variations depending on your preference and the image detail:
- Freehand Lasso: Good for detailed, careful tracing if you have a steady hand.
- Polygonal Lasso: Useful if you want to create a stylized, faceted selection of the strawberry.
- Magnetic Lasso: Potentially the fastest if the strawberry has good contrast with its background, allowing the magnetic tool to easily snap to its edges.
Once you have made your selection using any of the Lasso tools, you can then perform various operations on the selected area, such as:
- Moving the selection: Using the Move Tool (shortcut: V) to reposition the selected part of the image.
- Copying or cutting the selection: To paste the selected strawberry elsewhere or remove it from its original location.
- Applying adjustments or filters: To change the color, brightness, or apply effects only to the selected strawberry.
- Deleting the selected area: To remove the strawberry from the image.
Combining Lasso Tool with Other Tools
The power of the Lasso Tool is further amplified when combined with other Photoshop tools. For instance, after making a selection with the Lasso Tool, you might use:
- Move Tool (V): To reposition the selected area.
- Brush Tool (B): To paint or add details within the selection.
- Eraser Tool (E): To refine the selection edges or remove parts of the selection.
- Fill Tool (G) or Paint Bucket Tool: To quickly change the color of the selected area.
By mastering the Lasso Tool and understanding its variations, you gain a fundamental skill for precise image editing in Photoshop. Whether you’re removing backgrounds, isolating objects, or making intricate composites, the Lasso Tool is an indispensable part of your Photoshop toolkit. Experiment with each type of Lasso Tool to find which one best suits your workflow and the specific selection task at hand.