Modern vehicles are marvels of engineering, packed with sophisticated computer systems that control everything from engine performance to safety features. When something goes wrong, or when you simply want to monitor your car’s health, the On-Board Diagnostics II (OBD-II) system becomes your best friend. To access this valuable data, you’ll need an OBD-II scanner, and the first hurdle is often figuring out where to plug in your OBD II scanner.
Finding the OBD-II port can sometimes feel like a mini scavenger hunt. While standardized, its location isn’t always obvious and varies from car to car. This guide will walk you through the common locations, help you identify the port, and get you connected so you can start diagnosing your vehicle like a pro.
Understanding the OBD-II Port and Its Importance
Before we dive into locations, let’s quickly understand what an OBD-II port is and why it’s crucial for modern car maintenance. The OBD-II port is essentially an access point to your car’s central computer. This computer constantly monitors various systems within your vehicle, from engine emissions and performance to transmission and braking systems.
Since the mid-1990s (specifically 1996 in the US), OBD-II has been a standard requirement for almost all cars. This standardization means that any OBD-II compliant scanner can communicate with any OBD-II equipped vehicle, regardless of make or model. This standardization revolutionized car diagnostics, making it easier for both mechanics and car owners to understand what’s happening under the hood.
By plugging an OBD-II scanner into this port, you can:
- Read Diagnostic Trouble Codes (DTCs): These codes pinpoint specific issues within your car, often illuminating the “check engine” light.
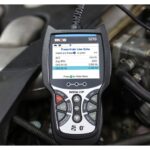
- Monitor Real-time Data: Access live information about your engine’s performance, such as engine speed (RPM), coolant temperature, oxygen sensor readings, and much more.
- Perform Emissions Tests: Check your vehicle’s emissions readiness for compliance.
- Clear Trouble Codes: After repairs, you can often clear the diagnostic codes and turn off the “check engine” light.
In essence, the OBD-II port is your gateway to understanding your car’s inner workings and performing effective diagnostics and maintenance.
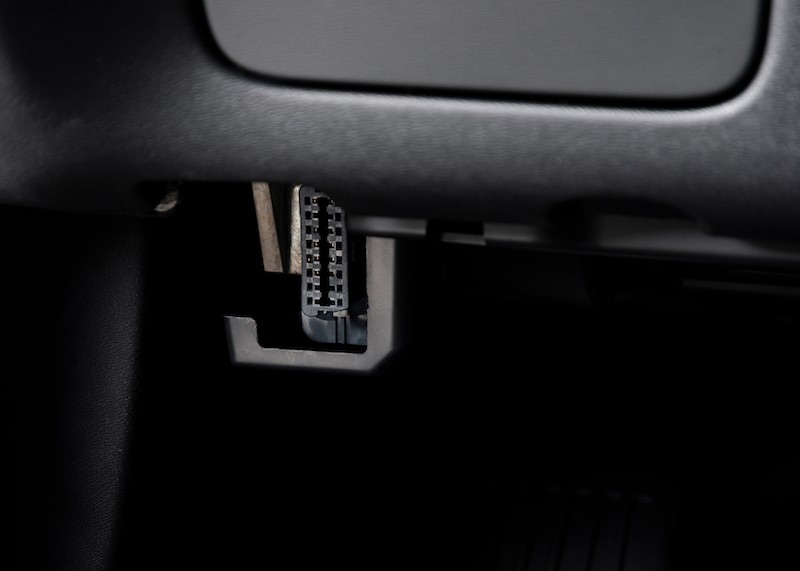
What Does an OBD-II Port Look Like?
The OBD-II port is designed to be easily recognizable once you know what to look for. Typically, it’s a 16-pin, trapezoid-shaped female connector. Imagine a small, rectangular socket with two rows of pins inside.
Here are key characteristics to help you identify it:
- Shape: Rectangular and approximately 1.5 inches wide and 0.5 inches tall.
- Pins: Features 16 pins arranged in two rows.
- Material and Color: Often made of black plastic, but can also be gray, white, or other colors. The material can be plastic or sometimes metal.
- Protective Cover: In some vehicles, the OBD-II port may be covered by a small plastic flap or cover. This cover might have labels like “OBD-II,” “Diagnostic,” or “Service.” You’ll need to open or remove this cover to access the port. Be gentle when removing any cover; if you encounter resistance, consult your car’s manual.
Don’t confuse the OBD-II port with other connectors in your car, such as USB ports or auxiliary jacks, which are usually smaller and have different shapes. The distinctive 16-pin trapezoidal shape is the key identifier for your OBD-II port.
Common OBD-II Port Locations: Where to Search
The standardized nature of OBD-II doesn’t extend to its location within the vehicle. Automakers have considerable freedom in placement, leading to some variation. However, there are several common areas where you’re most likely to find it.
1. Under the Driver’s Side Dashboard
This is by far the most frequent location for the OBD-II port. Manufacturers often place it within easy reach of the driver for convenient access by mechanics and technicians.
Where to look specifically:
- Below the Steering Wheel: Start by checking directly underneath the steering column. Look for the port in the area above your knees when seated in the driver’s seat. It’s often near the pedals or the fuse box.
- To the Left of the Steering Wheel: If it’s not directly underneath, check to the left side of the steering column. Look near the driver’s side door, still under the dashboard.
- To the Right of the Steering Wheel: If you haven’t found it on the left, check the right side of the steering column, moving towards the center console area.
Tips for searching under the dashboard:
- Use a flashlight: The area under the dashboard can be dimly lit. A flashlight will significantly improve visibility.
- Feel around: If you can’t see it immediately, gently feel under the dashboard. The port has a distinct shape that you might be able to identify by touch.
- Check behind panels: In some cases, the port might be slightly recessed or located behind a small, easily removable plastic panel.
2. Around the Center Console
If the driver’s side dashboard search comes up empty, the next most likely area is the center console. This area encompasses the space between the driver and passenger seats, often housing the gear shift, radio, and climate controls.
Where to look in the center console area:
- Under the Dashboard, Above the Pedals (Center): In some vehicles, the port might be located centrally under the dashboard, but more towards the center console area, above the pedals.
- On the Lower Center Console: Check the lower part of the center console, near the floor, on either the driver or passenger side.
- Inside the Center Console Compartment: Less commonly, but worth checking, the OBD-II port could be located inside the storage compartment of the center console, often under a removable tray or lining.
Important Note: OBD ports in the center console area are sometimes more likely to have a protective cover. Look for a small flap or panel that might conceal the port.
3. Less Common Locations
While less frequent, the OBD-II port can occasionally be found in these other locations:
- Passenger Side Dashboard: Check under the glove compartment on the passenger side, in a similar position to where it might be on the driver’s side.
- Behind the Rear Seats: In some SUVs or larger vehicles, the port could be located in the rear passenger area, often in the side paneling or within a console between the rear seats. This is less common in standard passenger cars.
- Inside the Engine Bay: Very rarely, and mostly in older or specialized vehicles, the diagnostic port might be located in the engine compartment. This is uncommon for OBD-II and more typical for older OBD-I systems.
When in doubt, consult your car’s manual. The owner’s manual is your definitive guide to your vehicle’s features and specifications, and it should indicate the location of the OBD-II port. Look in the index for “diagnostic port,” “OBD-II,” or “scanner port.”
What If You Can’t Find a Standard OBD-II Port?
For vehicles manufactured before 1996, or for certain specialized models, you might not find a standard OBD-II port. Also, some very early OBD-II implementations might use slightly different connectors.
If you can’t locate a standard OBD-II port:
- Check your vehicle’s year of manufacture: If it’s older than 1996, it might have an older OBD-I system or a proprietary diagnostic port.
- Consult your car’s manual: The manual should specify the type of diagnostic system your car uses and the port location, if any.
- Consider an adapter: For some older vehicles or non-standard ports, adapters are available that can convert the connection to a standard OBD-II interface. However, compatibility can vary, so research carefully.
- Use a 12V Power Port Adapter (Rare Cases): In very specific situations, like with some electric vehicles or older models with unusual diagnostic setups, you might need to use a special adapter that connects via the 12V power port (cigarette lighter socket). This is less common for general OBD-II scanning and more relevant for specific devices or insurance telematics.
Important Note: For most modern cars (1996 and newer), the standard OBD-II port is the norm. Not finding it usually just means it’s in a less obvious location, not that it’s absent.
Ensuring a Proper Connection
Once you’ve located your OBD-II port, connecting your scanner is usually straightforward.
Steps for connecting your OBD-II scanner:
- Locate the OBD-II port using the methods described above.
- Remove any protective cover from the port.
- Align the scanner’s connector with the OBD-II port. It should only fit in one orientation.
- Firmly push the scanner’s connector into the port until it’s securely seated. You might feel a slight click or resistance as it connects.
- Turn on your car’s ignition to the “ON” position (without starting the engine, if your scanner requires it – check your scanner’s instructions). Some scanners can draw power directly from the OBD-II port, while others might need the ignition to be on.
- Follow your OBD-II scanner’s instructions to begin diagnostics or data reading.
Troubleshooting connection issues:
- Check for proper alignment: Ensure the scanner connector is correctly aligned with the port before forcing it.
- Inspect for damage: Examine both the OBD-II port and the scanner connector for any bent pins or damage.
- Try a different scanner (if possible): If you suspect the scanner is faulty, try using a different OBD-II scanner to see if the issue persists.
- Consult a mechanic: If you’re still having trouble connecting or getting a reading, it’s best to consult a qualified mechanic to check your vehicle’s OBD-II system.
Stay Connected for Car Health
Finding where to plug in your OBD II scanner is the first step towards unlocking a wealth of information about your vehicle’s health and performance. With the right scanner and a little know-how, you can confidently diagnose issues, monitor your car’s condition, and potentially save money on unnecessary repairs. Embrace the power of OBD-II and stay connected to your car’s inner workings for a smoother and more informed driving experience.