
Diagnosing your car issues with an OBD2 scanner is usually a straightforward process. However, encountering a situation where your Obd Scanner Not Connecting To Ecu can be incredibly frustrating. When your scan tool fails to link up with the Engine Control Unit (ECU), you’re essentially locked out of vital diagnostic data, hindering your ability to read check engine lights or address other vehicle malfunctions.
This comprehensive guide, brought to you by the experts at obd2scanner.store, dives deep into the common reasons behind OBD2 scanner connection failures and provides detailed troubleshooting steps to get you back on track.
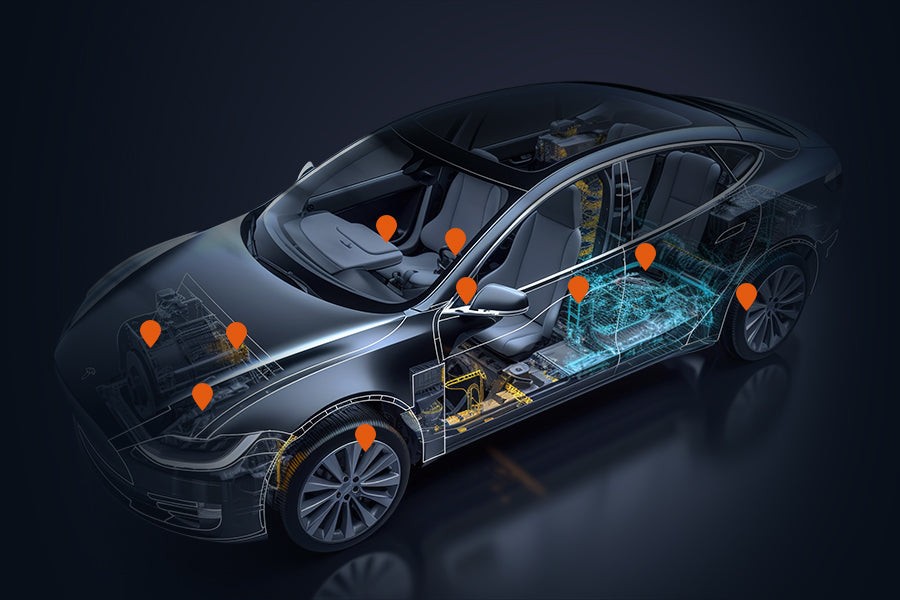
Decoding the Disconnection: Why Your OBD Scanner Won’t Connect to the ECU
Before you can fix the problem, it’s essential to understand why your OBD scanner is not connecting to the ECU. OBD2 (On-Board Diagnostics II) systems are designed to provide access to your vehicle’s computer for performance monitoring and diagnostics. The OBD2 port, typically located under the dashboard, should be your gateway to this information. However, several factors can interrupt this communication:
- Insufficient Power Supply: Like any electronic device, your OBD2 scanner and the ECU need adequate power to function correctly. A weak car battery or a power issue at the OBD2 port can prevent a successful connection.
- Defective OBD2 Port: The OBD2 port itself can be the culprit. Physical damage, bent pins, corrosion, or blockage from debris can disrupt the connection.
- OBD2 Scanner Incompatibility: Not all OBD scanners are universally compatible. Some vehicles, especially older models or those with specific communication protocols, might not be supported by your particular scanner.
- Blown Fuse Affecting OBD2 Port: The OBD2 port is often protected by a fuse. If this fuse blows, it cuts off power to the port, making it impossible for the scanner to connect.
- Incorrect Communication Protocols: Modern vehicles use various communication protocols (like CAN, ISO 9141, KWP2000) for OBD2 communication. If your scanner isn’t set to the correct protocol or doesn’t automatically detect it, a connection failure will occur.
- Scanner Software Glitches: Outdated or corrupted software within your OBD2 scanner can lead to communication errors and prevent connection to the ECU.
Pinpointing the Problem: Common Causes of OBD2 Connection Issues
Let’s explore each potential cause in more detail to help you diagnose the “OBD scanner not connecting to ECU” issue more effectively.
Power Supply Problems
A weak battery is a common offender. Ensure your car battery is fully charged and in good health. Use a multimeter to test the voltage at the OBD2 port itself. You should be getting around 12 volts. If the voltage is significantly lower, investigate battery issues or wiring problems.
Faulty OBD2 Port Inspection
Carefully examine the OBD2 port for any signs of physical damage. Look for:
- Bent or broken pins: These are delicate and can be easily damaged.
- Corrosion: Greenish or white deposits indicate corrosion, which can impede electrical contact.
- Debris: Dirt, dust, or foreign objects lodged in the port can block the scanner’s connector.
Ensure the pins inside the port are straight, clean, and free from corrosion.
Scanner Compatibility Verification
Before assuming a fault, double-check that your OBD2 scanner is actually compatible with your vehicle’s make, model, and year. Consult your scanner’s manual or the manufacturer’s website for compatibility lists. Some vehicles might require specific scanners or adapters to establish a connection. Premium scanners like the Foxwell NT809 boast wider vehicle compatibility, reducing this issue.
Blown Fuse Diagnosis
Locate the fuse box in your vehicle (refer to your owner’s manual for its location). Identify the fuse that protects the OBD2 port or the diagnostic system. It’s usually labeled as “OBD,” “Diagnostic,” or something similar. Check the fuse for a broken filament. If blown, replace it with a fuse of the same amperage rating. A blown fuse is a simple fix but crucial for restoring power to the OBD2 port.
Communication Protocol Mismatch
Vehicles use different OBD2 communication protocols. While many modern scanners automatically detect the correct protocol, older or basic scanners might require manual protocol selection. Your vehicle’s repair manual should specify the correct protocol. Ensure your scanner is set to the appropriate protocol (CAN, ISO 9141, KWP2000, etc.) for your vehicle.
Software and Scanner Glitches
Like any electronic device, OBD2 scanners can experience software glitches. Sometimes, simply restarting your scanner can resolve temporary software issues. For more persistent problems, check for software updates from the scanner manufacturer. Outdated software can have bugs that affect connectivity.
Step-by-Step Troubleshooting Guide: Getting Your OBD Scanner Connected
When faced with an “OBD scanner not connecting to ECU” situation, a systematic approach is key. Using a reliable scan tool like the Foxwell NT809 can simplify the process. Here’s a step-by-step guide:
Step 1: Power Supply Check at the OBD2 Port
- Turn your vehicle’s ignition to the “Accessory” position (without starting the engine).
- Use a multimeter to check for voltage at the OBD2 port. The positive probe of the multimeter should be placed on pin 16 (typically the top right pin), and the negative probe on pin 4 or 5 (ground pins).
- You should read approximately 12 volts. If the voltage is absent or significantly low, there’s a power supply issue that needs further investigation.
Step 2: OBD2 Port Physical Inspection and Cleaning
- Visually inspect the OBD2 port for any physical damage, bent pins, corrosion, or obstructions.
- If you notice debris, use compressed air to gently blow out any dust or dirt.
- If there’s corrosion, carefully use an electrical contact cleaner on the port pins.
Step 3: Scanner Compatibility Verification (Crucial Step)
- Consult your OBD2 scanner’s manual or the manufacturer’s website.
- Look for vehicle compatibility lists or use a compatibility lookup tool if available.
- Verify that your scanner explicitly lists your vehicle’s make, model, and year as supported.
- If compatibility is questionable, consider using a more versatile scanner or an adapter if recommended by the manufacturer.
Step 4: Fuse Box Examination
- Locate the fuse box in your vehicle (refer to your owner’s manual).
- Identify the fuse related to the OBD2 system or diagnostics.
- Visually inspect the fuse for a blown filament.
- If the fuse is blown, replace it with a new fuse of the correct amperage rating.
- After replacing the fuse, try connecting your OBD2 scanner again. If the fuse blows again immediately, there might be a short circuit in the OBD2 system that requires professional attention.
Step 5: Protocol Setting Adjustment
- Refer to your vehicle’s repair manual or online resources to determine the correct OBD2 communication protocol for your car (e.g., CAN, ISO 9141, KWP2000).
- Access your OBD2 scanner’s settings menu.
- Look for protocol selection options.
- Manually set the scanner to the correct protocol for your vehicle. (Note: Many modern scanners auto-detect this, so manual setting might not be necessary.)
Step 6: Scanner Software Update Procedure
- Connect your OBD2 scanner to a computer with internet access, as per the manufacturer’s instructions.
- Visit the scanner manufacturer’s website and look for a “software update” or “firmware update” section.
- Download and install the latest software updates for your scanner, following the provided instructions.
- After updating, try connecting the scanner to your vehicle again.
Step 7: Scanner Reset Attempt
- Turn off your OBD2 scanner and disconnect it from the OBD2 port.
- Wait for a few minutes.
- Reconnect the scanner to the OBD2 port and turn it back on.
- Attempt to establish a connection with the ECU again. A simple reset can sometimes clear temporary glitches.
Advanced Troubleshooting Tips for Persistent Connection Issues
If you’ve gone through the step-by-step guide and your OBD scanner is still not connecting to the ECU, here are some additional tips and more advanced troubleshooting steps:
Double and Triple-Check Connections
Ensure the OBD2 connector is firmly and correctly plugged into your vehicle’s OBD2 port. A loose connection can lead to intermittent or no communication. Push it in firmly to ensure a solid connection.
Wiring Harness Inspection
Examine the wiring harness leading to the OBD2 port for any signs of damage, such as frayed wires, cuts, or loose connections. Damage to these wires can disrupt communication between the scanner and the ECU.
OBD2 Port Cleaning with Contact Cleaner
Use an electrical contact cleaner to thoroughly clean the pins in the OBD2 port. Over time, dirt, oxidation, and contaminants can build up on the pins, hindering proper electrical contact.
Test on Another Vehicle (Scanner Isolation Test)
To rule out a problem with the scanner itself, try connecting it to another vehicle that is known to be OBD2 compliant and compatible with your scanner. If the scanner connects successfully to another car, the issue is likely with your vehicle’s OBD2 system, not the scanner.
Utilize a Backup Scanner (Further Scanner Isolation)
If you have access to another OBD2 scanner, try using it to connect to your vehicle. If a different scanner also fails to connect, it strengthens the likelihood of an issue within your vehicle’s OBD2 system rather than with your primary scanner.
Hidden Fuse Check
Some vehicles may have hidden fuses or relays that protect the OBD2 port or ECU communication circuits. Consult your vehicle’s service manual or a professional mechanic to check for these less obvious fuses.
Software Update Vigilance
Regularly check the scanner manufacturer’s website for software updates. These updates often include bug fixes, enhanced vehicle compatibility, and performance improvements that can resolve connection issues.
Automotive Forum and Community Support
Join online automotive forums and communities dedicated to car diagnostics. You can find valuable insights, shared experiences, and troubleshooting tips from other users who may have encountered similar “OBD scanner not connecting to ECU” problems.
Vehicle-Specific Procedures Research
Some vehicle makes or models might have specific procedures or quirks related to OBD2 scanner connections. Research your vehicle’s specific requirements. For example, some vehicles might require the ignition to be in a specific position or a sequence of steps to initiate communication.
Professional-Grade Diagnostic Tool Consideration
If basic OBD2 scanners fail, consider using a professional-grade diagnostic scan tool. These advanced tools often have enhanced capabilities, deeper diagnostic functions, and better vehicle coverage, potentially bypassing issues that simpler scanners can’t overcome.
Battery Health Optimization
Ensure your vehicle’s battery is in optimal condition. A weak or failing battery can cause voltage drops that interfere with OBD2 communication. A healthy battery is crucial for reliable diagnostics.
ECU or OBD2 Port Calibration/Reprogramming (Professional Intervention)
In rare cases, the ECU or OBD2 port itself might require professional calibration or reprogramming. This is usually a last resort and requires specialized equipment and expertise. Consult a qualified mechanic or automotive electronics specialist if you suspect this issue.
Conclusion: Resolving OBD2 Scanner Connection Frustrations
Troubleshooting an “OBD scanner not connecting to ECU” problem can be a process of elimination. However, by systematically following the steps outlined in this guide, you can effectively diagnose and resolve most common connection issues.
Remember to start with the basics: check connections, verify compatibility, and ensure adequate power. Progress through more advanced troubleshooting steps like fuse checks, software updates, and wiring inspections if needed. And when in doubt, don’t hesitate to seek assistance from a qualified mechanic.
By taking a methodical approach and utilizing the right tools and knowledge, you can restore reliable communication between your OBD2 scanner and your vehicle’s ECU, ensuring accurate diagnostics and keeping your car running smoothly.
FAQs: OBD Scanner Not Connecting to ECU
Q1: Why won’t my OBD2 scanner connect to the ECU even though it was working before?
A: Possible reasons include a blown fuse (even if it worked before, a sudden surge could blow it), a loose connection that has worsened over time, or a new software glitch in the scanner or vehicle. Retrace the troubleshooting steps, even the basic ones, as something might have changed since the last successful connection.
Q2: How do I know if my OBD2 port is faulty?
A: Signs of a faulty OBD2 port include visible physical damage, bent or corroded pins, no power at pin 16 (check with a multimeter), or consistent connection failures even with compatible scanners and after checking all other potential issues.
Q3: Can a software update really fix an OBD2 scanner connection problem?
A: Yes, absolutely. Software updates often contain bug fixes, improved vehicle compatibility, and refined communication protocols. If your scanner’s software is outdated, updating it can very well resolve connection issues, especially with newer vehicles or updated vehicle software.
Q4: When should I consult a professional mechanic for OBD2 connection issues?
A: Consult a professional mechanic if you’ve exhausted all basic troubleshooting steps, checked fuses, verified compatibility, updated software, and the scanner still won’t connect. Also, if you suspect a short circuit (repeatedly blown fuses) or a deeper electrical issue, professional diagnosis is recommended.