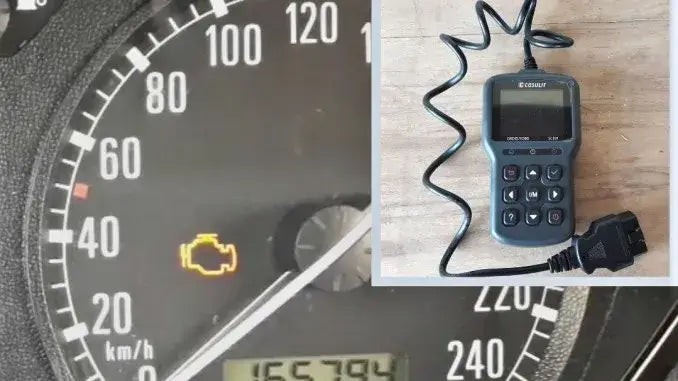
Seeing your check engine light illuminate can be unsettling, sparking concerns about potential car troubles. Driving with the engine light on isn’t advisable, as it signals an issue that needs attention. Fortunately, an OBD2 diagnostic scanner offers a straightforward way to address this – and you might even resolve the problem yourself. This not only saves you a trip to the mechanic, but also time and money.
This guide will demonstrate how simple it is to use an OBD2 scanner to turn off your engine light, a process as user-friendly as operating a smartphone. For those who prefer visual learning, we’ve included a video tutorial at the end.
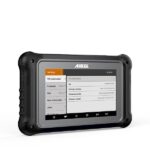
To clear the check engine light, you’ll need an OBD2 reader, also known as an OBD2 scanner or diagnostic tool. It’s important to choose a scanner that not only reads trouble codes but also has the capability to erase them. Some basic models only offer code reading functionality.
A reliable option is the CGSULIT SC301 OBD2 scanner. You can find detailed reviews of this scanner online to learn more about its features and benefits.
Step-by-Step Guide: Turning Off Your Engine Light
Prior experience with an OBD2 scanner can be helpful, but it’s not essential. Even if you’re a first-time user, the process is designed to be intuitive.
If you’re completely new to OBD2 scanners, we recommend checking out a dedicated article on how to use an OBD2 scanner, which provides a comprehensive introduction in easy-to-follow steps. Video tutorials are also readily available online for a visual learning experience.
Step 1: Locate the OBDII Port
The first step is to locate the OBDII port in your vehicle. This port is the communication interface for the OBD2 scanner. It’s typically found under the dashboard on the driver’s side. Check your vehicle’s owner’s manual if you are unsure of its exact location.
Step 2: Connect the OBD2 Scanner
Once you’ve located the OBDII port, firmly plug the OBD2 scanner connector into it. Ensure it’s securely connected for proper communication between the scanner and your car’s computer system.
Step 3: Turn On the Ignition (to Accessory)
Turn your ignition key to the “Accessory” or “ON” position. This powers up your car’s electrical system and allows the OBD2 scanner to communicate with the vehicle’s computer. You don’t need to start the engine at this stage.
Step 4: Allow the OBD2 Scanner to Scan for Codes
Now, power on your OBD2 scanner. It will typically automatically begin scanning for diagnostic trouble codes (DTCs) once connected and powered up. Follow the scanner’s on-screen prompts to initiate a scan if it doesn’t start automatically.
Step 5: Read and Understand the Error Codes
After the scan is complete, the OBD2 scanner will display a list of error codes. There may be one or multiple codes present.
It’s crucial to understand what these error codes mean. This step is critical because it informs you about the nature and severity of the problem triggering the check engine light. A seemingly minor issue might trigger the light, but so could a more significant problem.
If the underlying issue is serious, simply clearing the code will only temporarily turn off the light, and it will likely reappear soon. Ignoring a serious problem can lead to further damage and costly repairs.
Many OBD2 scanners have a built-in DTC library, allowing you to look up code definitions directly on the device. Alternatively, you can easily search for the error code online using your smartphone or computer to find detailed explanations and potential causes.
Step 6: Navigate to the Clear Codes Menu and Erase the Codes
If you’ve investigated the error code and are confident it’s safe to clear (perhaps it was a minor, resolved issue, or you plan to address it promptly), navigate through the OBD2 scanner’s menu to find the “Clear Codes” or “Erase Codes” function. This is usually found within a “Tools” or “Diagnostic Functions” menu.
Follow the on-screen prompts to clear the codes. The scanner may ask for confirmation before erasing the codes; confirm that you want to proceed.
Step 7: Return to the Main Menu
Once the codes are cleared, use the “Escape” or “Return” button on the scanner to go back to the main menu. This ensures the scanner is ready for disconnection.
Step 8: Disconnect the OBD2 Scanner
Carefully disconnect the OBD2 scanner from the OBDII port. Avoid yanking the connector; gently pull it straight out to prevent damage to the port or the scanner. If your scanner has a power button, turn it off before disconnecting.
Step 9: Turn Off the Ignition
Turn the ignition key back to the “OFF” position, fully powering down your vehicle’s electrical system.
Step 10: Start the Engine and Check if the Light is Off
Now, start your engine as you normally would. If the code clearing was successful and the underlying issue is resolved (or was minor/intermittent), the check engine light should turn off immediately after starting the engine.
Allow the engine to reach its normal operating temperature, and then start and stop the engine a few more times to confirm that the check engine light remains off.
Conclusion: OBD2 Scanners Empower DIY Car Care
As you can see, using an OBD2 diagnostic scanner to turn off your check engine light is a straightforward process, typically taking only 5 to 10 minutes, depending on your scanner model and experience. Successfully clearing the light yourself demonstrates the value and convenience of owning these tools for DIY car maintenance.
However, it’s critical to reiterate the importance of understanding the error codes before simply clearing them. Always investigate the meaning of the codes and address any underlying issues, especially if they are serious. Clearing the code is a temporary fix; it doesn’t resolve the root problem.
Learning to clear the check engine light is a valuable skill for anyone interested in DIY car repairs. It allows you to confirm that repairs have been successful and avoid driving with a persistent check engine light after completing maintenance tasks.