
Knowing how to use an OBD2 scanner is an invaluable skill for any car owner. These handy devices can empower you to understand your vehicle’s health, diagnose issues, and potentially save money on repairs. The OBD2 scanner interfaces with your car’s computer system, retrieving diagnostic trouble codes (DTCs) that can pinpoint problems from a loose gas cap to a more serious engine malfunction. This guide will walk you through the process of connecting and using an OBD2 scanner effectively.
Locating the OBD2 Port in Your Vehicle
The first step in using your OBD2 scanner is finding the diagnostic port in your car. Thankfully, it’s in a standardized location for almost all passenger vehicles manufactured after 1996. Look for a 16-pin, trapezoid-shaped female connector. The most common location is under the dashboard on the driver’s side. You’ll typically find it within a foot or two of the steering column.
While the driver’s side under the dash is the most common spot, there are exceptions. In some vehicles, the OBD2 port might be:
- In the center console: Check inside the storage compartment of your center console.
- Under the passenger side dashboard: Similar to the driver’s side, but located on the passenger side.
- Behind a panel: Some ports might be concealed behind a small, easily removable panel, often near the fuse box.
Consult your vehicle’s owner’s manual if you are having trouble locating the OBD2 port. It will provide the exact location for your specific make and model.
Connecting Your OBD2 Scanner: Step-by-Step
Connecting an OBD2 scanner is a straightforward process. The connector is designed to fit only one way, making it virtually foolproof. Follow these steps for a successful connection:
- Turn Off the Ignition: Ensure your vehicle’s ignition is completely off before you begin. This is a safety precaution and ensures a stable connection.
- Locate the OBD2 Port: As described above, find the 16-pin diagnostic port in your vehicle.
- Connect the Scanner: Take your OBD2 scanner and align the male connector with the female OBD2 port in your car. The trapezoidal shapes should match up. Gently push the scanner connector firmly into the port. You might feel a slight resistance and a soft click when it’s fully seated. Avoid forcing it; if it doesn’t connect easily, double-check the alignment.
- Turn the Ignition to “ON” (Engine Off): Turn your key in the ignition to the “ON” position. This will power up your car’s electrical system and the OBD2 port, but do not start the engine.
- Power Up the Scanner: In most cases, the OBD2 port provides power to the scanner. The scanner should automatically power on and begin its boot sequence. Some scanners might have a power button that you need to press.
- Follow Scanner Prompts: Once powered on, your OBD2 scanner will likely display a menu or prompts on its screen. Follow these instructions. You might be asked for vehicle information, such as the VIN (Vehicle Identification Number), engine size, or model year.
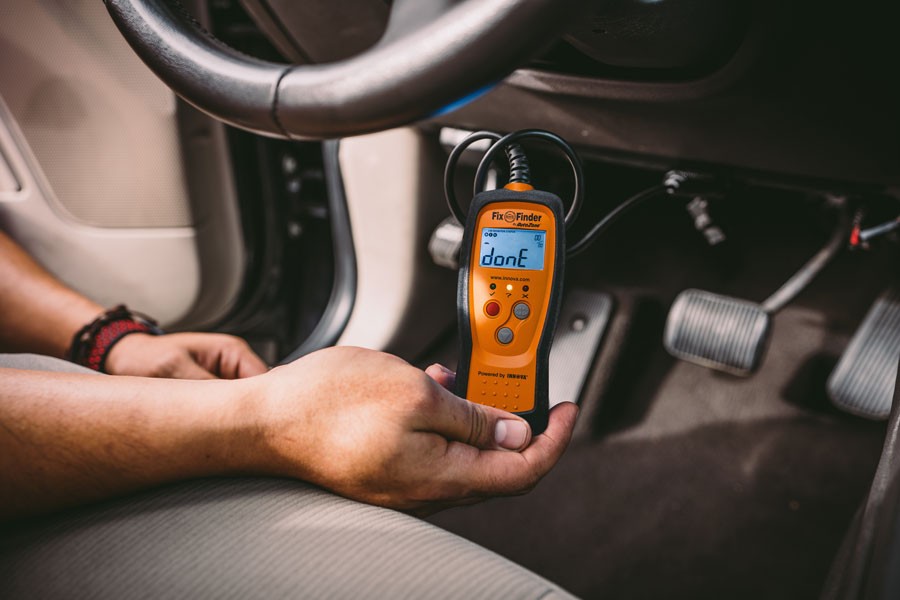 OBD2 scanner displaying diagnostic trouble codes after reading vehicle's computer
Navigating the OBD2 Scanner Menu and Understanding Functions
Once your scanner is connected and powered up, you’ll be presented with a menu of options. The exact menu will vary depending on the type and features of your OBD2 scanner, but common options include:
- Read Codes (or Diagnostic Codes): This is the primary function for most users. Selecting this option will instruct the scanner to retrieve and display any stored or pending Diagnostic Trouble Codes (DTCs) from your vehicle’s computer. These codes are alphanumeric and provide a starting point for diagnosing problems.
- Erase Codes (or Clear Codes): This option allows you to clear or reset the DTCs stored in your vehicle’s computer. Use this function with caution. While clearing codes can turn off the Check Engine Light, it doesn’t fix the underlying problem. It’s generally recommended to diagnose and repair the issue before clearing codes. Clearing codes is useful after repairs to confirm the problem is resolved and the light doesn’t reappear.
- Live Data (or Data Stream): Advanced scanners offer a “Live Data” feature, which displays real-time sensor readings from your vehicle’s engine and other systems. This can be incredibly useful for diagnosing intermittent problems or monitoring sensor performance while the engine is running. You can observe parameters like engine temperature, RPM, oxygen sensor readings, and more.
- Freeze Frame: This function captures a snapshot of sensor data at the exact moment a DTC was triggered. This “freeze frame” data provides valuable context and can help pinpoint the conditions under which a fault occurred.
- Vehicle Info (or VIN Info): This option retrieves and displays your vehicle’s Vehicle Identification Number (VIN) and other vehicle-specific information stored in the computer.
- I/M Readiness (Inspection/Maintenance Readiness): This is crucial for emissions testing. I/M Readiness checks the status of various emissions-related systems to ensure they are ready for a smog check. If any system is not “ready,” it could indicate a problem that might cause you to fail an emissions test.
Most OBD2 scanners use buttons and directional arrows for navigation. Refer to your scanner’s user manual for specific instructions on navigating its menu and using its features.
Decoding OBD2 Trouble Codes
When you select “Read Codes,” your scanner will display one or more DTCs. These codes are formatted with a letter followed by four numbers (e.g., P0301). Understanding the structure of these codes is key to interpreting them:
-
First Character (Letter): Indicates the system where the fault occurred:
- P (Powertrain): Engine, transmission, fuel system, emissions.
- B (Body): Body control systems, interior electronics, airbags.
- C (Chassis): Brakes, suspension, steering.
- U (Network/Communication): Communication issues within the vehicle’s computer network.
-
Second Character (Digit):
- 0: Generic code (SAE standard), common to all manufacturers.
- 1: Manufacturer-specific code, unique to a particular car brand.
-
Third Character (Digit): Indicates the subsystem:
- 1, 2: Fuel and air metering.
- 3: Ignition system or misfire.
- 4: Auxiliary emission controls.
- 5: Vehicle speed control, idle control.
- 6: Computer output circuit.
- 7, 8: Transmission.
- 9: Transmission.
- A, B, C: Hybrid powertrain systems.
-
Fourth and Fifth Characters (Digits): Further specify the fault within the subsystem. These are specific sequence numbers that pinpoint the exact nature of the problem.
For example, code P0301 tells us:
- P: Powertrain system (engine-related).
- 0: Generic code.
- 3: Ignition system or misfire.
- 01: Cylinder 1 misfire.
While the code provides a direction, it’s important to remember that it’s a starting point for diagnosis. Further investigation is usually needed to pinpoint the root cause of the problem. Resources like online OBD2 code databases and repair manuals can help you understand the specific meaning of each code and guide you towards potential solutions.
Saving Time and Money with an OBD2 Scanner
Investing in and learning how to use an OBD2 scanner can lead to significant savings and empower you as a car owner.
- Early Problem Detection: An OBD2 scanner allows you to identify potential issues early, often before they escalate into costly repairs. The Check Engine Light is a signal, and the scanner helps you understand what that signal means.
- Informed Repair Decisions: By reading the codes yourself, you can go to a mechanic with more information, potentially preventing unnecessary diagnostic charges and ensuring you understand the proposed repairs.
- DIY Repairs: For simpler issues, like a faulty oxygen sensor or a loose gas cap indicated by a code, you may be able to perform the repair yourself, saving on labor costs.
- Smog Check Readiness: The I/M Readiness function helps you ensure your vehicle is ready for emissions testing, avoiding potential failures and re-test fees.
OBD2 scanners are valuable tools for both DIY enthusiasts and everyday car owners. By understanding how to use them, you can take a more proactive role in maintaining your vehicle and keeping repair costs in check.
FAQ About Using OBD2 Scanners
How do you use an OBD II scanner?
Plug the scanner into your car’s OBD2 port (usually under the driver’s side dash), turn the ignition to the “ON” position (engine off), and follow the on-screen prompts to read diagnostic codes and access other functions.
Does the car have to be running to use an OBD2 scanner?
No, in most cases, the engine should be off, but the ignition should be in the “ON” position to power the OBD2 port and allow the scanner to communicate with the car’s computer.
How do I read my OBD scanner?
Navigate to the “Read Codes” or “Diagnostic Codes” option on your scanner’s menu. The scanner will display any stored or pending DTCs. Note down these codes for further research and diagnosis.
Can you plug in an OBD scanner while the car is running?
While technically possible in many cases, it’s generally not recommended to plug in or unplug an OBD2 scanner while the engine is running. It’s best practice to turn the ignition to the “ON” position (engine off) before connecting or disconnecting the scanner.