When your vehicle’s performance takes a dip, fuel efficiency decreases, or that dreaded check engine light illuminates, the oxygen (O2) sensor is often a prime suspect. This small but crucial component plays a pivotal role in your engine’s management system by monitoring the oxygen levels in the exhaust gases. This data is essential for the engine control unit (ECU) to regulate the air-fuel mixture, ensuring optimal combustion and reducing harmful emissions. Fortunately, diagnosing an O2 sensor issue has become significantly easier with the advent of user-friendly OBD-II scanners.
An OBD2 scanner is an indispensable tool for modern car diagnostics, allowing you to tap into your vehicle’s computer and retrieve valuable data about its operation. This guide will walk you through the process of using an OBD-II scanner to effectively test your O2 sensor, helping you pinpoint potential problems and maintain your vehicle’s peak performance.
Before we dive into the step-by-step process of testing an O2 sensor with an OBD-II scanner, let’s briefly understand the function of this sensor and why using a scanner is the most efficient way to diagnose it.
Understanding the O2 Sensor and OBD-II Scanners
The oxygen sensor, often referred to as the O2 sensor or lambda sensor, is positioned in the exhaust system, typically before and after the catalytic converter. Its primary function is to measure the amount of oxygen in the exhaust gas. This information is relayed back to the ECU, which then adjusts the air-fuel ratio to maintain the ideal stoichiometric mixture (approximately 14.7:1 for gasoline engines). This precise ratio is crucial for efficient combustion, optimal engine performance, and minimizing harmful emissions.
Why Use an OBD-II Scanner for O2 Sensor Testing?
OBD-II (On-Board Diagnostics II) scanners are electronic tools that communicate with your vehicle’s computer system. They access a wealth of real-time data, including sensor readings, engine parameters, and diagnostic trouble codes (DTCs). Using an OBD-II scanner to test an O2 sensor offers several advantages:
- Efficiency: Scanners provide instant access to live sensor data, eliminating guesswork and time-consuming manual testing.
- Accuracy: Digital readings from the scanner are more precise than relying on subjective observations.
- Comprehensive Diagnostics: Scanners not only read sensor data but also retrieve trouble codes that can pinpoint specific issues, including O2 sensor malfunctions.
- User-Friendliness: Modern OBD-II scanners, like the FOXWELL NT909, are designed with intuitive interfaces, making them accessible even for users with limited mechanical experience.
Step-by-Step Guide: Testing Your O2 Sensor with an OBD-II Scanner
Testing your O2 sensor with an OBD-II scanner is a straightforward process. Here’s a step-by-step guide to help you through it:
Step 1: Locate the OBD-II Port
The first step is to locate your vehicle’s OBD-II port. In most vehicles manufactured after 1996, the OBD-II port is typically located under the dashboard on the driver’s side, often near the steering column. It’s usually easily accessible and not hidden behind panels. Think of it as finding the charging port on your phone – once you know where to look, it’s easy to find.
Step 2: Connect Your OBD-II Scanner
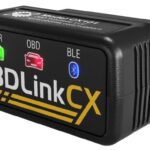
Once you’ve located the OBD-II port, firmly plug in your OBD-II scanner. Ensure a secure connection so the scanner can communicate effectively with your vehicle’s computer. Different types of scanners are available, from handheld devices to Bluetooth scanners that connect to your smartphone. Regardless of the type, the connection process is usually plug-and-play.
Step 3: Start Your Vehicle and Scanner
Turn on your vehicle’s ignition and then power on your OBD-II scanner. Some scanners will automatically power on once connected to the OBD-II port. Follow the scanner’s instructions to establish a connection with your vehicle.
Step 4: Navigate to Live Data or O2 Sensor Test
Most OBD-II scanners have a user-friendly menu. Navigate through the menu to find options like “Live Data,” “Sensor Readings,” or specifically “O2 Sensor Test.” The exact menu names might vary depending on your scanner model, but the principle is the same: you need to access the real-time data stream from your vehicle’s sensors. For instance, on a FOXWELL NT909 scanner, you can easily find the “Live Data” option and select “O2 Sensor” to view real-time readings.
Interpreting O2 Sensor Live Data
Once you’re viewing the live data for your O2 sensor, understanding how to interpret the readings is crucial. The key parameters to observe are voltage readings and response time.
Understanding Voltage Readings
A healthy O2 sensor typically fluctuates its voltage between 0.1V and 0.9V.
- Low Voltage (around 0.1V): Indicates a lean condition (high oxygen, low fuel).
- High Voltage (around 0.9V): Indicates a rich condition (low oxygen, high fuel).
- Fluctuating Voltage: A properly functioning O2 sensor should show constant and rapid fluctuations between these ranges as the ECU adjusts the air-fuel mixture to maintain the ideal balance. These fluctuations are a sign of the sensor actively monitoring and responding to changes in the exhaust.
- Flat-Lining Voltage: If the voltage reading stays consistently high or low without fluctuation, it’s a strong indicator of a malfunctioning sensor. A flat-line at either extreme suggests the sensor is not responding to changes in exhaust oxygen levels.
Analyzing Response Time
In addition to voltage fluctuations, the speed at which the sensor responds to changes is also important. A healthy O2 sensor should switch quickly between rich and lean voltage readings, ideally multiple times per second. A slow response time indicates that the sensor is degrading and may not be providing accurate data to the ECU in a timely manner.
Fuel Trim Values (STFT and LTFT)
While monitoring O2 sensor voltage, also pay attention to Short-Term Fuel Trim (STFT) and Long-Term Fuel Trim (LTFT) values, which are also accessible through the OBD-II scanner’s live data. Fuel trim values indicate how the ECU is adjusting the fuel mixture to compensate for deviations from the ideal air-fuel ratio.
- High Positive Fuel Trim: Indicates the ECU is adding fuel (compensating for a lean condition).
- High Negative Fuel Trim: Indicates the ECU is reducing fuel (compensating for a rich condition).
- Stable Fuel Trim: In a properly functioning system, fuel trim values should be relatively close to zero. Wildly fluctuating or excessively high/low fuel trim values, especially in conjunction with abnormal O2 sensor readings, can point to an O2 sensor issue or other engine problems affecting the air-fuel mixture.
Decoding O2 Sensor Trouble Codes (DTCs)
OBD-II scanners are invaluable for retrieving Diagnostic Trouble Codes (DTCs). These codes are alphanumeric identifiers that your vehicle’s computer stores when it detects a problem. Understanding O2 sensor-related DTCs is crucial for accurate diagnosis.
Retrieving DTCs with a Scanner
After connecting your scanner, navigate to the “Diagnostic Trouble Codes” or “Fault Codes” section in the menu. The scanner will retrieve any stored DTCs.
Common O2 Sensor Codes:
- P0130 – O2 Sensor Circuit Malfunction (Bank 1, Sensor 1): This code indicates a general malfunction in the circuit of the upstream O2 sensor (Sensor 1) on Bank 1 (the side of the engine with cylinder #1). Possible causes include a faulty sensor, wiring issues (shorts, opens, corrosion), or problems with the sensor’s heater circuit.
- P0171 – System Too Lean (Bank 1): This code indicates that the engine is running lean on Bank 1. While not directly pointing to a faulty O2 sensor, an inaccurate O2 sensor reading can cause the ECU to misinterpret the air-fuel mixture and trigger this code. However, lean codes can also be caused by vacuum leaks, fuel delivery issues, or intake air leaks.
- P0135 – O2 Sensor Heater Circuit Malfunction (Bank 1, Sensor 1): Many O2 sensors are equipped with a heater element to bring them up to operating temperature quickly for accurate readings, especially during cold starts. This code indicates a problem with the heater circuit of the Sensor 1 on Bank 1. A faulty heater circuit can cause the sensor to respond slowly or inaccurately.
Troubleshooting Steps Based on DTCs:
- For P0130:
- Visual Inspection: Carefully inspect the wiring and connectors associated with the indicated O2 sensor for any signs of damage, fraying, or corrosion. Ensure connectors are securely plugged in.
- Sensor Replacement (If necessary): If wiring and connections appear sound, the sensor itself may be faulty and require replacement.
- For P0171:
- Consider Other Causes First: Lean codes can have multiple causes. Before replacing the O2 sensor, check for vacuum leaks, inspect the air intake system for leaks or blockages, and consider fuel delivery issues (fuel pump, fuel filter, injectors).
- Evaluate O2 Sensor Data: Use the scanner to monitor live O2 sensor data. If the upstream O2 sensor readings are consistently low or unresponsive, it might be contributing to the lean condition.
- For P0135:
- Test Heater Circuit: Use a multimeter to test the heater circuit of the O2 sensor for continuity. If there’s no continuity, the heater element is likely faulty, and the sensor needs replacement.
Avoiding Common Misdiagnoses
It’s crucial to remember that O2 sensor-related codes don’t always mean the sensor itself is faulty. Here are some common misdiagnoses to avoid:
- Don’t Jump to Sensor Replacement Immediately: Codes like P0171 (lean) or P0172 (rich) can be triggered by various issues beyond a bad O2 sensor. Always investigate other potential causes before replacing the sensor.
- Check for Exhaust Leaks: Exhaust leaks near the O2 sensor can introduce extra oxygen into the exhaust stream, causing the sensor to read incorrectly and trigger false codes. Listen for hissing sounds or inspect the exhaust system for visible damage, especially near the O2 sensor.
- Perform Basic Maintenance Checks: Sometimes, seemingly complex sensor issues can stem from simple maintenance oversights. Ensure your air filter is clean, your fuel cap is properly tightened, and you are using good quality fuel. These basic factors can influence the air-fuel mixture and trigger sensor-related codes.
Key Indicators of a Healthy O2 Sensor (Recap)
To summarize, here are the key indicators of an effectively working O2 sensor:
- Consistent Voltage Fluctuations: Readings between 0.1V and 0.9V with continuous oscillation.
- Rapid Response Time: Quick switching between high and low voltage levels.
- Balanced Fuel Trim Values: STFT and LTFT values close to zero under normal operating conditions.
O2 Sensor Failure Symptoms
Beyond diagnostic codes, be aware of these common symptoms that can indicate a failing O2 sensor:
- Decreased Fuel Economy: An inaccurate O2 sensor can lead to an improperly rich fuel mixture, wasting fuel.
- Check Engine Light: This is often the first sign of an O2 sensor problem, triggering related DTCs.
- Rough Idle or Engine Misfires: An incorrect air-fuel mixture can cause engine misfires and a rough idle.
- Failed Emissions Test: Faulty O2 sensors can result in increased emissions, causing your vehicle to fail emissions testing.
- Hesitation or Poor Acceleration: An improperly functioning O2 sensor can negatively affect engine performance and responsiveness.
Conclusion
Testing your O2 sensor with an OBD-II scanner is a powerful and efficient way to diagnose potential engine issues and maintain your vehicle’s health. By understanding how to connect your scanner, interpret live data, and decode trouble codes, you can confidently assess your O2 sensor’s performance. Regular checks with an OBD-II scanner empower you to catch problems early, ensuring your engine runs efficiently, reduces emissions, and saves you from potentially expensive repairs down the road.
FAQs
How to read O2 sensor data on a scan tool?
Connect your OBD-II scanner, navigate to “Live Data” or “Sensor Readings,” and select “O2 Sensor.” Monitor the voltage readings, which should fluctuate between 0.1V and 0.9V in a healthy sensor.
What are signs of a bad O2 sensor?
Signs include reduced fuel economy, check engine light, rough idle, failed emissions, engine misfires, and hesitation during acceleration.
How do you read an O2 sensor with a multimeter?
Set your multimeter to DC voltage. With the engine running, connect the multimeter probes to the sensor’s signal wire and ground. A functioning sensor should show fluctuating voltage between 0.1V and 0.9V.


