
The Ancel AD310 is a popular entry-level OBD2 scanner known for its affordability and ease of use. If you’re new to car diagnostics or just bought an Ancel AD310, you’re likely wondering, “How Do I Use My Ancel Ad310 Obd Scanner?” This guide will walk you through each step, from unboxing to understanding the diagnostic trouble codes, ensuring you can effectively use this tool to diagnose your vehicle’s issues.
Step 1: Unboxing and Initial Setup
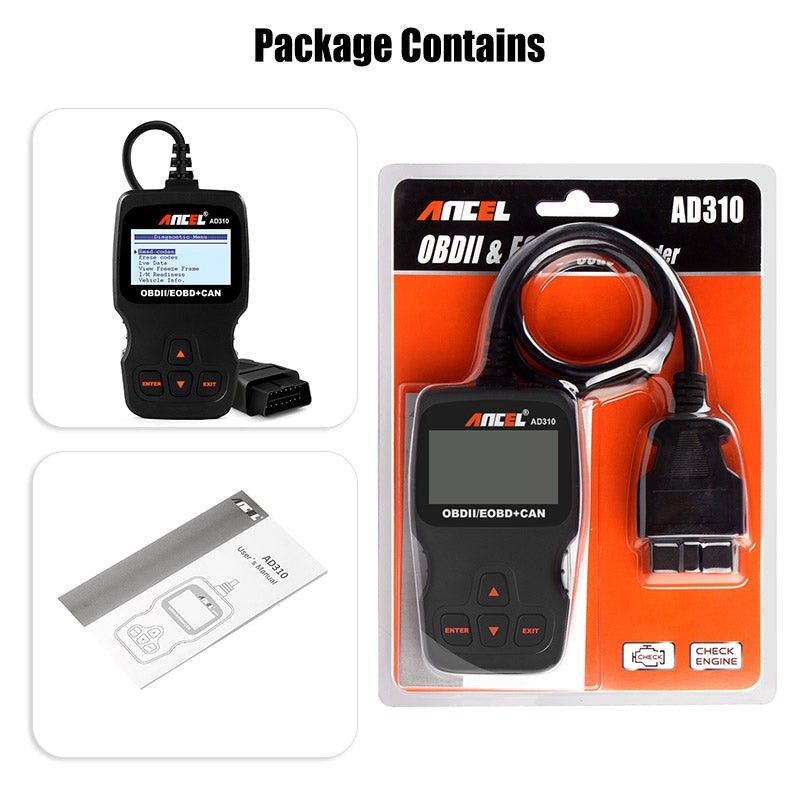
When you receive your Ancel AD310, the first step is to unpack everything and familiarize yourself with the contents. Inside the box, you should find:
- The Ancel AD310 handheld scanner device itself.
- An OBD2 cable to connect the scanner to your car.
- A user manual providing basic instructions and information.
Take a moment to connect the OBD2 cable to the AD310 scanner. One end of the cable is designed to plug into the scanner unit, and the other will connect to your vehicle’s OBD2 port. This simple connection prepares your device for use.
Step 2: Locate Your Vehicle’s OBDII Port
The On-Board Diagnostics II (OBDII) port is a standardized port found in most cars and light trucks manufactured after 1996. To use your Ancel AD310, you need to locate this port in your vehicle.
Typically, the OBD2 port is located within the passenger compartment of your car, usually within reach of the driver’s seat. Common locations include:
- Under the dashboard on the driver’s side, often near the steering column.
- Below the steering wheel column.
- In the center console.
- Sometimes, it might be found on the passenger side.
If you are having trouble finding it, consult your vehicle’s owner’s manual. It should contain a diagram or description of the OBD2 port’s location. You can also perform a quick online search for “[your car make and model] OBD2 port location”.
Step 3: Connecting the AD310 Scanner to Your Car
Once you’ve found the OBD2 port, you’re ready to connect your Ancel AD310. Follow these steps carefully:
- Turn off your vehicle’s ignition. It’s crucial to ensure the car is completely off before connecting the scanner.
- Plug the OBD2 cable into your car’s OBD2 port. The connector is trapezoidal and keyed, so it will only fit one way. Ensure it’s firmly plugged in.
- Turn your vehicle’s ignition to the “ON” position. This means turning the key so that the car’s electrical systems are active, but the engine is not running. Do not start the engine at this stage.
After connecting and turning the ignition to “ON”, the Ancel AD310 scanner should automatically power on. It will then begin to establish communication with your car’s Engine Control Unit (ECU). You should see the scanner’s screen light up and display initial prompts or information.
Step 4: Automatic Vehicle Information Retrieval
One of the convenient features of the Ancel AD310 is its ability to automatically retrieve your vehicle’s information. After establishing a connection, the scanner will attempt to read data such as:
- VIN (Vehicle Identification Number): A unique identifier for your car.
- Vehicle Model and Make: The specific model and manufacturer of your vehicle.
This automatic retrieval saves you the hassle of manually entering this information, which is often required by less advanced or older OBD2 scanners. If for some reason the automatic retrieval fails, you might need to manually enter your VIN, which can usually be found on the driver’s side dashboard near the windshield, on your vehicle registration, or insurance documents.
Step 5: Accessing Diagnostic Trouble Codes (DTCs)
Once connected and powered on, the Ancel AD310’s primary function is to read Diagnostic Trouble Codes (DTCs) from your vehicle’s computer. These codes are generated when the ECU detects a problem or malfunction within the car’s systems.
Using the scanner’s interface (refer to your user manual for specific button functions), navigate to the “Read Codes” or “Diagnostic Codes” option. The AD310 will then scan your vehicle’s systems and display any stored trouble codes.
You might encounter two types of codes:
- Active Codes (Current Codes): These codes represent problems that are currently occurring and are often the reason your check engine light is illuminated.
- Pending Codes: These codes indicate intermittent issues or problems that haven’t yet triggered the check engine light but have been detected. Pending codes can become active codes if the problem persists.
Scroll through the displayed codes using the scanner’s buttons to see all the DTCs present. Note down these codes, as they are crucial for diagnosis.
Step 6: Understanding and Decoding OBD2 Trouble Codes
Simply having the trouble codes isn’t enough; you need to understand what they mean. OBD2 codes are standardized and follow a specific format: a letter followed by four digits.
-
First Letter: Indicates the system the code relates to:
- P (Powertrain): Engine, transmission, fuel, and emission systems.
- B (Body): Body-related systems like airbags, power windows, and seats.
- C (Chassis): Braking system, suspension, and steering.
- U (Network/Undefined): Communication issues within the vehicle’s computer network.
-
First Digit (after the letter):
- 0: Generic OBD2 code (standard across all manufacturers).
- 1: Manufacturer-specific code (unique to a particular car brand).
-
Remaining Digits: Further specify the subsystem and the nature of the problem.
The Ancel AD310 often provides a brief description of the code directly on the screen, which is a very helpful feature for beginners. For more detailed information about a specific code, you can:
- Use the Ancel AD310’s built-in DTC lookup function (if available – consult your manual).
- Search online for “[OBD2 code] definition” (e.g., “P0300 definition”). Reputable websites and forums dedicated to car repair can provide detailed explanations and possible causes.
Step 7: Interpreting Codes and Deciding on a Course of Action
Once you understand the meaning of the trouble codes, you need to interpret them in the context of your vehicle’s symptoms and decide how to proceed. The Ancel AD310 helps identify potential problems, but it doesn’t fix them.
Consider these points:
- Severity: Some codes indicate minor issues (like a loose gas cap), while others can point to serious problems (like engine misfires or transmission faults).
- Symptoms: Does the code align with any symptoms you’ve noticed while driving (e.g., rough idling, poor fuel economy, unusual noises)?
- Complexity: Some fixes are simple DIY tasks, while others require specialized tools or expertise.
Based on your interpretation, you have a few options:
- DIY Repair: If you’re mechanically inclined and the issue seems straightforward (e.g., replacing a faulty sensor), you might attempt the repair yourself.
- Professional Mechanic: For complex issues or if you’re unsure how to proceed, it’s always best to consult a qualified mechanic. Provide them with the trouble codes you retrieved from your Ancel AD310 – this will help them diagnose the problem more efficiently.
Important Note: Always prioritize safety. If a code indicates a serious safety issue (e.g., braking system problem), avoid driving the vehicle and seek professional help immediately.
Step 8: Clearing the Check Engine Light (Resetting Codes)
After addressing the issue that triggered the trouble code (whether you fixed it yourself or had a mechanic do it), you’ll likely want to clear the check engine light. The Ancel AD310 allows you to do this.
Warning: Only clear codes after you have diagnosed and addressed the underlying problem. Clearing codes without fixing the issue will only temporarily turn off the check engine light, and it will likely reappear.
To reset the codes and turn off the check engine light using the Ancel AD310:
- Navigate to the “Erase Codes” or “Clear Codes” option in the scanner’s menu.
- Follow the on-screen prompts. The scanner will typically ask for confirmation before erasing codes.
- Once confirmed, the AD310 will send a command to your vehicle’s ECU to clear the stored trouble codes and reset the check engine light.
After successful code clearing, the check engine light should turn off. If it comes back on shortly after, it indicates that the underlying problem was not fully resolved, or a new issue has arisen. In this case, you’ll need to rescan for codes and continue the diagnostic process.
Final Thoughts
The Ancel AD310 is a valuable tool for any car owner wanting to understand and address basic vehicle problems. By following these steps, you can confidently use your Ancel AD310 OBD scanner to read trouble codes, gain insights into your car’s health, and make informed decisions about maintenance and repairs. Remember to always consult your vehicle’s repair manual and seek professional help when needed. For its price and features, the Ancel AD310 provides a great starting point for DIY car diagnostics.
FAQs
Q: Will the Ancel AD310 work on my car?
A: The Ancel AD310 is compatible with most vehicles manufactured after 1996 that are OBD2 compliant. This includes cars, light trucks, SUVs, and minivans sold in the US, Europe, and Asia. However, it’s always best to check your vehicle’s owner’s manual or the Ancel website for specific compatibility information.
Q: Can the Ancel AD310 diagnose ABS or SRS codes?
A: The Ancel AD310 is primarily an engine code reader and typically focuses on powertrain-related codes. While it might read some basic codes related to other systems, it generally does not have the advanced capabilities to diagnose ABS (Anti-lock Braking System) or SRS (Supplemental Restraint System – airbags) codes in detail. For comprehensive diagnostics of these systems, you might need a more advanced scanner.
Q: Does the Ancel AD310 provide live data?
A: Yes, the Ancel AD310 does offer live data streaming capabilities. This feature allows you to view real-time sensor data from your vehicle, such as engine temperature, RPM, oxygen sensor readings, and more. Live data can be helpful for diagnosing intermittent issues or monitoring sensor performance. Consult your user manual for instructions on accessing and using the live data function.