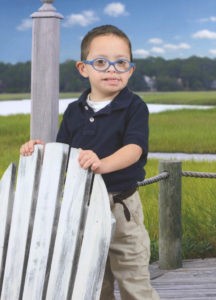
All kids adore cars, and Daniel, a special boy with Down Syndrome and Autism, has an особенное connection. Unlike many children, Daniel needs constant supervision and spends most of his time indoors, playing with his beloved Lightning McQueen cars. To create a space tailored to his passions, we designed a race car themed bedroom just for him!
A year ago, PaintforChildren.org, a nonprofit organization, was born with the mission of blessing special needs children with room makeovers. Being part of these transformations is incredibly rewarding. Witnessing the pure joy on their faces when they see their new room for the first time is truly heartwarming.
With a dash of creativity and the incredible support of volunteers, we transformed Daniel’s room into a vibrant race car haven in just two days. The transformation is remarkable! Let’s dive into the details of this race car themed room makeover.
(Affiliate links are used for the products mentioned in this room transformation)
This is what Daniel’s room looked like before the makeover. Painted by his mom when he was younger, it was time for an upgrade to suit a 10-year-old’s tastes and interests.
Setting the Stage: Paint and Checkerboard Border
The first step in any room makeover is establishing the base. For Daniel’s race car room, we opted for a classic two-tone look: crisp white for the upper walls and a dynamic blue for the lower section. Dennis and his team from “On a Roll Painting” generously applied two fresh coats of paint, creating a clean and bright canvas. To seamlessly blend the two colors and introduce a race-inspired element, we added a checker wallpaper border. This not only hid the seam but also injected a dose of race track flair.
Alt text: Room painting in progress for race car themed bedroom, white top and blue bottom walls.
Alt text: Newly painted race car bedroom with blue and white walls, ready for decor elements.
This room transformation incorporated several cool DIY projects. In this article, we’ll guide you through creating a dresser that resembles a tool chest, applying a personalized flag stencil, easily installing the checker border, updating a ceiling fan, sourcing and painting hubcaps, and crafting unique shelves from tires.
Ceiling Fan with a Racing Stripe
To extend the race car theme upwards, we tackled the ceiling fan. A checkerboard self-stick wall border was the perfect material to give it a racing makeover. Remember to measure your fan blades and the room’s perimeter to ensure you purchase enough border, accounting for any cutting mishaps. The original brown fan blades were spray-painted black to better match the race car aesthetic.
Alt text: Plain ceiling fan before race car theme decoration, brown blades visible.
Alt text: Applying checkerboard border to ceiling fan blade for race car room decor.
Applying the border is straightforward: lay the fan blade on the border, trace its outline, cut it out, peel off the backing, and stick it onto the blade. For the screw holes, use a pick to poke through the border, making reassembly easy. The same border application technique was used around the room’s walls for a cohesive look.
](https://artzyfartzycreations.com/race-car-boys-room/race-car-boys-room-cheryl-phan-ceiling-fan-3.jpg)
Alt text: Close-up of checkerboard border applied to ceiling fan blade with screw holes poked through.
From Changing Table to Tool Box Dresser: A DIY Transformation
An old changing table, a relic from Daniel’s baby days, was repurposed into a fantastic tool chest dresser. This DIY project is a highlight of the room!
Alt text: Old changing table before transformation into a tool box dresser, light wood finish.
Alt text: Dresser with top removed, prepped for tool box makeover, drawers visible.
First, we cleaned, sanded, and primed the dresser. A spray primer was chosen for its speed and ease of use.
Alt text: Priming the dresser for tool box look, spray primer application.
Next, two coats of vibrant red Benjamin Moore Advanced paint were applied. Durability was key for a child’s room, making this paint a perfect choice.
Alt text: Red paint being applied to dresser, transforming it into a tool chest.
To achieve the tool chest look, self-stick Diamond Foil was applied to the doors and drawers. While self-adhesive, extra glue was added for secure adhesion.
Alt text: Applying diamond foil to dresser drawers to create tool chest effect.
Each piece of foil was measured and carefully applied, using a soft cloth to smooth it out and prevent scratches. Finally, flat black paint mixed with Magic Powder (to create DIY chalk paint) was used to add details and dimension, mimicking the look of a real tool chest. This homemade chalk paint is a budget-friendly alternative to store-bought versions.
Alt text: Finished Lightning McQueen tool box dresser, red with diamond foil and black chalk paint details.
Upcycled Tire Shelves: A Creative Storage Solution
Perhaps the most inventive element in the room is the tire shelves. J.B. Salvage Yard generously donated a golf cart tire, and a local mechanic at Tell A Friend Automotive skillfully cut it in half. Golf cart tires are ideally sized for shelves. After thorough cleaning, the tires were spray-painted with black lacquer paint for a refreshed look.
Alt text: Golf cart tire halves after cleaning and painting black, ready for shelf conversion.
Safety Caution: Cutting tires involves metal threads. Exercise extreme caution to avoid injury and trim any exposed wires. If you’re not experienced, it’s best to have a professional handle this step.
Alt text: Close-up of cut tire edge showing metal threads, highlighting safety concerns.
Alt text: Black painted tire halves ready to be mounted as shelves in race car room.
To create the shelves, round wood pieces (1”x18”x18” from Home Depot) were cut in half and painted black. These wooden semicircles are mounted to the wall with L-brackets, and the tire halves slide over them. Securing the tires to the wood with screws ensures they remain safely attached to the wall.
Alt text: Arnold, a volunteer, assembling tire shelves in the race car themed bedroom.
Volunteer Arnold, with his handy skills, was instrumental in assembling the tire shelves, showcasing the power of teamwork in these room transformations.
Alt text: Completed tire shelves mounted on the wall in the race car bedroom, functional and decorative.
These tire shelves truly enhance the race car theme, adding both visual interest and practical storage.
Personalized Wall Art with Stencils
A custom stencil from Faux Effects added a personal touch to the room. Daniel was thrilled to see his name on the wall! Modello’s stencils are similar to contact paper, making them user-friendly and minimizing paint bleed-through. Measuring the application area and having assistance for placement is recommended. Once applied, paint is rolled on with a sponge roller.
Alt text: Applying personalized wall stencil with Daniel’s name in race car bedroom.
Alt text: Close-up of stencil application process, rolling paint onto the stencil design.
After the paint dries, use a pick to lift the stencil’s sticky sections and peel it away to reveal the personalized design. Any minor bleed-through can be touched up with the base wall paint and an artist’s brush.
Alt text: Removing stencil after painting, revealing the personalized name design on the wall.
Alt text: Finished personalized name stencil on the wall, clean and crisp design.
Hubcap Wall Art: Recycled Decor
Donated hubcaps from a junkyard became another unique decorative element. Although initially dirty, Krud Kutter effectively cleaned them. Krud Kutter is a versatile cleaner, even useful for stencil cleaning.
Alt text: Dirty hubcaps before cleaning and painting for wall decoration.
Alt text: Painted hubcap wall art in race car themed bedroom, adding metallic accents.
After cleaning, the hubcaps were primed with primer and then painted with Rust Oleum spray paint., transforming them into eye-catching wall art.
A Helping Hand: Volunteers Make it Happen
Christie, Arnold’s 10-year-old daughter and volunteer, also contributed to the room makeover. Christie painted the bed with chalk paint, showcasing the heartwarming spirit of young people giving back.
Alt text: Young volunteer Christie painting the bed frame with chalk paint in race car bedroom.
The Grand Reveal: Lightning McQueen Takes Center Stage
The incredible Lightning McQueen painting, the centerpiece of the room, was created by the talented Ray Mayo. His artistic talent always amazes! The entire room theme revolved around Lightning McQueen, Daniel’s favorite character. Daniel’s first word upon entering the room was “McQueen,” perfectly capturing the project’s goal: “Make A Child Smile.” Thank you, Ray, for your dedication and hard work!
Alt text: Artist Ray Mayo painting a large Lightning McQueen mural on the bedroom wall.
(For a simpler option, a Lightning McQueen wall decal is a great alternative!)
Alt text: Daniel smiling in his newly decorated race car bedroom with Lightning McQueen painting.
Seeing Daniel’s smile made all the effort worthwhile! Follow our nonprofit, Paint for Children, to witness more heartwarming room transformations and the smiles we create, one room at a time!
If you’re interested in turning your hobby into income, find out more HERE. For DIY tips and tricks, subscribe to my weekly blog HERE.
HAPPY PAINTING!
Alt text: Final race car themed bedroom makeover for Daniel with Lightning McQueen, tire shelves, and tool box dresser.