Flashing a custom ROM or firmware onto your Android device can seem daunting, often requiring a computer and intricate setups. But what if you could perform this directly from another Android phone? This guide will show you how to flash your Android device using another Android phone as a host, eliminating the need for a computer. Utilizing the Bugjaeger Mobile ADB app, this method offers a convenient and surprisingly straightforward way to update or modify your device’s software.
To get started, ensure you have the following:
Prerequisites:
- Two Android Phones: One device you intend to flash (target device) and another to act as the host. Root access is not required on the host phone.
- USB Cable: A USB-C to USB-C cable is ideal, or a USB-C to USB-A cable with an OTG adapter can also be used to connect both phones.
- Patience and Attention to Detail: Follow each step carefully to ensure a successful flashing process.
Procedure:
-
Install Bugjaeger App on Host Phone: Begin by downloading and installing the “Bugjaeger Mobile ADB” app from the Google Play Store on the Android phone you’ll be using as the host.
-
Boot Target Phone into Fastboot Mode: Power off the phone you want to flash and boot it into fastboot mode. The method to enter fastboot mode varies between devices, but it usually involves pressing a combination of power and volume buttons while booting. Refer to your phone’s specific instructions for entering fastboot.
-
Connect Phones via USB: Use the USB cable to connect your target phone (in fastboot mode) to the host phone.
-
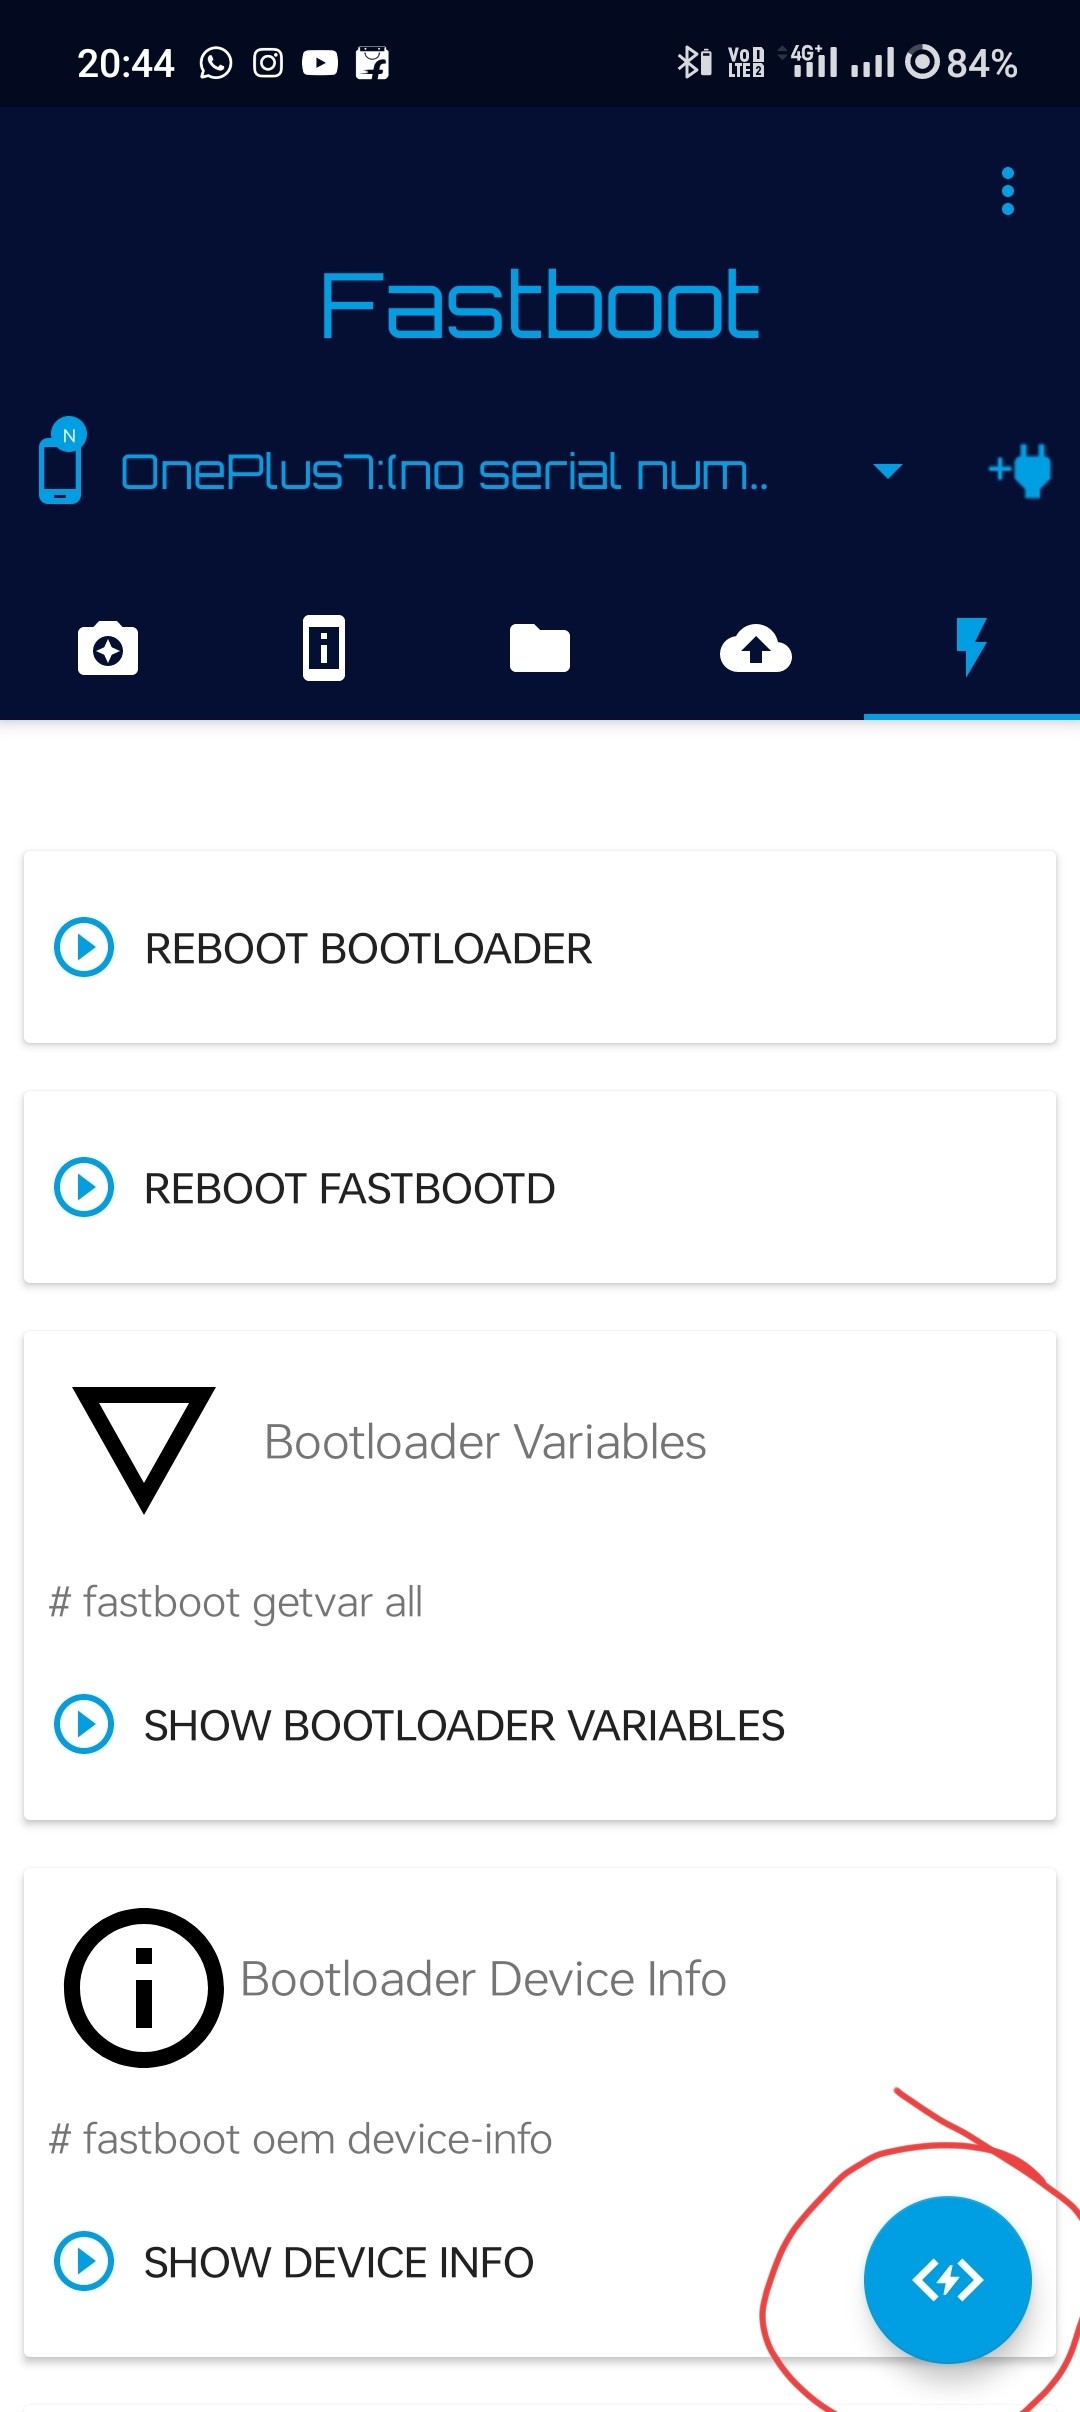
Open Bugjaeger and Select Device: Launch the Bugjaeger app on the host phone and navigate to the last tab within the app. Your target device should appear listed. Select your device from this list.
-
Initiate Terminal Interface: Tap the blue button located at the bottom right of the Bugjaeger app interface. This action will open a terminal-like interface, ready for fastboot commands.
-
Flash Boot Image: To flash a boot image, type the command
fastboot flash bootin the terminal. Instead of typing the file path, tap the file attachment icon at the top of the screen within Bugjaeger. Select your desiredboot.imgfile. The app will automatically append the file location to the command. -
Execute Flash Command: Press the execute button (usually a right-arrow icon) in the terminal to initiate the flashing process. Wait for the boot image to be flashed onto your device.
-
Boot to Recovery Mode: Once the boot image is flashed, reboot your target phone into recovery mode. Again, the method varies by device, but it generally involves button combinations during startup.
-
Enable ADB Sideload in Recovery: In your phone’s recovery menu, navigate and select the “adb sideload” option. This prepares your phone to receive the ROM zip file via ADB sideload.
-
Select Device in Bugjaeger Again: Return to the Bugjaeger app on your host phone. Your target phone should reappear in the device list. Ensure it is selected.
-
Initiate Sideload from Bugjaeger: Scroll down to the bottom of the same tab in Bugjaeger. You will find the option “Pick file and perform sideload.” Tap this option.
-
Choose ROM Zip File and Flash: Select the ROM zip file you wish to flash onto your device. The flashing process will begin, and the progress will be displayed on your host phone’s screen. The progress bar may reach around 47% before the entire process completes – this is normal behavior.
-
Reboot and Enjoy: After the ROM is successfully flashed, reboot your target phone. It should now boot into the newly flashed ROM.
Credits:
This incredible method is made possible by the developer @bugjaeger and their fantastic Bugjaeger Mobile ADB App. Their work has revolutionized Android flashing, bringing powerful tools to mobile platforms and eliminating the dependence on traditional computers for advanced operations.