
Encountering issues with your Vivo V5 such as bootloops, logo sticking, pattern lock, or even a complete shutdown? Flashing your device with stock firmware is a proven solution to revive your phone and restore it to its optimal working condition. This guide will walk you through the process of flashing your Vivo V5 using SP Flash Tool v5, a reliable and effective software for MediaTek-based devices. This method is 100% tested and working, ensuring you can confidently troubleshoot software problems on your Vivo V5.
Before we dive into the steps, it’s crucial to understand the process and prepare your device and computer accordingly. Flashing essentially reinstalls the operating system on your phone, effectively resolving software-related malfunctions.
Important Preparations Before Flashing Your Vivo V5:
-
Check Your Vivo V5 Version: Before proceeding, identify the specific version of your Vivo V5. This is essential to ensure you download and use the correct firmware. You can usually find this information in the phone’s settings or by checking the phone’s box. Alternatively, you can refer to this guide on “how to check Vivo version via recovery mode” to accurately identify your device version and match it with the firmware used in this tutorial.
-
Backup Your Data: The flashing process will erase all data on your phone’s internal storage. Therefore, it is highly recommended to back up all important data, including contacts, photos, videos, and documents, before proceeding.
-
Gather the Necessary Tools and Files: You will need to download the following:
- Vivo V5 Firmware: Download the official stock ROM for your Vivo V5 D1612F (MT6750) Vivo V5 D1612F_MT6750_EX_A_2.7.25_ALPS.M0.MP7.V2.10.zip. Click the download link, wait for 5 seconds, skip the ads, and allow redirects to Google Drive.
- MTK USB Drivers: Download and install the necessary drivers for your computer to recognize your Vivo V5 in flashing mode: All_MTK_USB_Drivers.
- SP Flash Tool v5: Download the SP Flash Tool software, which is essential for flashing MediaTek devices: SP_Flash_Tool_v5.1824_Win.
Once you have downloaded all the necessary files, proceed with the following steps to flash your Vivo V5.
Step-by-Step Guide: Flashing Vivo V5 PD1612F with SP Flash Tool v5
-
Extract Firmware: Locate the downloaded Vivo V5 firmware ZIP file (
Vivo V5 D1612F_MT6750_EX_A_2.7.25_ALPS.M0.MP7.V2.10.zip). Right-click on the file and select “Extract Here”. If prompted for a password, use “evilicacelldotcom”. This will extract the firmware files to a folder. -
Install MTK USB Drivers: Extract the downloaded MTK USB Drivers ZIP file (
All_MTK_USB_Drivers.zip) and run theDriverInstall.exefile as administrator. Follow the on-screen instructions to install all the necessary drivers. This step ensures that your computer can communicate with your Vivo V5 in flashing mode. -
Launch SP Flash Tool: Extract the SP Flash Tool ZIP file (
SP_Flash_Tool_v5.1824_Win.zip). Open the extracted folder and locateflash_tool.exe. Right-click onflash_tool.exeand select “Run as administrator” to launch the SP Flash Tool application. -
Load Scatter File: In the SP Flash Tool window, click on the “Scatter-loading” button. Navigate to the extracted Vivo V5 firmware folder and select the
MT6750_Android_scatter.txtfile. Click “Open”. SP Flash Tool will now load the firmware files.
Image: Vivo V5 stuck in bootloop, a common issue that flashing can resolve.
- Deselect Preloader: In the SP Flash Tool interface, you will see a list of partitions to be flashed. Uncheck the box next to “preloader”. Leaving the preloader unchecked is crucial in most cases to prevent potential flashing errors. Keep other settings at their default values as shown in the image below.
Image: Scatter file loaded in SP Flash Tool, preloader option highlighted for deselection.
-
Initiate Flashing: Click the “Download” button in SP Flash Tool to begin the flashing process.
-
Connect Your Vivo V5: Power off your Vivo V5 completely. Press and hold the Volume Up button. While holding Volume Up, connect your phone to your computer using a USB cable. Your computer should detect the device as “MTK USB Driver VCom” or “Preloader USB VCom”.
Image: Preloader option deselected for Vivo V5 flashing in SP Flash Tool.
-
Wait for Flashing to Complete: Continue holding the Volume Up button until a yellow progress bar appears in SP Flash Tool, indicating that the flashing process has started. You can now release the Volume Up button. Wait patiently for the flashing process to complete. This may take several minutes.
-
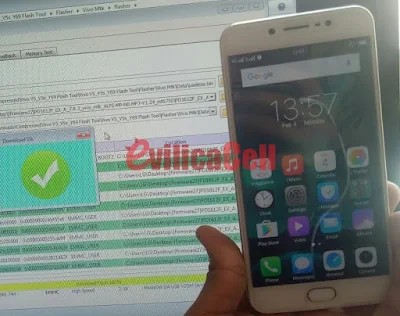
Flashing Successful: Once the flashing process is finished, a green “Download OK” checkmark will appear in SP Flash Tool. This confirms that the flashing was successful. Disconnect your Vivo V5 from the computer and power it on.
First Boot and Troubleshooting:
The first boot after flashing might take longer than usual, so be patient. Once your Vivo V5 boots up, it should be running on a fresh installation of the stock firmware.
If you encounter issues even after a successful flash, such as the phone still malfunctioning, you can refer to this article: “flash successful but still nothing happens” for further troubleshooting steps and explanations. This resource provides guidance on common post-flashing issues and how to address them.
Video Tutorial:
For a visual guide and proof of the effectiveness of this method, you can watch this video tutorial on flashing Vivo V5 with SP Flash Tool:
[Link to Video Tutorial (To be inserted)]
Conclusion:
This comprehensive guide has detailed the process of flashing your Vivo V5 using SP Flash Tool v5. By following these steps carefully, you should be able to resolve software-related problems on your device and restore it to a working state. If you encounter any difficulties during the download process or have further questions, feel free to leave a comment below. For more tutorials and updates on flashing and device troubleshooting, subscribe to our YouTube Channel.
Download Link Issues:
If you experience issues with the download links, such as Google Drive limits or broken links, try logging in with your Google account or contact the administrator on Facebook EvilicaCell.