Adobe Photoshop is a powerhouse for image editing, and mastering its selection tools is crucial for anyone looking to manipulate images effectively. Among these tools, the Quick Selection Tool stands out for its speed and ease of use, allowing you to select objects or areas in your images with just a few clicks. While Photoshop offers automated selection features like “Select Subject,” understanding how to wield the Quick Selection Tool provides you with greater control and precision, especially when automated selections fall short.
In this guide, we’ll dive deep into the Quick Selection Tool, exploring its functionalities, how to use it effectively, and when it’s the ideal choice for your selection needs. We’ll also touch upon its strengths and limitations compared to other selection methods in Photoshop.
Understanding the Quick Selection Tool
The Quick Selection Tool (often found in the toolbar alongside the Magic Wand Tool) is designed for rapid selections based on edges and color similarities. It works by automatically detecting edges as you “paint” over an area, expanding the selection to include similarly colored and textured pixels. This makes it exceptionally useful for selecting subjects that are distinct from their backgrounds, or for quickly isolating specific areas within an image.
How to Use the Quick Selection Tool: A Step-by-Step Guide
Let’s break down the process of using the Quick Selection Tool in Photoshop:
-
Select the Quick Selection Tool: Locate the Quick Selection Tool in your Photoshop toolbar. It’s often grouped with the Magic Wand Tool. You can also activate it by pressing the W key on your keyboard.
-
Choose Your Brush Settings: In the Options Bar at the top of your screen, you’ll find settings to customize your Quick Selection Tool brush.
- Brush Size: Adjust the brush size to match the area you’re selecting. A smaller brush is useful for detailed selections, while a larger brush works faster for broader areas.
- Brush Hardness: A softer brush (lower hardness) creates smoother selection edges, while a harder brush results in sharper edges. For most selections, a medium hardness is a good starting point.
- Brush Spacing: Control the spacing between brush strokes. Generally, the default spacing works well.
-
Start Selecting: Simply click and drag the Quick Selection Tool over the area you want to select. As you paint, Photoshop will intelligently analyze the image and expand the selection to include areas it deems part of the object or region you’re targeting.
-
Refine Your Selection (Adding to Selection): If the initial selection doesn’t capture the entire object, continue painting over the unselected areas. The Quick Selection Tool will intelligently add to your existing selection. Ensure the “+” (Add to Selection) icon is selected in the Options Bar. This is usually the default setting.
-
Refine Your Selection (Subtracting from Selection): If the selection includes areas you don’t want, you can subtract from the selection. Hold down the Alt or Option key (depending on your operating system) while painting over the areas you want to remove. Alternatively, you can click the “Subtract from Selection” icon in the Options Bar (the brush icon with a “-“).
-
Further Refinement with “Select and Mask”: For even finer control over your selection edges, especially for complex selections like hair or fur, use the “Select and Mask” workspace. With your selection active, click “Select and Mask” in the Options Bar. This opens a dedicated workspace where you can refine edges, adjust opacity, and more.
Tips for Effective Quick Selection Tool Use
-
Start with the Right Brush Size: Adjust your brush size frequently as you work. Use a larger brush for quickly selecting large areas and switch to a smaller brush for detailed edges.
-
Don’t Be Afraid to Overshoot: It’s often faster to initially select a bit more than needed and then subtract the excess, rather than trying to be perfectly precise from the start.
-
Work in Increments: For complex selections, build up your selection gradually. Make a few strokes, then refine, then add more, and so on.
-
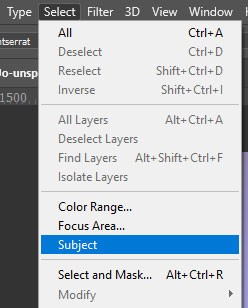
Use “Select Subject” as a Starting Point (Sometimes): As mentioned, Photoshop’s “Select Subject” (Select > Subject) can be a very quick way to get a preliminary selection, especially for portraits or images with clear subjects. However, it’s not always perfect. The Quick Selection Tool is excellent for refining and correcting “Select Subject” results.
When to Use the Quick Selection Tool
The Quick Selection Tool excels in scenarios where:
- Subjects are Well-Defined: Images where the object you want to select has clear edges and distinct colors compared to the background.
- Speed is Important: When you need to make selections quickly, especially for less critical editing tasks.
- Refining Automated Selections: To clean up and perfect selections made by features like “Select Subject.”
However, it may be less ideal for:
- Complex Scenes with Overlapping Objects: Images with many objects close together, or where the subject blends into the background. In these cases, tools like the Pen Tool or more meticulous masking techniques might be necessary.
- Extremely Precise Selections: While the Quick Selection Tool is efficient, for pixel-perfect selections, especially for intricate shapes, other tools offer greater control.
Conclusion
The Quick Selection Tool is an indispensable part of the Photoshop toolkit, offering a fast and intuitive way to make selections in a wide variety of images. By understanding its mechanics and practicing its use, you can significantly speed up your workflow and achieve impressive results in your photo editing projects. While it may not be the perfect tool for every selection task, mastering the Quick Selection Tool will undoubtedly enhance your Photoshop skills and efficiency.
Explore further Photoshop tutorials to deepen your knowledge of image editing techniques and discover more tools to refine your skills!