
Are you eager to dive into the world of graphic design but feel overwhelmed by Photoshop? Don’t worry! Photoshop might seem daunting at first, but understanding its basic tools is the perfect starting point for creating your own digital masterpieces. This software is the industry standard for photo editing and digital art, and mastering it opens up a world of creative possibilities. If you’re serious about graphic design, getting to grips with Photoshop is essential. Let’s explore some fundamental Photoshop tools, with a special focus on the Magnetic Lasso Tool and how to use it effectively.
Understanding Photoshop’s Toolbox: Essential Tools for Beginners
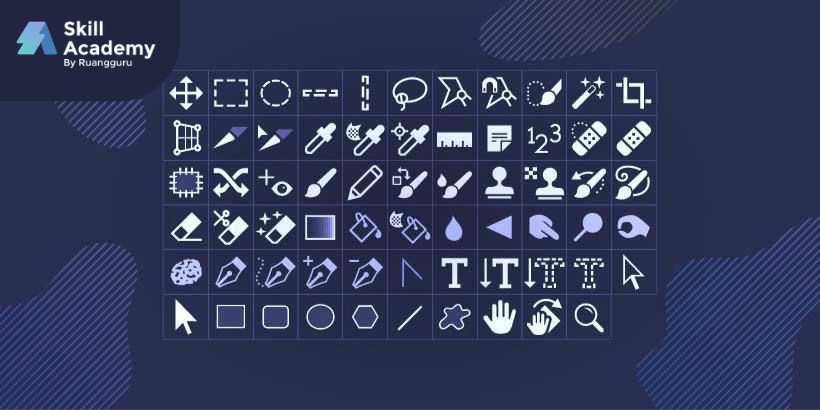
Photoshop’s interface is packed with tools, each designed for specific tasks. For beginners, it’s best to start with the core tools that you’ll use most frequently. Let’s break down some of these essential tools:
1. The Move Tool
The Move Tool is your most basic tool for rearranging elements within your Photoshop project. It allows you to reposition layers, images, or text boxes on your canvas.
To use it, simply select the Move Tool (its icon looks like a crosshair arrow) from the toolbar or press V on your keyboard. Then, click and drag the object you want to move.
2. Marquee Tools: Selection Basics
Marquee Tools are fundamental for making selections in Photoshop. They allow you to select areas of your image in geometric shapes, enabling you to edit specific portions without affecting the rest. After making a selection, you can delete, cut, copy, change color, or apply effects only to the selected area.
Photoshop offers different types of Marquee Tools:
- Rectangular Marquee Tool: Selects rectangular or square areas.
- Elliptical Marquee Tool: Selects elliptical or circular areas.
- Single Row Marquee Tool: Selects a single row of pixels horizontally.
- Single Column Marquee Tool: Selects a single column of pixels vertically.
3. Lasso Tools: Freeform Selections
Lasso Tools provide more flexibility in making selections compared to Marquee Tools. They allow you to draw freehand selections, making them ideal for irregularly shaped objects. There are three main types of Lasso Tools:
- Lasso Tool: Draw freeform selections by dragging your mouse.
- Polygonal Lasso Tool: Creates selections using straight lines and angles by clicking to set anchor points.
- Magnetic Lasso Tool: This intelligent tool snaps to the edges of objects as you drag, making it easier to select objects with well-defined boundaries.
4. Quick Selection & Magic Wand Tools: Smart Selections
For faster selections, Photoshop offers the Quick Selection Tool and the Magic Wand Tool.
- Quick Selection Tool: “Paints” a selection quickly by automatically finding and following defined edges.
- Magic Wand Tool: Selects areas based on color similarity. Click on a color, and the Magic Wand will select all adjacent pixels with a similar color range.
5. Crop & Slice Tools: Image Dimension Control
Crop Tools are essential for adjusting the dimensions and composition of your images.
- Crop Tool: Trims the edges of your image, removing unwanted areas and focusing on the desired subject. You can define specific aspect ratios or crop freely.
- Perspective Crop Tool: Allows you to crop and correct perspective distortions in images, useful for straightening tilted photos of buildings or objects.
- Slice Tool: Divides an image into smaller sections (slices), often used for web design to optimize image loading and create interactive elements.
- Slice Select Tool: Selects and manipulates slices created with the Slice Tool.
6. Eyedropper Tool: Color Sampling
The Eyedropper Tool is a simple but powerful tool for color management. It samples colors from your image and sets them as your foreground or background color.
Beyond basic color sampling, the Eyedropper Tool group includes:
- 3D Material Eyedropper Tool: Samples material colors from 3D objects.
- Color Sampler Tool: Samples colors and displays color values (RGB, CMYK, etc.) at specific points.
- Ruler Tool: Measures distances and angles within your image.
- Note Tool: Adds text notes directly onto your Photoshop file for reminders or collaboration.
- Count Tool: Counts objects within an image, useful for inventory or analysis.
7. Brush Tools: Painting and Drawing
Brush Tools are your digital paintbrushes in Photoshop. They allow you to paint, draw, and apply color to your image with various brush styles, sizes, and effects.
Within the Brush Tool group, you’ll find:
- Brush Tool: The standard painting tool with a wide range of customizable brushes.
- Pencil Tool: Creates hard-edged lines, mimicking a traditional pencil.
- Color Replacement Tool: Replaces a specific color with your chosen foreground color while preserving textures and shading.
- Mixer Brush Tool: Simulates realistic painting by blending colors directly on the canvas, similar to wet paint.
8. Spot Healing Brush Tool: Retouching Made Easy
Spot Healing Brush Tools are designed for retouching and removing imperfections in images, like blemishes or unwanted spots.
Example of using the Spot Healing Brush Tool to remove spots from a strawberry in Photoshop.
The Spot Healing Brush Tool family includes:
- Spot Healing Brush Tool: Automatically samples surrounding pixels to seamlessly blend away blemishes with a single click.
- Healing Brush Tool: Requires you to sample a source area (by Alt-clicking) and then paint over the area you want to heal, blending it with the sampled texture and color.
- Patch Tool: Selects an area and replaces it with another area you drag and drop, blending the textures and colors.
- Content-Aware Move Tool: Moves or extends objects in your image, intelligently filling in the empty space left behind using content-aware technology.
- Red Eye Tool: Specifically designed to remove red-eye caused by camera flash in photographs.
9. Eraser Tools: Removing Pixels
Eraser Tools do exactly what you’d expect – they erase pixels in your image.
Photoshop offers different Eraser Tool variations:
- Eraser Tool: Erases pixels as you drag, revealing the background color or transparency.
- Background Eraser Tool: Erases the background color of a layer, useful for isolating objects from their backgrounds.
- Magic Eraser Tool: Erases areas of similar colors with a single click, similar to the Magic Wand Tool but for erasing instead of selecting.
10. Gradient Tool: Smooth Color Transitions
The Gradient Tool creates smooth transitions between two or more colors. It’s often used for backgrounds, adding depth, or creating stylized effects.
The Gradient Tool group also includes:
- Paint Bucket Tool: Fills areas of similar color with your chosen foreground color with a single click.
- 3D Material Drop Tool: Applies materials to 3D objects in Photoshop.
11. Shape Tools: Geometric Precision
Shape Tools allow you to create vector-based shapes in Photoshop, which are scalable without losing quality.
Common Shape Tools include:
- Rectangle Tool: Creates rectangles and squares.
- Rounded Rectangle Tool: Creates rectangles with rounded corners.
- Ellipse Tool: Creates ellipses and circles.
- Polygon Tool: Creates polygons with a specified number of sides.
- Line Tool: Draws straight lines.
- Custom Shape Tool: Provides a library of pre-defined shapes like arrows, symbols, and banners.
12. Pen Tools: Precise Path Creation
Pen Tools are powerful for creating precise paths and selections. They use anchor points and curves to define shapes, offering maximum control.
Pen Tool variations include:
- Pen Tool: The standard Pen Tool for creating precise paths with anchor points and Bézier curves.
- Freeform Pen Tool: Allows you to draw paths freehand, more like drawing with a pencil.
- Add Anchor Point Tool: Adds anchor points to existing paths for further refinement.
- Delete Anchor Point Tool: Removes anchor points from paths.
- Convert Point Tool: Converts between smooth and corner points on paths, adjusting curve handles.
13. Direct Selection Tools: Path Editing
Direct Selection Tools are used to fine-tune paths created with Pen Tools or Shape Tools.
- Direct Selection Tool: Selects and adjusts individual anchor points and path segments, allowing you to reshape and refine vector paths.
- Path Selection Tool: Selects and moves entire paths or shapes.
14. Blur Tool: Softening Details
The Blur Tool softens edges and details in your image, creating a blurring effect.
Example of applying the Blur Tool to a portion of a strawberry to soften its details.
The Blur Tool family also includes:
- Sharpen Tool: Increases contrast and sharpness, enhancing details.
- Smudge Tool: Simulates dragging wet paint, smudging colors together.
15. Type Tools: Adding Text
Type Tools are used to add text to your Photoshop projects.
Type Tool variations include:
- Horizontal Type Tool: Creates horizontal text.
- Vertical Type Tool: Creates vertical text.
- Horizontal Type Mask Tool: Creates a text-shaped selection (horizontal).
- Vertical Type Mask Tool: Creates a text-shaped selection (vertical).
Deep Dive: Mastering the Magnetic Lasso Tool
Now, let’s focus specifically on the Magnetic Lasso Tool, a powerful selection tool within the Lasso Tool family. This tool is incredibly useful for quickly and easily selecting objects with well-defined edges, saving you time and effort in your editing workflow.
How to Use the Magnetic Lasso Tool:
-
Select the Magnetic Lasso Tool: Find the Lasso Tool group in your toolbar (it looks like a lasso). Click and hold on the Lasso Tool icon to reveal the dropdown menu, and select the Magnetic Lasso Tool.
-
Start Tracing: Position your cursor at the edge of the object you want to select. Click once to set your starting point.
-
Drag Along the Edge: Slowly drag your cursor along the edge of the object. The Magnetic Lasso Tool will automatically snap to the edge as you move, placing anchor points along the way. You don’t need to click and drag continuously; simply guide your cursor along the edge.
-
Adjust Settings (Optional): In the Options Bar at the top of your screen, you can adjust settings like:
- Width: Determines how far from the edge the tool will detect. A higher width is useful for edges with lower contrast.
- Contrast: Controls the tool’s sensitivity to edge contrast. Higher contrast makes it snap more aggressively to sharp edges.
- Frequency: Sets how often anchor points are placed. Higher frequency means more anchor points and a more detailed selection, but can also make the path more complex.
-
Close the Selection: To complete your selection, do one of the following:
- Double-Click: Double-click to close the selection with a magnetic segment connecting to your starting point.
- Click on the Starting Point: Bring your cursor back to the starting point. A small circle will appear next to the cursor icon. Click on the starting point to close the selection.
- Manually Close: If the magnetic snapping isn’t perfectly following the edge in a certain area, you can manually place anchor points by clicking along the edge. This gives you more control in tricky spots.
-
Refine Your Selection (Optional): After making your initial selection, you can refine it further using selection tools like Quick Mask mode or the Select and Mask workspace for more precise edge adjustments and feathering.
Tips for Using the Magnetic Lasso Tool:
- Go Slowly: Move your cursor slowly and deliberately along the object’s edge for the best results.
- Adjust Width and Contrast: Experiment with the Width and Contrast settings in the Options Bar to optimize the tool’s performance for different types of edges and images.
- Manual Anchor Points: Don’t hesitate to manually place anchor points in areas where the magnetic snapping is not accurate enough.
- Zoom In: Zoom in on your image (Ctrl + Plus or Cmd + Plus) for more precise edge tracing, especially for complex selections.
- Practice Makes Perfect: Like any Photoshop tool, mastering the Magnetic Lasso Tool takes practice. Experiment with different images and objects to get comfortable with its behavior and settings.
Conclusion: Building Your Photoshop Foundation
Understanding these fundamental Photoshop tools is the first step towards unleashing your creative potential in graphic design and photo editing. While each tool has its specific function, they often work together in a seamless workflow. The Magnetic Lasso Tool, in particular, is a powerful ally for making selections efficiently, a crucial skill in Photoshop.
Keep practicing, experimenting, and exploring the vast capabilities of Photoshop. As you become more familiar with these tools, you’ll be well on your way to creating stunning visuals and bringing your creative ideas to life.