Adobe Photoshop CS6 is a powerful tool for graphic designers and photo editors. Among its vast array of features, selection tools are paramount for manipulating specific parts of an image. One of the most versatile selection tools available is the Magnetic Lasso Tool. This guide will provide you with a detailed walkthrough on how to use the Magnetic Lasso Tool in Photoshop CS6, enhancing your photo editing and design skills.
Understanding the Power of Selection Tools in Photoshop CS6
Before diving into the specifics of the Magnetic Lasso Tool, it’s crucial to understand why selection tools are so important in Photoshop. Selection tools allow you to isolate areas of an image, enabling you to make targeted edits. Whether you want to change the color of an object, remove a background, or apply specific effects to a portion of your image, selections are the first step.
Photoshop CS6 offers a variety of selection tools, each suited for different tasks and levels of precision. These include:
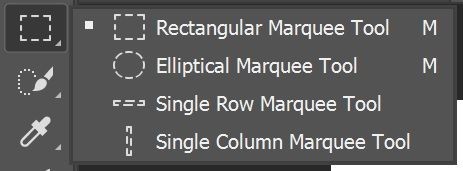
- Marquee Tools: For selecting rectangular, elliptical, and single-row/column areas.
- Lasso Tools: Offering freehand, polygonal, and magnetic selection capabilities.
- Quick Selection Tool & Magic Wand Tool: For quick selections based on edges and color similarities.
Among the Lasso Tools, the Magnetic Lasso Tool stands out for its ability to “snap” to the edges of objects, making it particularly useful for selecting objects with complex or irregular outlines.
What is the Magnetic Lasso Tool and When to Use It?
The Magnetic Lasso Tool is designed to make selections by automatically clinging to the edges of contrasting areas in an image. It works by detecting the edges as you move your cursor along the boundary of an object. This “magnetic” behavior simplifies the selection process, especially when dealing with objects that have:
- Defined edges: Objects that clearly stand out from their background in terms of contrast or color.
- Intricate shapes: Subjects with curves, corners, and non-uniform outlines that would be tedious to select with freehand tools.
The Magnetic Lasso Tool is less effective when:
- Low contrast edges: When the object and background have very similar colors or tones, the tool may struggle to find a clear edge.
- Busy backgrounds: Cluttered backgrounds can confuse the tool, causing it to snap to unwanted edges.
In such cases, other selection tools like the Quick Selection Tool or Pen Tool might be more appropriate. However, for many common photo editing tasks, the Magnetic Lasso Tool is a time-saving and effective option.
Step-by-Step Guide: How to Use the Magnetic Lasso Tool in Photoshop CS6
Let’s get into the practical steps of using this powerful tool.
-
Select the Magnetic Lasso Tool:
- In the Tools panel, locate the Lasso Tool icon. It looks like a lasso (rope loop).
- Click and hold on the Lasso Tool icon to reveal a flyout menu.
- Select the Magnetic Lasso Tool from the menu. Its icon typically has a small magnet attached to the lasso.
-
Adjust Tool Options in the Options Bar:
Once you’ve selected the Magnetic Lasso Tool, the Options Bar at the top of the Photoshop interface will display various settings to customize its behavior. Understanding these options is key to effective use:
-
Width: This setting determines the tool’s edge detection range. A higher width value (e.g., 10 pixels) makes the tool more sensitive and likely to snap to edges further away from the cursor. A lower value (e.g., 1 pixel) makes it more precise but requires you to be closer to the edge. Start with a mid-range value like 5-10 pixels and adjust as needed.
-
Contrast: This setting controls the tool’s sensitivity to contrast differences along edges. Higher contrast values (e.g., 50%) make the tool snap more aggressively to strong edges. Lower values (e.g., 10%) are better for softer edges.
-
Frequency: This determines how often Photoshop places anchor points along your selection edge. Higher frequency values (e.g., 60) create more anchor points, resulting in a more detailed and potentially smoother selection, but also a more complex path. Lower values (e.g., 20) create fewer points, leading to a simpler path.
-
Feather: This option, common to many selection tools, softens the edges of your selection. A feather value of 0 pixels creates a hard edge, while higher values create softer, blurred edges. Feathering is useful for blending selections into new backgrounds or for subtle effects. Typically, you’ll set feathering to 0 initially and adjust later if needed.
-
Anti-aliased: Keep this option checked to smooth the edges of your selection, preventing jagged or pixelated lines, especially along curved edges.
-
Selection Modes: Similar to other selection tools, you’ll see options to:
- New Selection: (Default) Creates a new selection each time you use the tool.
- Add to Selection: Allows you to add to an existing selection.
- Subtract from Selection: Allows you to remove areas from an existing selection.
- Intersect with Selection: Selects only the area that overlaps with an existing selection.
-
-
Start Tracing the Edge:
- Position your cursor at the starting point of the object you want to select. This should be on the edge of the object.
- Click once to set the initial anchor point.
- Begin moving your cursor along the edge of the object. You don’t need to click and drag as with the standard Lasso Tool. Simply move your cursor, and the Magnetic Lasso Tool will automatically snap to the edge, placing anchor points as you go.
-
Let the Magnet Work:
As you move your cursor, observe how the Magnetic Lasso Tool automatically detects and follows the edge. Adjust your cursor speed to match the complexity of the edge. For intricate areas, move slowly and deliberately. For straighter edges, you can move a bit faster.
-
Correcting Mistakes and Adding Points:
-
Manual Anchor Points: If the tool is not snapping to the desired edge or if you need more control in a specific area, you can manually add an anchor point by clicking. This forces the selection path to include a point at your click location.
-
Deleting Anchor Points: If you make a mistake or the selection path goes astray, press the Backspace (Windows) or Delete (Mac) key to remove the last placed anchor point. Continue pressing to step back further along your path.
-
-
Completing the Selection:
To close the selection path and complete your selection, do one of the following:
- Double-click: Double-click at any point to close the selection with a magnetic segment back to the starting point.
- Click on the Starting Point: Move your cursor back to the initial starting anchor point. A small circle will appear next to the cursor icon, indicating that you are about to close the path. Click on the starting point to close the selection.
-
Refine Your Selection (Optional):
After you’ve made your initial selection with the Magnetic Lasso Tool, you might need to refine it further, especially if there are areas that were not perfectly selected. Photoshop CS6 offers tools for refining selections:
-
Quick Mask Mode (Q): Press ‘Q’ to enter Quick Mask mode. The selected area will be clear, and the unselected area will be covered with a red overlay. You can use the Brush Tool (B) with black and white to paint away or add to the selection. Press ‘Q’ again to exit Quick Mask mode and see your refined selection.
-
Refine Edge (in later Photoshop versions): While “Refine Edge” as a dedicated button wasn’t prominent in CS6 in the same way as later versions, selection refinement options are available in the “Select” menu. Explore the “Modify” submenu within the “Select” menu for options like “Border,” “Smooth,” “Expand,” “Contract,” and “Feather” to fine-tune your selection edges.
-
Example: Selecting a Strawberry with the Magnetic Lasso Tool
Let’s illustrate the process with a practical example – selecting a strawberry, similar to the example in the original article.
-
Open an image of a strawberry in Photoshop CS6.
-
Select the Magnetic Lasso Tool. Set your Options Bar settings appropriately (e.g., Width: 8 px, Contrast: 20%, Frequency: 50).
-
Start at one point on the edge of the strawberry. Click to set the initial anchor point.
-
Move your cursor around the strawberry’s outline. Let the Magnetic Lasso Tool snap to the edge. Manually click to add anchor points in curved or less defined areas.
-
Correct any mistakes using Backspace/Delete and by adding manual anchor points.
-
Close the selection by clicking on the starting point.
-
Once selected, you can perform various operations:
- Copy and Paste: Copy the strawberry to a new layer (Ctrl+J or Cmd+J) to isolate it.
- Adjust Color: Use adjustments layers (like Hue/Saturation or Color Balance) to change the strawberry’s color.
- Apply Effects: Add filters or effects specifically to the selected strawberry.
Tips for Using the Magnetic Lasso Tool Effectively
- Zoom In: For detailed selections, zoom in (Ctrl + ‘+’ or Cmd + ‘+’) to get a closer view of the edges.
- Adjust Settings: Experiment with the Width, Contrast, and Frequency settings in the Options Bar to find the optimal values for different images and edges.
- Combine with Other Tools: Don’t hesitate to combine the Magnetic Lasso Tool with other selection tools. For instance, you might use the Quick Selection Tool for large areas and then refine the edges with the Magnetic Lasso Tool.
- Practice Regularly: Like any Photoshop skill, proficiency with the Magnetic Lasso Tool comes with practice. Experiment with different images and selection scenarios to improve your technique.
Beyond the Magnetic Lasso: Exploring Other Selection Tools
While the Magnetic Lasso Tool is powerful, Photoshop CS6 offers other selection tools that are valuable to learn. Briefly consider these alternatives:
-
Lasso Tool: For freehand selections, giving you complete manual control. Useful for organic shapes and when precise magnetic snapping is not needed.
-
Polygonal Lasso Tool: For straight-edged selections. Ideal for selecting objects with geometric shapes or when you need to create precise, angular selections.
-
Quick Selection Tool: For quickly selecting regions based on edge detection. Excellent for selecting large areas rapidly, often requiring refinement with other tools afterwards.
-
Magic Wand Tool: For selecting areas based on color similarity. Best for images with solid color backgrounds or objects with distinct color ranges.
Conclusion: Mastering Selections in Photoshop CS6
The Magnetic Lasso Tool in Photoshop CS6 is a valuable asset in your photo editing and graphic design toolkit. By understanding how to use the Magnetic Lasso Tool, adjusting its settings, and practicing its application, you can efficiently and accurately select objects with complex edges. Combine this tool with other selection methods in Photoshop to achieve even greater precision and versatility in your creative projects. Keep experimenting and refining your technique to unlock the full potential of Photoshop CS6’s selection capabilities!