
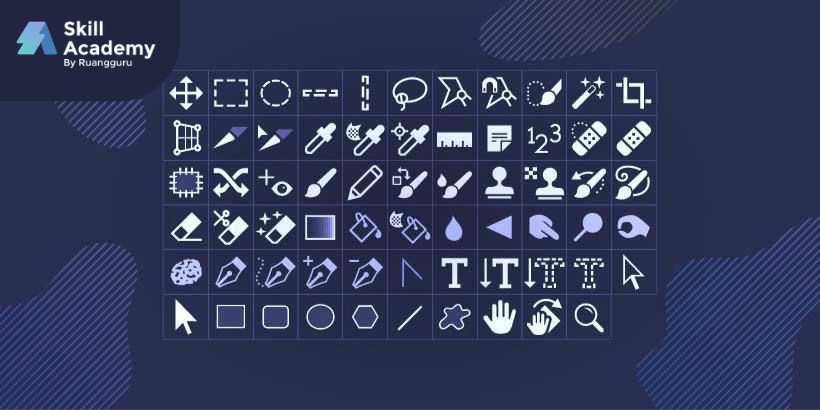
Are you eager to dive into the world of graphic design but feel overwhelmed by Photoshop’s toolkit? Don’t worry! Understanding the basic tools is the perfect starting point to unleash your creativity. Photoshop is a powerful software used extensively for digital art and image manipulation. If you’re serious about graphic design, mastering Photoshop is a must. This guide will introduce you to essential Photoshop tools, with a special focus on the Magic Wand Tool in Photoshop CS5, and how to use it effectively.
Understanding Essential Photoshop Tools
Before we delve into the Magic Wand Tool, let’s explore some fundamental tools in Photoshop that are crucial for any beginner.
1. Move Tool
The Move Tool is straightforward: it allows you to reposition objects, layers, or selections within your canvas. Simply click and drag the desired element to move it.
Iconically represented by a crosshair arrow, the Move Tool is easily activated by pressing V on your keyboard.
2. Marquee Tools
Marquee Tools are your primary selection tools for defining areas based on geometric shapes. Once selected, you can modify, delete, or apply effects to the chosen area.
Marquee Tools come in several variations:
- Rectangular Marquee Tool: For square or rectangular selections.
- Elliptical Marquee Tool: For circular or oval selections.
- Single Row Marquee Tool: Selects a 1-pixel horizontal line.
- Single Column Marquee Tool: Selects a 1-pixel vertical line.
3. Lasso Tools
Lasso Tools offer freehand selection capabilities. Unlike Marquee tools, Lasso tools let you draw selections manually, providing flexibility for irregular shapes.
- Lasso Tool: Draw freeform selections by dragging your mouse.
- Polygonal Lasso Tool: Create selections using straight lines and angles.
- Magnetic Lasso Tool: Automatically snaps to edges as you trace around an object, ideal for contrasting subjects.
4. Quick Selection Tool & Magic Wand Tool
These are your smart selection tools. The Quick Selection Tool rapidly “paints” a selection based on edge detection, while the Magic Wand Tool selects areas based on color similarity. This is where our focus keyword comes in!
The Magic Wand Tool in Detail:
The Magic Wand Tool is invaluable for selecting areas of an image that share similar colors. Here’s how to effectively use the Magic Wand Tool in Photoshop CS5:
-
Select the Magic Wand Tool: Find it in the toolbar (it looks like a wand with sparkles) or press W on your keyboard. It’s often grouped with the Quick Selection Tool.
-
Adjust Tolerance: In the options bar at the top, you’ll see a “Tolerance” setting. This value determines the range of colors the Magic Wand will select.
- Lower Tolerance (e.g., 0-30): Selects only colors very similar to the pixel you click on. Useful for precise selections of very distinct color areas.
- Higher Tolerance (e.g., 30-100+): Selects a wider range of colors similar to the clicked pixel. Great for selecting larger areas with subtle color variations. Experiment to find the right tolerance for your image.
-
Contiguous vs. Non-contiguous:
- Contiguous (Checked): Selects only adjacent areas of similar color. If there are similar colored pixels elsewhere in the image that are not connected, they won’t be selected in the initial click.
- Non-contiguous (Unchecked): Selects all pixels throughout the entire image that fall within the tolerance range, regardless of whether they are connected to the initial click point.
-
Click to Select: Simply click on the area of the image you want to select. Photoshop will then select pixels based on the tolerance and contiguous settings.
-
Refine Your Selection:
- Add to Selection: Hold Shift while clicking to add more areas to your existing selection.
- Subtract from Selection: Hold Alt (Option on Mac) while clicking to remove areas from your selection.
- Feathering and Anti-aliasing: These options in the options bar control the edge quality of your selection. Feathering softens the edges, and Anti-aliasing smooths jagged edges for a cleaner look, especially useful when compositing.
Use Cases for the Magic Wand Tool:
- Background Removal: Quickly select and remove a solid or near-solid color background.
- Color Adjustments: Select areas of a specific color to selectively adjust hue, saturation, or brightness.
- Isolating Objects: Select an object based on its color to isolate it from its surroundings.
- Creating Masks: Use selections made with the Magic Wand Tool to create layer masks for non-destructive editing.
5. Crop Tool & Slice Tool
Crop Tool is essential for trimming and resizing images. It allows you to eliminate unwanted areas and adjust the image’s composition.
- Crop Tool: Define a rectangular area to keep, discarding the rest.
- Perspective Crop Tool: Correct perspective distortion while cropping.
- Slice Tool: Divide an image into multiple sections for web design, optimizing loading times.
- Slice Select Tool: Select and adjust individual slices created by the Slice Tool.
6. Eyedropper Tool
The Eyedropper Tool samples colors from your image. Click on any pixel, and the Eyedropper Tool will set your foreground color to match that pixel’s color, useful for color consistency.
Associated tools include:
- 3D Material Eyedropper Tool: Samples material colors in 3D models.
- Color Sampler Tool: Provides RGB and CMYK color readings for up to four points in your image.
- Ruler Tool: Measures distances and angles within your image.
- Note Tool: Add text notes directly onto your Photoshop file.
- Count Tool: Manually count items in an image, useful for inventory or analysis.
7. Brush Tool
The Brush Tool is your digital paintbrush. It allows you to paint strokes of color onto your image. Photoshop offers a vast array of brush types, sizes, and hardness settings for diverse artistic effects.
Related tools are:
- Pencil Tool: Creates hard-edged lines, similar to a real pencil.
- Color Replacement Tool: Replaces a specific color with your foreground color while preserving texture and shading.
- Mixer Brush Tool: Simulates realistic paint mixing and blending directly on your canvas.
8. Spot Healing Brush Tool
Spot Healing Brush Tool is designed for retouching imperfections. It seamlessly blends away blemishes, spots, and minor distractions by sampling surrounding textures and colors.
Variations include:
- Healing Brush Tool: Similar to Spot Healing, but you define the source sample area using Alt + Click (Option + Click on Mac).
- Patch Tool: Select an area and replace it with texture from another area you drag to.
- Content-Aware Move Tool: Move or extend selected objects, and Photoshop intelligently fills in the gaps.
- Red Eye Tool: Specifically targets and corrects red-eye in photographs caused by flash.
9. Eraser Tool
The Eraser Tool removes pixels, making areas transparent (or revealing the background color if the layer isn’t transparent).
Types of Eraser Tools:
- Background Eraser Tool: Erases the background, attempting to maintain foreground edges.
- Magic Eraser Tool: Erases areas of similar color in a single click, much like the Magic Wand Tool but for erasing.
10. Gradient Tool
The Gradient Tool creates smooth color transitions. You can create linear, radial, angled, reflected, and diamond gradients, perfect for backgrounds and stylistic effects.
Associated tools:
- Paint Bucket Tool: Fills contiguous, similarly colored areas with your foreground color.
- 3D Material Drop Tool: Applies materials to 3D objects accurately.
11. Shape Tools
Shape Tools allow you to create vector-based shapes like rectangles, ellipses, polygons, lines, and custom shapes. Vector shapes are scalable without losing quality.
Available Shape Tools:
- Rectangle Tool
- Rounded Rectangle Tool
- Ellipse Tool
- Polygon Tool
- Line Tool
- Custom Shape Tool: Access a library of pre-designed shapes.
12. Pen Tool
The Pen Tool creates precise vector paths and selections. It uses anchor points and handles to create curves and straight lines, essential for detailed selections and vector graphics.
Variations include:
- Freeform Pen Tool: Draw freehand paths.
- Add Anchor Point Tool: Add points to existing paths for more control.
- Delete Anchor Point Tool: Remove points to simplify paths.
- Convert Point Tool: Change anchor points between smooth curves and sharp angles.
13. Direct Selection Tool
The Direct Selection Tool is used to manipulate vector paths created by Shape or Pen Tools. You can adjust individual anchor points and handles to refine shapes.
- Path Selection Tool: Selects and moves entire paths or shapes.
14. Blur Tool
The Blur Tool softens edges and details, creating a blurring effect. It’s useful for depth of field effects or softening harsh lines.
Related tools:
- Sharpen Tool: Increases contrast and sharpness.
- Smudge Tool: Simulates dragging paint while blending colors.
15. Type Tool
The Type Tool allows you to add text to your images. Photoshop offers extensive text formatting options, including fonts, sizes, colors, and styles.
Types of Type Tools:
- Horizontal Type Tool: Creates standard left-to-right text.
- Vertical Type Tool: Creates top-to-bottom text.
- Horizontal Type Mask Tool: Creates text-shaped selections.
- Vertical Type Mask Tool: Creates vertically oriented text-shaped selections.
Conclusion
Mastering these fundamental Photoshop tools, especially the Magic Wand Tool, is your first step to becoming proficient in graphic design. Experiment with each tool, practice regularly, and explore further tutorials to deepen your skills. Photoshop is a vast and powerful program, and understanding these basics will set you on the path to creating stunning visuals.
