Adobe Photoshop CS6 remains a powerful tool for image editing, even years after its release. Whether you’re enhancing photos for your website, creating marketing materials, or preparing images for print, Photoshop CS6 offers a comprehensive suite of features. One key aspect to maximizing your efficiency in Photoshop CS6 is customizing your workspace. This includes understanding how to add tools in Photoshop CS6 to ensure you have quick access to the features you use most frequently. This guide will walk you through customizing your Photoshop CS6 workspace, focusing on adding and arranging tools to streamline your workflow. We’ll also touch upon a practical example of using these tools for a common task: resizing images.
Customizing your workspace in Photoshop CS6 is about more than just aesthetics; it’s about creating an environment that works best for you. By learning how to add tools in Photoshop CS6, arrange panels, and save custom workspaces, you can significantly speed up your editing process and focus on your creative vision.
Understanding the Photoshop CS6 Workspace
Before we dive into how to add tools in Photoshop CS6, let’s briefly understand the key components of the Photoshop CS6 workspace:
- Menu Bar: Located at the very top, it provides access to all of Photoshop’s menus and commands (File, Edit, Image, Layer, Type, Select, Filter, 3D, View, Window, Help).
- Options Bar: Situated below the Menu Bar, it displays options for the currently selected tool. The options change depending on the tool you have active.
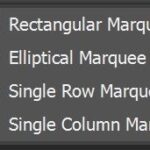
- Tools Panel (Toolbar): Usually found on the left side of the screen, this panel houses the essential tools for image editing and creation, such as selection tools, painting tools, retouching tools, and more. This is where our focus on how to add tools in Photoshop CS6 will be primarily directed.
- Panels: Dockable windows on the right side (by default) that offer a wide range of controls and information, like Layers, Adjustments, Color, History, and more.
How to Add Tools in Photoshop CS6: Customizing the Toolbar
The Tools panel is your primary toolkit in Photoshop CS6. While it comes pre-populated with a standard set of tools, you can customize it to better suit your specific needs. Photoshop CS6, by default, presents a single-column toolbar for ease of access. Here’s how to add tools in Photoshop CS6 and customize this toolbar:
-
Understanding Tool Groups: Many tools in Photoshop are grouped together. You’ll notice small triangles in the bottom right corner of some tool icons. These indicate tool groups. Click and hold (or right-click) on a tool with a triangle to reveal the other tools within that group.
Alt text: Illustrating how to access tool groups in Photoshop CS6 by clicking and holding on a tool icon with a small triangle.
-
Rearranging Tools: You can rearrange the order of tools within the toolbar by simply clicking and dragging a tool icon to a new position. This allows you to place your most frequently used tools at the top for quicker access.
-
Choosing Visible Tools: Photoshop CS6 offers a wide array of tools, and not all of them are visible in the default toolbar. While you can’t directly “add” completely new tools that aren’t already within Photoshop’s toolset, you can customize which tools are visible and readily accessible in your toolbar. To manage the visibility of tools, you would typically customize workspaces or use the “Edit Toolbar” option in newer Photoshop versions. However, in CS6, the primary method is managing workspace and tool arrangement as described above.
-
Saving Custom Workspaces: Once you’ve customized your toolbar and panel arrangement, it’s crucial to save your workspace. Go to Window > Workspace > New Workspace. Give your workspace a descriptive name and click Save. This allows you to quickly switch between different workspace layouts optimized for various tasks.
Alt text: Screenshot showing the “New Workspace” dialog box in Photoshop CS6, emphasizing the process of saving a customized workspace layout.
By understanding how to add tools in Photoshop CS6 through customization and workspace management, you can create a more efficient and personalized editing environment.
Example: Resizing Images to 4×6 Using Customized Tools
Let’s put these workspace customization tips into practice with a common task: resizing images to a 4×6 inch format. This is a frequent requirement for printing photos or preparing images for specific online dimensions. While resizing itself doesn’t directly involve “adding” new tools, having a streamlined workspace ensures you can quickly access the necessary tools and commands.
Here’s how you can resize an image to 4×6 in Photoshop CS6, potentially leveraging your customized workspace for efficiency:
-
Open Your Image: Go to File > Open and select the image you want to resize.
-
Access Image Size: Navigate to Image > Image Size. This will open the Image Size dialog box.
-
Set Dimensions (Method 1: Image Size Dialog):
- In the Image Size dialog, ensure the “Resample” option is checked (usually Bicubic Automatic is a good default).
- Under “Document Size”, change the units to “inches” if they are not already.
- Enter “4” for Width and “6” for Height.
- Adjust the Resolution as needed. For printing, 300 pixels per inch (ppi) is generally recommended. For web use, 72 ppi is sufficient.
- Click OK.
Alt text: The Image Size dialog box in Photoshop CS6, highlighting the fields for adjusting width, height, and resolution for image resizing.
-
Set Dimensions (Method 2: Crop Tool):
- Select the Crop Tool (C) from the Tools panel. If you’ve customized your toolbar, ensure the Crop Tool is easily accessible.
- In the Options Bar at the top, set the Width to “4in” and Height to “6in”. You can also set the Resolution here if desired.
- Drag the crop handles on your image to define the area you want to keep in the 4×6 ratio. Adjust the crop box to frame your subject as desired.
- Press Enter or click the checkmark in the Options Bar to apply the crop.
Alt text: Demonstrating the Options Bar settings for the Crop Tool in Photoshop CS6, specifically showing the width and height fields set to 4 inches and 6 inches.
-
Save Your Resized Image: Go to File > Save As. Choose a new file name and format (e.g., JPEG for photos) to avoid overwriting your original image. Click Save.
By familiarizing yourself with how to add tools in Photoshop CS6 through workspace customization and practicing common tasks like image resizing, you’ll become more proficient and efficient in your image editing workflow. Experiment with different workspace layouts and tool arrangements to find what works best for you and the types of projects you frequently undertake.