Creating smooth gradients is a fundamental technique in digital art, and Paint Tool SAI is a fantastic program for achieving this effect. Whether you’re aiming for soft shading, vibrant backgrounds, or eye-catching highlights, understanding how to make gradients is crucial. This tutorial will guide you through the process of creating beautiful gradients in Paint Tool SAI, enhancing your artwork and bringing your visions to life. Let’s dive in and explore how to add depth and dimension to your digital paintings using gradients.
Tutorial Steps:
-
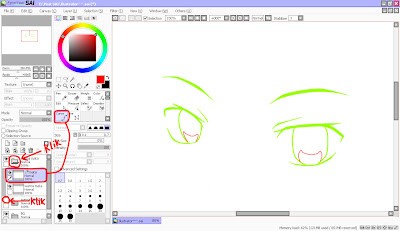
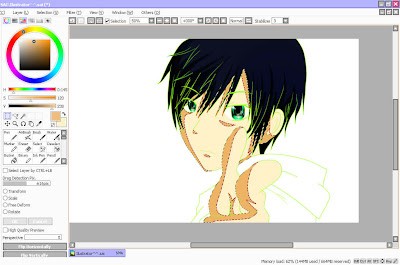
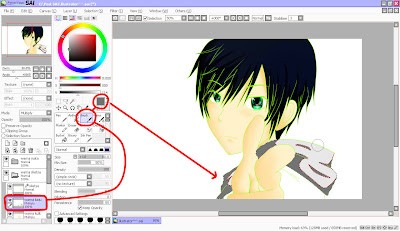
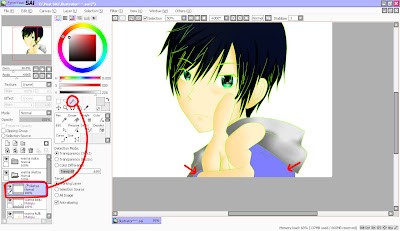
Layer Setup: Start by organizing your layers. In Paint Tool SAI, layers are managed efficiently using layer sets.
Double click on “Layer/LayerSet2” to rename your layer set. This helps in keeping your artwork organized. 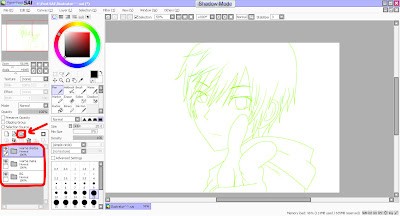


-
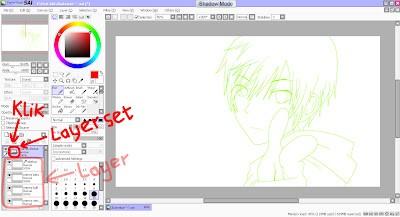
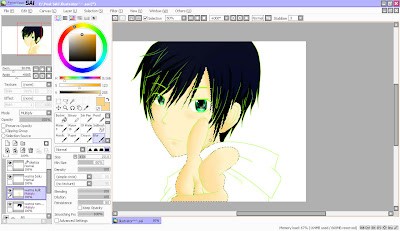
Understanding Layer Sets: Layer sets are containers for grouping layers. Click on a layer set to see the layers grouped within it.
Click the layer set icon to view the hierarchy of layers within your organized groups. -
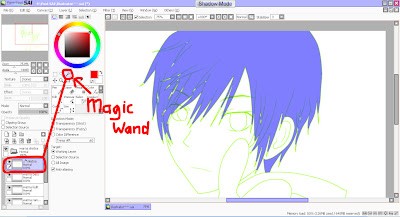
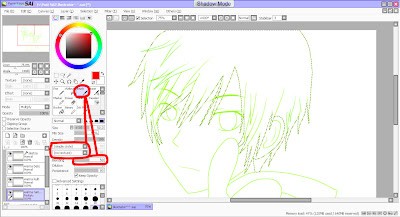
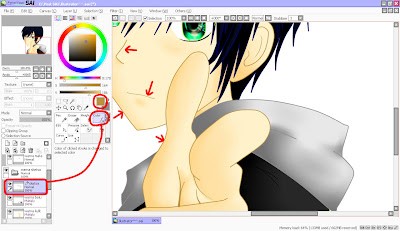
Selecting the Area for Gradient: To begin coloring and creating a gradient, first, select the area where you want to apply the gradient. For hair, use the Magic Wand tool. Ensure your “line art” or “sketch” layer is active and click on the hair section to select it.
-
Refining the Selection: Often, the Magic Wand tool might miss some areas, especially in corners or detailed sections of the hair. Use the Magic Wand again to click on these unselected parts to add them to your selection.
-
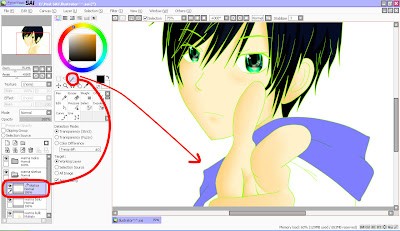
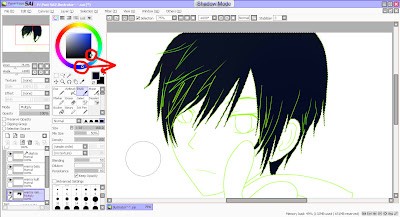
Base Coloring: Switch to the layer intended for hair color, usually named something like “hair color”. Change the layer mode from “Normal” to “Multiply”. This mode is excellent for shading and gradients as it blends colors naturally with layers below.
-
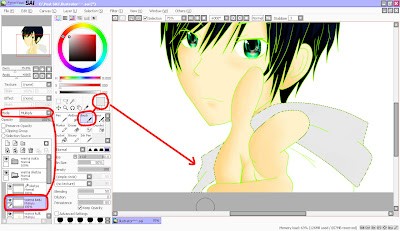
Brush Settings: Select the Brush tool for coloring. Set the Brush Shape to “Simple Circle” and Brush Texture to “No Texture” for a smooth color application. If you want a watercolor-like effect, adjust the Blending setting to your preference.
-
Applying Base Color: Choose a base color from the color wheel. For this example, a dark blue-black is used as the base hair color. Apply this color to the selected hair area using the Brush tool. You can adjust brush size using the
[or]keys for smaller or larger strokes. -
Deselect: Deselect the hair area by switching to the Selection tool and clicking anywhere outside the canvas.
-
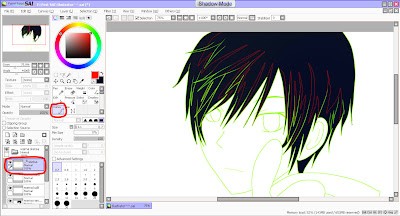
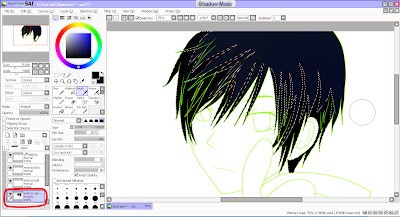
Creating Shading Guides: Return to the sketch layer and use the Curve tool to draw lines where you want to create shading. These lines will guide the shading process.
-
Selecting Shading Areas: Use the Magic Wand tool again to select the areas of the hair where you want to apply shading, using the curve lines as guides.
-
Applying Shading Color: Switch back to the “hair color” layer and choose a darker shade of your base color for shading. Apply this to the selected shading areas using the Brush tool.
-
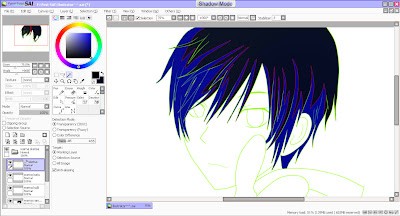
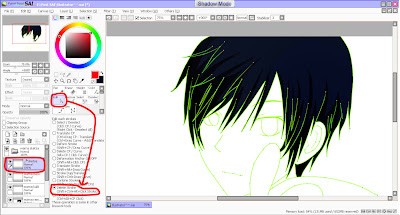
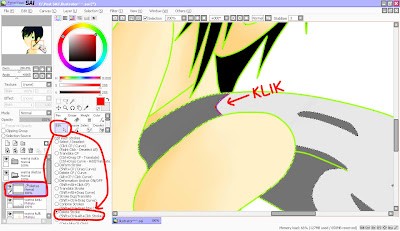
Deleting Stroke Lines: Return to the sketch layer and go to Edit → Delete Stroke. Click on the red curve lines you created for shading to remove them.
-
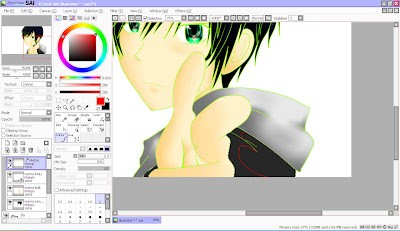
Blurring for Gradient Effect: Go back to the “hair color” layer and select the Blur tool. Adjust the Blur settings as needed, and then gently blur the edges where the base color and shading color meet. This will blend the colors smoothly, creating a gradient effect.
-
Layer Order: Ensure that your color layer set is positioned above the sketch layer set in your layer panel. This ensures that your colors are applied over the line art.
-
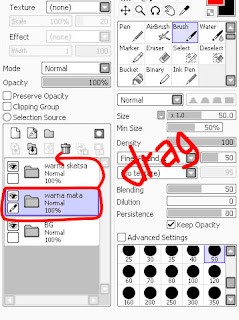
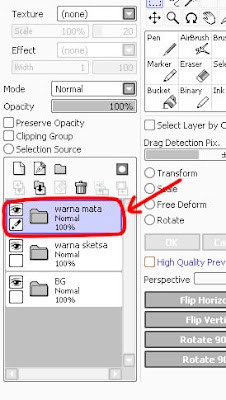
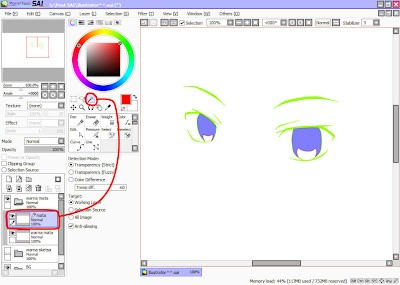
Coloring the Eyes – Preparation: To prevent hair color from interfering while coloring the eyes, hide the “sketch color” layer set by clicking the show/hide icon. Then, select the layer set for eye color and the specific layer for the eyes. Use the Curve tool to create lines around the eye area as boundaries for coloring.
-
Selecting Eye Area: Still on the “eye” layer, use the Magic Wand tool to select the eye area within the boundaries you just created.
-
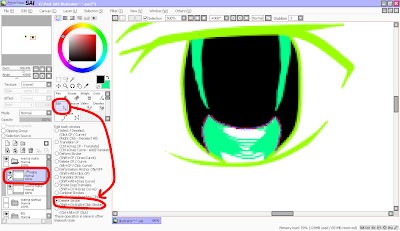
Applying Base Eye Color: Select the “eye color” layer. Use the Brush tool to apply a base color to the selected eye area. For this example, black is used as the base eye color. Remember to adjust your brush settings as needed.
-
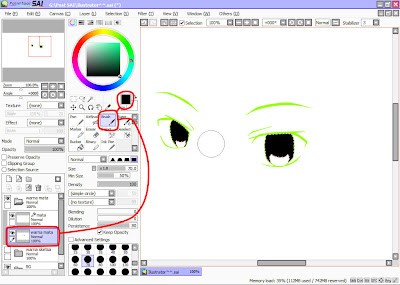
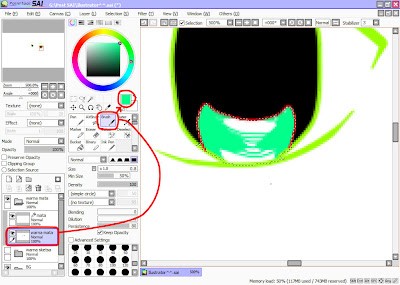
Selecting Iris Area: Go back to the “eye” layer, use the Magic Wand tool to select the area within the eye where you want to add iris color and highlights.
-
Coloring Iris and Adding Detail: Return to the “eye color” layer and use the Brush tool to color the selected iris area. Choose your desired eye color and apply it within the selection. You can add multiple colors and highlights as you wish to create depth in the eyes.
-
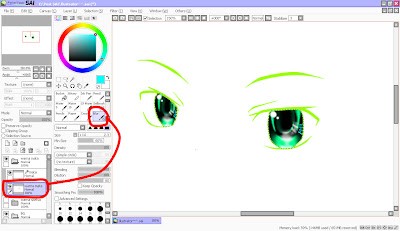
Eye Detailing: Continue adding colors and details to the eyes to achieve the desired look. Experiment with different brush sizes and colors to make the eyes expressive.
-
Deleting Eye Boundaries: Select the “eye” layer, go to Edit Tool, and choose Delete Stroke. Click on the curve lines you used as eye boundaries to remove them.
-
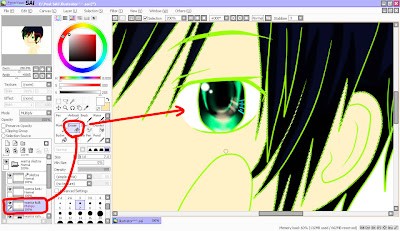
Blurring Eye Colors: Select the “eye color” layer and choose the Blur tool. Gently blur the colors within the eyes to create a smooth gradient and enhance the overall look of the eyes.
-
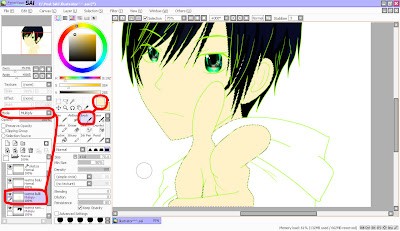
Coloring Skin – Selection: Open the layer set for “sketch color” and select the “sketch” layer. Use the Magic Wand tool to select the skin areas you want to color.
-
Applying Base Skin Color: Select the “skin color” layer and change its mode from “Normal” to “Multiply”. Choose a base skin color, select the Brush tool, and apply the color to the selected skin areas.
-
Erasing Skin Color from Eyes: Still on the “skin color” layer, select the Eraser tool. Carefully erase the skin color from the white parts of the eyes, ensuring they remain white.
-
Skin Shading Guides: Create guide lines for skin shading on the sketch layer using the Curve tool. These lines will help define where shadows will be added to the skin.
-
Skin Shading and Blurring: Similar to hair shading, delete the stroke lines for skin shading using Edit → Delete Stroke on the sketch layer. Then, on the “skin color” layer, use the Blur tool to blur the shading edges, creating a smooth gradient on the skin.
-
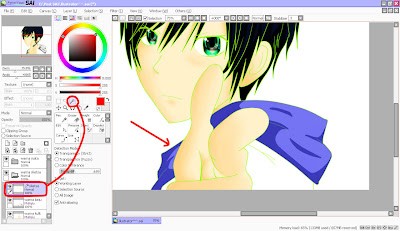
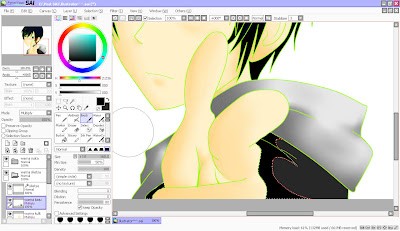
Coloring Clothes – Selection: Move to coloring the clothes. On the sketch layer, use the Magic Wand Tool to select individual parts of the clothing. This helps in applying gradients to different sections of the clothes separately.
-
Applying Base Clothes Color: Select the “clothes color” layer, change the mode to “Multiply”, choose a base color for the clothing, and apply it to the selected area using the Brush tool.
-
Clothes Shading Guides: Return to the sketch layer and use the Curve tool to create shading guide lines on the clothes. Then, use the Magic Wand tool to select the areas defined by these lines for shading.
-
Applying Clothes Shading Color: Go back to the “clothes color” layer, choose a darker shade for shading, and apply it to the selected areas using the Brush tool.
-
Deleting Clothes Shading Guides: Return to the sketch layer, select Edit Tool → Delete Stroke, and click on the guide lines to remove them.
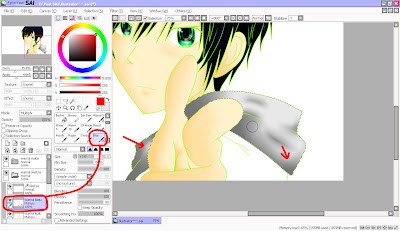
-
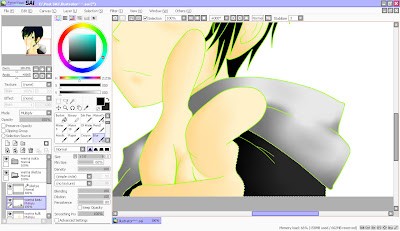
Blurring Clothes Shading: Select the entire clothing area again using the Magic Wand Tool on the sketch layer. Then, go back to the “clothes color” layer, choose the Blur Tool, and blur the shading edges to create smooth gradients on the clothing.
-
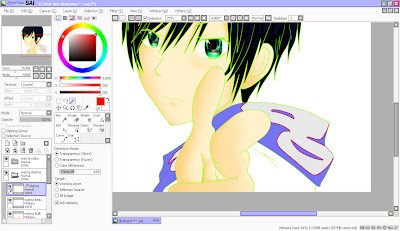
Adding More Detail to Clothes: Continue coloring and shading other parts of the clothing using the same techniques of selection, shading lines, coloring, and blurring to achieve the desired depth and gradient effects.
-
Finishing Touches – Line Art Color: For a polished look, change the color of the line art to better match the colors of the objects. Return to the sketch layer, select the Color Tool, choose a color that is slightly darker than the object’s base color, and click on the lines to change their color.
-
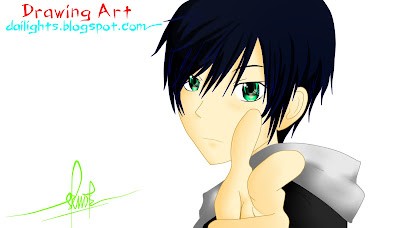
Completion: Congratulations! You have successfully created gradients in Paint Tool SAI, adding depth and dimension to your artwork.
This tutorial has shown you a basic method for creating gradients in Paint Tool SAI. Experiment with different colors, brush settings, and blur amounts to achieve various gradient effects and enhance your digital artwork further. Practice these techniques, and you’ll soon be creating stunning, gradient-rich illustrations!