
In today’s fast-paced digital world, printing documents and photos remains a crucial task for both personal and professional needs. While technology has made connecting devices simpler, understanding the different methods to link your printer to your computer, laptop, or even handheld devices is essential for a smooth and efficient workflow. Whether you’re dealing with wired USB connections or the convenience of wireless networks, this guide will walk you through each step, ensuring you can effortlessly bring your digital files to life on paper.
Getting Started: Unboxing and Initial Setup
Before diving into connections, proper setup is key. Carefully unpack your new printer, ensuring all components are present. Rushing this initial stage can lead to overlooking essential parts or skipping basic steps. Once unpacked, place all components within easy reach for a streamlined configuration process.
Next, connect the power cable to your printer and a nearby power outlet. Your printer might power on automatically, or you may need to press the power button. With the printer powered up, you’re ready to establish a connection with your devices.
Connecting via Wired USB Cable
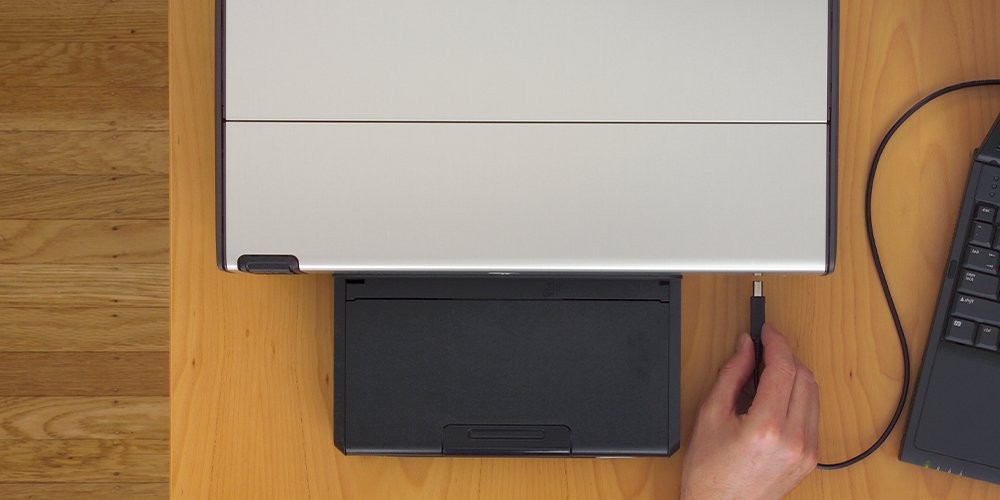
A USB cable connection offers a straightforward and reliable method to link your printer to your computer. Typically included with your printer, the USB cable directly connects your printer to your computer tower or laptop.
Upon connection, your computer’s operating system, whether Windows or macOS, should detect the new device. A notification usually appears, indicating that a driver installation is necessary to complete the setup. If prompted, clicking this notification often initiates an automated installation process. However, if your computer doesn’t automatically guide you, follow these manual steps:
Step 1: Access Windows Settings
- Click the Windows icon located in the bottom-left corner of your screen to open the Start Menu.
- In the Start Menu, find and click the gear-shaped “Settings” icon, usually situated above the power button.
Step 2: Navigate to Devices
- Within the Windows Settings panel, locate and click on the “Devices” option. This section manages printers, Bluetooth devices, and other peripherals.
- In the left-hand menu of the Devices window, select “Printers & scanners.”
Step 3: Add Your Printer
- On the “Printers & scanners” page, click the “+ Add printer or scanner” button. Windows will begin scanning for available printers.
- Your printer, connected via USB, should appear in the list of detected devices. Click on your printer’s name when it appears and follow any on-screen prompts to finalize the installation.
Once these steps are complete, your printer should be ready for use, providing a dependable wired connection for all your printing needs.
Connecting via Wireless Network
Wireless connections offer greater flexibility and convenience, allowing you to print from anywhere within your WiFi network’s range. Setting up a wireless printer involves connecting it to your home or office WiFi network and then linking it to your computer.
Step 1: Access Printer’s Wireless Settings
- Turn on your wireless printer and ensure it is ready for setup.
- Most modern wireless printers have an LCD control panel. Navigate through the printer’s menu to find “Wireless LAN Setup” or similar settings. The exact menu names and steps can vary by manufacturer, so consult your printer’s manual if needed.
Step 2: Connect to Your WiFi Network
- Within the Wireless LAN settings, your printer will scan for and display available WiFi networks.
- Select your home or office WiFi network (SSID) from the list. If prompted, you may need to manually enter your network name (SSID).
- You can typically find your SSID on your WiFi router, often labeled on the router itself or within your router’s configuration interface.
Step 3: Enter WiFi Password
- Once you’ve selected your network, you’ll be prompted to enter your WiFi password (network key).
- Use the printer’s control panel to carefully enter your password. Ensure correct capitalization and character input.
Step 4: Add Printer on Your Computer
- After successfully connecting your printer to WiFi, return to your computer.
- Open Windows Settings by clicking the Windows icon and then the “Settings” gear icon.
- Go to “Devices” and then “Printers & scanners.”
- Click “+ Add printer or scanner.” Windows will search for printers on your network.
- Your wireless printer should appear in the list. Select it and click “Add device” to complete the wireless setup on your computer.
With these steps completed, your wireless printer is set up for network printing, offering convenient access from all devices on your WiFi network.
Connecting to Handheld Devices: Smartphones and Tablets
In our mobile-centric world, printing directly from smartphones and tablets is increasingly useful. Both iOS and Android platforms offer streamlined ways to connect to compatible printers.
Connecting to iPhones and iPads (AirPrint)
AirPrint, Apple’s built-in wireless printing technology, simplifies printing from iPhones and iPads to AirPrint-enabled printers. No driver installations or complex software setups are needed.
Step 1: Ensure WiFi Connection
- Verify that both your iPhone/iPad and your AirPrint-compatible printer are connected to the same WiFi network.
Step 2: Print from an App
- Open the app containing the document or photo you wish to print.
- Tap the “Share” icon (often an upward-pointing arrow or three dots) within the app.
- Look for the “Print” option in the share menu and tap it.
Step 3: Select Printer and Print
- On the Print Options screen, select your AirPrint printer from the “Printer” dropdown menu.
- Adjust print settings like number of copies or paper size, if needed.
- Tap “Print” to send the print job to your wireless printer.
Connecting to Android Devices (Google Cloud Print)
For Android devices, Google Cloud Print (though now deprecated in favor of Android’s built-in printing system) or printer manufacturer-specific apps enable wireless printing. Many modern Android devices and apps directly support printer discovery and printing without needing Google Cloud Print.
Step 1: Add Printer to Your Network (if needed)
- Ensure your printer is connected to your WiFi network as described in the “Wireless Network Connection” section above.
Step 2: Print from an App
- Open the app on your Android device with the file to print.
- Look for the “Print” option in the app’s menu (often under three dots or “More options”).
Step 3: Select Printer and Print
- In the print preview screen, tap the dropdown menu to select a printer. Your network printer should appear in the list if correctly connected.
- Choose your printer and adjust settings as needed.
- Tap the print icon to initiate printing from your Android device.
For some older printers or specific functionalities, you might need to install a printer manufacturer’s app from the Google Play Store for enhanced compatibility and features.
Troubleshooting Common Printer Connection Issues
Encountering printer connection problems can be frustrating. Here are solutions to common issues:
“My Computer Can’t Find My Printer”
- Check Connections: For USB, ensure the cable is securely plugged into both the printer and computer. For wireless, verify both devices are on the same WiFi network and the printer is online.
- Restart Devices: Reboot both your computer and printer. This often resolves temporary glitches.
- Use Windows Troubleshooter: In “Printers & scanners” settings, click “Add printer or scanner.” If your printer isn’t found, click “The printer that I want isn’t listed” for Windows’ built-in troubleshooting.
- Update Drivers: Visit your printer manufacturer’s website, find your printer model, and download the latest drivers for your operating system.
“My Computer Can’t Install Printer Software”
- Direct USB Connection (if wireless): Even for wireless printers, temporarily connect via USB cable. This can sometimes trigger software installation.
- Enable Automatic Device Installation:
- Search for “Control Panel” in the Windows search bar and open it.
- Search for “change device installation settings” in the Control Panel search.
- Select “Yes” to “Automatically download manufacturers’ apps and realistic icons for my devices” and save changes.
“My Printer Is Unable to Print Over a Network”
- Printer and WiFi Connection: Double-check that your printer is connected to the correct WiFi network and that the network is working.
- Proximity to Router: Wireless signal strength can weaken with distance. Move the printer closer to your WiFi router to rule out signal issues.
- Driver Issues: Corrupted or outdated drivers can cause network printing problems. Reinstall the latest driver from the manufacturer’s website.
- Printer User Manual: Consult your printer’s manual for specific troubleshooting steps and contact information for tech support if issues persist.
By following these comprehensive steps and troubleshooting tips, you can confidently connect your printer to your computers and mobile devices, ensuring seamless printing for all your needs.