
Monitoring your website’s health is crucial for every website owner. In this guide, we will walk you through how to register for Google Search Console, a powerful tool that allows you to keep a close eye on your site’s performance and identify areas for improvement.
Google Search Console, formerly known as Google Webmaster Tools, plays a vital role in understanding your website’s internal condition. It provides valuable insights into Googlebot’s crawling activity, alerts you to potential issues, and offers a wealth of data to optimize your site for search engines.
Here are some key functions of Google Search Console:
- Discover your website’s backlink profile.
- Check the indexing status of your articles and pages.
- Monitor website errors and identify technical issues.
- Disavow harmful or low-quality backlinks.
- Remove outdated or broken URLs from Google’s index.
- And much more.
Just like setting up a Facebook Pixel or Google Analytics, integrating your website with Google Search Console is an essential step for any website owner who is serious about online visibility and SEO.
Setting Up Google Search Console: A Step-by-Step Guide
To begin, navigate to the Google Search Console website. You will see a page similar to the image below. Click Start Now to proceed.
You will be prompted to sign in with your Gmail account. For better organization, we recommend using the same Gmail account for your website, Google Analytics, Search Console, and other related services. This simplifies account management and access.
1. Domain Property Setup
In this step, you’ll encounter two methods for registering your website with Google Search Console: Domain and URL Prefix.
The Domain method is a newer, more comprehensive approach. By simply entering your domain name (e.g., yourwebsite.com) without any prefixes like “http,” “https,” or “www,” Search Console automatically integrates all versions of your domain.
The URL Prefix method requires adding each version of your URL separately. For example, you would need to add: https://yourwebsite.com, https://www.yourwebsite.com, http://www.yourwebsite.com, and http://yourwebsite.com individually and verify each one.
In the left-hand column (Domain), enter your domain name without any prefixes as shown in the example above. Click Continue to proceed.
You will be directed to a new page displaying verification instructions. The Domain method exclusively uses DNS record verification. Unlike the URL Prefix method, which offers various verification options like HTML file, Tag Manager, and Google Analytics, the Domain method relies solely on DNS management. Click Copy to copy the verification code.
Next, you need to add this code to your domain provider’s DNS management settings. Access your domain provider’s client area or dashboard where you purchased your domain.
Since domain provider interfaces vary, locating the DNS Manager might differ. If you are unsure, contacting your provider’s customer support is a quick way to get assistance. We will illustrate how to add the code in Cloudflare, assuming your website is already integrated with Cloudflare. If not, consider setting up Cloudflare for enhanced website security and performance.
Log in to Cloudflare, select your active website, and navigate to the DNS menu. Input the copied code in the format indicated within the red box in the image below. Ensure you select TXT for the record type and @ for the name if needed, then click Add record.
Return to the Google Search Console verification page and click Verify in the bottom right corner. If the DNS record is correctly configured, your domain property should be successfully verified, as shown below.
2. URL Prefix Property Setup
The second method, URL Prefix, is the traditional approach to registering with Google Search Console. While the Domain method offers broader coverage, the URL Prefix method still serves as a viable alternative, especially if you encounter difficulties with DNS verification.
Furthermore, the URL Prefix method provides more diverse verification options.
To use this method, enter the complete URL of your website, including the prefix (e.g., https://yourwebsite.com), in the field provided in the right-hand column. This action initiates the process of registering your website in Search Console.
Click Continue to proceed.
In the subsequent step, you’ll be asked to verify website ownership. Several options are available. Here, we will demonstrate verification using the HTML tag method. Copy the code within the quotation marks (as shown in the image below) and integrate it into your website using a plugin like Yoast SEO.
If you are using Yoast SEO, go to General >> Webmaster Tools in your WordPress dashboard. Paste the copied code into the “Google verification code” field. Click Save Changes to apply the settings.
If you don’t use Yoast SEO, you can choose alternative verification methods such as HTML file upload, Google Analytics, Google Tag Manager, or Domain name provider.
HTML File Upload
For this method, download the provided HTML verification file and upload it to the public_html folder of your website using a file manager accessed through your hosting cPanel. Log in to cPanel >> find and click File Manager.
Navigate to the public_html folder on the left-hand side and upload the downloaded HTML file. Use the Upload button in the top menu.
Google Analytics / Google Tag Manager
If you choose this option, ensure you have already set up Google Analytics or Google Tag Manager for your website and installed the respective tracking code in your website’s <header> section (e.g., header.php file). In Search Console, simply click Verify.
Domain Name Provider
This verification process is identical to the Domain Property method described in point number 1 above. Refer back to that section for detailed instructions.
Select the verification method that suits you best. The HTML tag method, especially when using Yoast SEO, is often the easiest and most recommended.
Once you have implemented your chosen verification method, return to the Google Search Console page, click Verify, and then Go to Property. Your website is now successfully integrated with Search Console. Data will begin to populate within 24-48 hours.
A crucial next step is to submit your website’s Sitemap to Google Search Console. This helps Googlebot efficiently crawl and index your website’s content.
Exploring Google Search Console Features
Now that you have registered for Google Search Console, let’s explore some of its essential features. All screenshots in this guide reflect the latest Google Search Console interface.
1. Overview
The Overview section is the first screen you’ll see in Google Search Console. It provides a summary of key performance indicators, including Performance, Coverage, and Enhancements, which are detailed below.
2. Performance
The Performance report offers a comprehensive view of your website’s search performance. Key metrics include: Total Clicks, Total Impressions, Average CTR (Click-Through Rate), and Average Position.
- Total Clicks: The total number of clicks from Google Search results to your website.
- Total Impressions: How many times your website’s pages appeared in Google Search results.
- Average CTR: The average click-through rate, calculated as clicks divided by impressions.
- Average Position: The average ranking position of your website’s pages in Google Search results.
Data is typically displayed for the last three months.
Below the performance graph, you will find tabs for Queries, Pages, Countries, Devices, and Search Appearance. Each tab presents data sorted from highest to lowest.
- Queries: Shows the search terms (keywords) that drive the most traffic to your website.
- Pages: Lists the website pages that receive the most traffic from search results.
- Countries: Indicates the geographic locations of your website visitors.
- Devices: Shows the types of devices (desktop, mobile, tablet) used by visitors to access your website.
This data provides valuable insights into user search behavior, popular content, audience demographics, and device preferences.
3. URL Inspection
The URL Inspection tool allows you to analyze individual URLs. You can check if a URL is indexed by Google, identify any indexing issues, and request indexing for new or updated pages.
4. Index
4.1. Coverage
The Coverage report analyzes the indexing status of your website’s pages. It categorizes pages into four statuses: Error, Valid with Warning, Valid, and Excluded.
This report helps you identify indexing errors, warnings, successfully indexed pages, and pages excluded from Google’s index.
4.2. Sitemaps
A Sitemap is an XML file that lists all the important pages of your website. Submitting your sitemap to Google Search Console under the “Add a new sitemap” section is highly recommended.
Sitemaps help Googlebot discover and index your website’s content more efficiently. If you use Yoast SEO, your default sitemap URL is typically yourdomain.com/sitemap_index.xml.
Clicking on a submitted sitemap name will take you to a new page with details about the sitemap. A new feature allows you to remove a submitted sitemap (previously only available in the older version of Search Console).
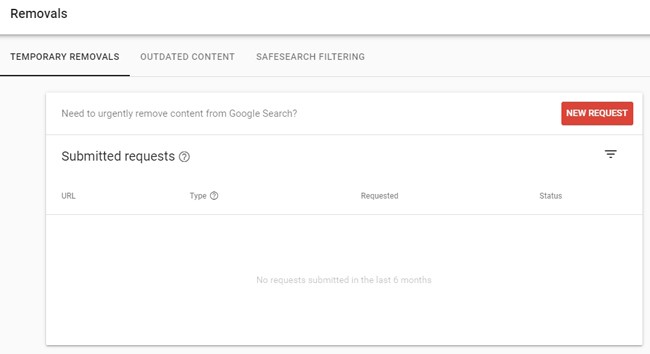
4.3. Removals
The Removals tool allows you to temporarily remove content from Google Search results. If you have deleted content from your website but it’s still appearing in search results, you can use this tool to expedite its removal from Google’s index. This is especially useful for resolving 404 errors caused by outdated indexed pages.
5. Enhancements
5.1. Speed (Experimental)
The Speed report (currently experimental) provides insights into your website’s page speed performance on both desktop and mobile devices.
This report is based on Chrome User Experience Report data, reflecting real-world user experiences.
Clicking “Open Report” provides more detailed information, highlighting pages that are considered fast, moderate, or slow.
5.2. Mobile Usability
The Mobile Usability report identifies pages on your website that are not mobile-friendly. This is often due to themes that are not responsive or mobile-optimized.
In today’s mobile-first world, having a mobile-friendly website is essential as the majority of users access the internet via mobile devices.
5.3. Breadcrumbs
The Breadcrumbs report shows pages on your website that use breadcrumb schema markup, typically article pages. It helps you identify any errors in your breadcrumb implementation.
5.4. Sitelinks Searchbox
The Sitelinks Searchbox report is a newer feature. It displays data for valid pages indexed and eligible for a sitelink search box in Google Search results. Pinterest is a good example of a website utilizing sitelink search boxes.
As shown above, when you search for “pizza” on Pinterest, a search box appears allowing you to search specifically within the Pinterest website for pizza-related content. The Sitelinks Searchbox report in Search Console provides data related to this feature. If your website doesn’t yet have sitelinks, you can disregard this feature for now.
5.5. FAQ
The FAQ report relates to the FAQ schema markup for articles that include Frequently Asked Questions. If you use Yoast SEO, this feature is readily available in the Gutenberg editor.
When implemented correctly, FAQ schema can enhance your search result appearance, making it more prominent and potentially increasing click-through rates.
Besides Sitelink Searchbox and FAQ, Google offers various other schema markups to enhance search results depending on the content type, such as recipe schema carousels for recipe articles.
6. Security & Manual Actions
6.1. Manual Actions
The Manual Actions report will notify you if a Google reviewer has manually reviewed your website and identified any policy violations. Manual actions are relatively rare. Types of manual actions are detailed on this Google support page.
6.2. Security Issues
The Security Issues report alerts you to any security problems detected on your website, such as hacking or malware infections, often caused by vulnerabilities like using nulled themes or plugins.
7. Legacy Tools & Reports
This section contains features from the older version of Google Search Console. Their inclusion in the new interface suggests continued relevance and user demand.
7.1. International Targeting
In International Targeting, you can set your website’s target audience by country. This helps Google optimize your content for searches in your chosen region.
For example, the image below shows that for ngetik.id (an Indonesian domain), the target country is automatically set to Indonesia.
7.2. Crawl Stats
Crawl Stats provides reports on Googlebot’s crawling activity on your website over the last 90 days.
7.3. Messages
The Messages section displays notifications related to errors and actions within Google Search Console. The example below shows messages received after submitting a disavow file for spammy backlinks pointing to ngetik.id.
7.4. URL Parameters
URL Parameters is an advanced feature. Google advises against modifying these settings unless you have a thorough understanding of URL parameters and their impact on crawling and indexing. Incorrect settings can negatively impact your website’s search rankings.
7.5. Web Tools
Web Tools is another legacy section containing various tools, some of which are less commonly used. Explore this section to understand if any of these tools are relevant to your website management needs.
8. Links
The Links report provides data on your website’s internal and external links (backlinks). It also lists domains linking to your website.
- Top linked pages: Shows which pages on your website receive the most links (internal and external).
- Top linking sites: Lists the domains of websites that link to your website.
- Top linking text: Displays the anchor text used by external websites when linking to your website.
This report helps you analyze your backlink profile and identify valuable referring domains. High-quality backlinks contribute positively to your website’s search performance.
9. Settings
The Settings section allows you to manage verification, user permissions, and important website configurations like change of address.
It also indicates the Googlebot version currently crawling your website (desktop or smartphone). Newer websites may initially show Googlebot Desktop, but over time, it typically transitions to Googlebot Smartphone as Google prioritizes mobile-first indexing.
10. Submit Feedback
If you encounter issues or have suggestions for the new Google Search Console interface, use the Submit Feedback option to share your thoughts with Google.
11. About New Version
The About New Version section provides documentation and information about the latest Google Search Console updates and features.
Conclusion
This comprehensive guide has covered how to register for Google Search Console and explored its key features. By utilizing this powerful tool, you can effectively monitor your website’s health, optimize its performance, and improve its visibility in Google Search results.
As highlighted in our guide to creating a blog, using Google Search Console is a mandatory step for website owners. Combining Google Search Console with Google Analytics provides a complete data ecosystem for website analysis and optimization.
So, have you registered your website with Google Search Console yet? Start leveraging its insights today to enhance your website’s online presence!