Adobe Photoshop offers a plethora of tools for image manipulation, and when it comes to precise cropping, the Pen Tool stands out as the gold standard. While other tools may offer quick selections, the Pen Tool provides unparalleled control and accuracy, especially when dealing with complex shapes and intricate details. This article will guide you through the process of using the Photoshop Pen Tool for cropping, ensuring clean edges and professional results.
Why Choose the Pen Tool for Cropping?
Before diving into the steps, it’s important to understand why the Pen Tool is favored by professionals for cropping:
- Unmatched Precision: Unlike automatic selection tools, the Pen Tool allows you to manually define the cropping path point by point, giving you pixel-perfect control.
- Handles Complexity: The Pen Tool excels at tracing intricate shapes, curves, and details that automatic tools often struggle with, such as hair, foliage, or complex product outlines.
- Scalability: Paths created with the Pen Tool are vector-based, meaning they can be scaled infinitely without losing quality. This is crucial for designs that may be used at various sizes.
- Non-Destructive Workflow: Using paths for cropping is inherently non-destructive. You can always adjust the path later without affecting the original image data.
While it may have a steeper learning curve compared to one-click background removal tools, mastering the Pen Tool for cropping is an invaluable skill for any serious Photoshop user.
Step-by-Step Guide to Cropping with the Photoshop Pen Tool
Let’s break down the process of using the Pen Tool for cropping into manageable steps.
1. Prepare Your Image and Select the Pen Tool
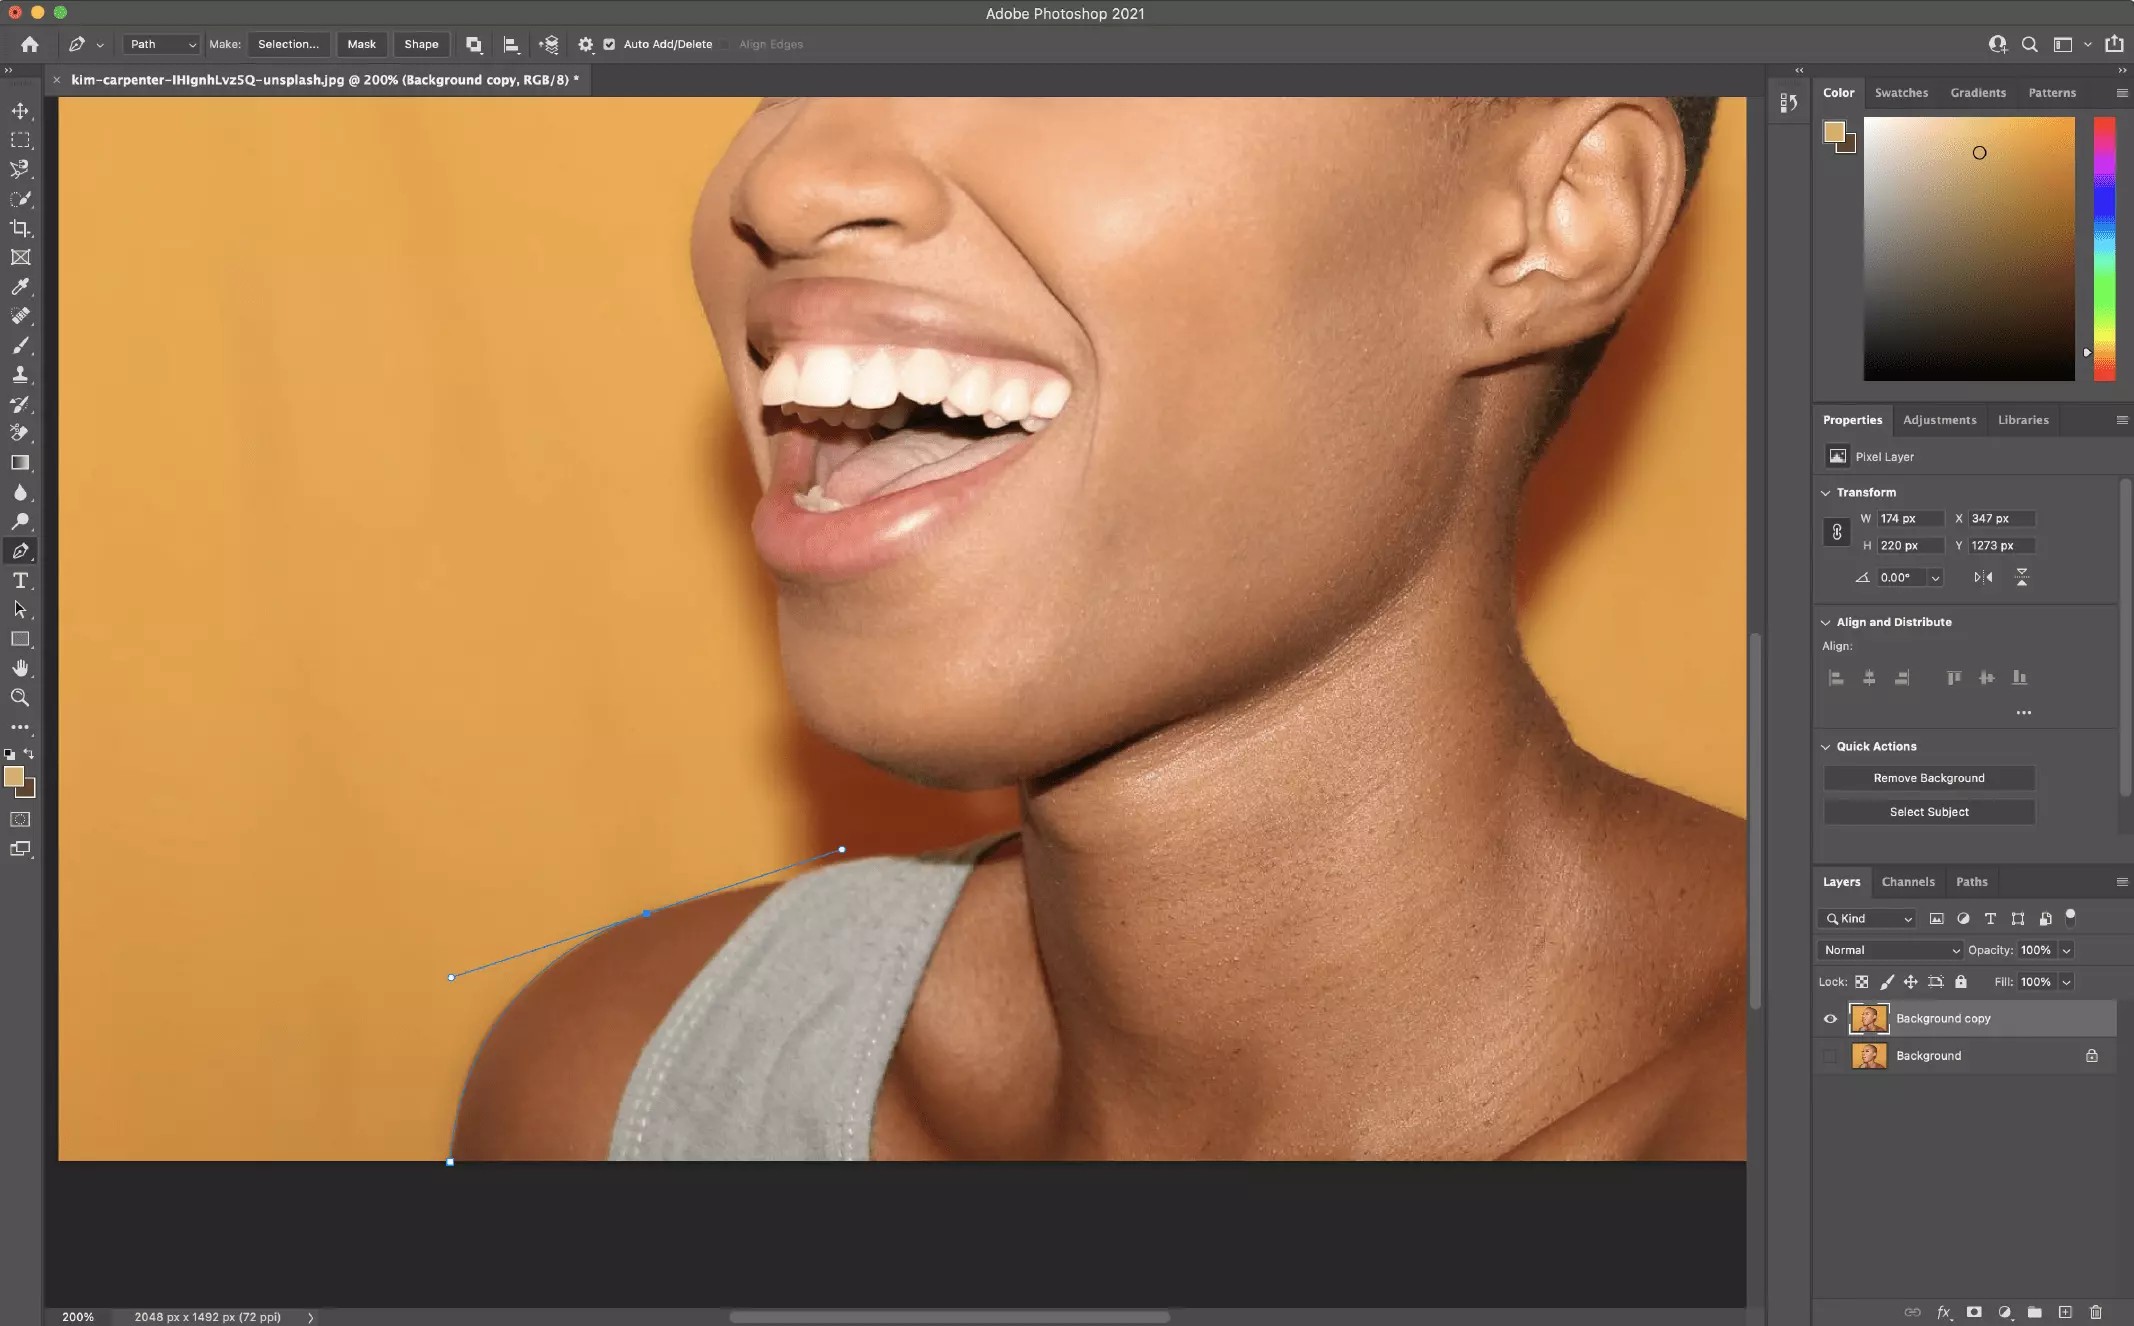
Open your image in Photoshop. To begin, locate the Pen Tool in the toolbar on the left-hand side. It is usually grouped with the Freeform Pen Tool, so you might need to click and hold on the visible icon to reveal the standard Pen Tool icon.
2. Create a Path Around Your Subject
Zoom into the area of your image where you want to start your crop path. Click to set your first anchor point. This point will be the beginning of your cropping path.
Continue clicking around the subject to place anchor points. For straight lines, simply click at each corner. For curves, click and drag to create direction handles. These handles control the shape of the curve between anchor points.
- Straight Lines: Click once to create an anchor point. Then, click again at the desired end point for a straight segment.
- Curves: Click and drag to create the first anchor point and its direction handle. Click and drag again for the next point, adjusting the direction handles to shape the curve.
- Closing the Path: Once you have traced the entire subject, complete the path by clicking on the very first anchor point you created. A small circle will appear next to your pen cursor when you hover over the starting point, indicating that clicking will close the path.
3. Refine Your Path for Accuracy
After creating the initial path, it’s likely you’ll need to fine-tune it for perfect cropping.
- Direct Selection Tool: Switch to the Direct Selection Tool (A) – it’s often found under the Path Selection Tool. This tool allows you to individually adjust anchor points and direction handles.
- Adjusting Anchor Points: Click on an anchor point to select it. You can then drag it to reposition it.
- Adjusting Curves: Click on a direction handle to adjust the curve segment. Drag the handle to reshape the curve. You can also adjust the angle and length of the handles to fine-tune the curve.
- Adding or Deleting Anchor Points: If you need more control in a specific area, you can add more anchor points using the Add Anchor Point Tool (usually grouped with the Pen Tool). Conversely, use the Delete Anchor Point Tool to remove unnecessary points.
4. Convert the Path to a Selection
Once you are satisfied with your path, you need to convert it into a selection to perform the crop.
-
Open the Paths Panel: Go to Window > Paths to open the Paths panel. Your created path should be listed as “Work Path” (or the name you gave it if you saved it).
-
Make Selection: Right-click on your path in the Paths panel and select Make Selection.
-
Feather Radius: In the “Make Selection” dialog box, you can set a Feather Radius. A feather of 0 pixels will give you a sharp, hard edge crop. For slightly softer edges, especially for natural subjects like people or organic shapes, a small feather radius (0.5 – 1 pixel) can help blend the cropped area more smoothly. Click OK.
You will now see the “marching ants” selection outline based on your Pen Tool path.
5. Crop Your Image
With the selection active, you can now crop your image.
- Inverse Selection for Background Removal: If you want to remove the background and keep the subject you traced, go to Select > Inverse. Now the background is selected. Press Delete to remove the background, leaving your subject cropped out.
- Direct Crop: If you want to crop to just the selected area, simply go to Image > Crop. Photoshop will crop the image to the boundaries of your selection.
- Layer Mask (Non-Destructive Crop): For a non-destructive approach, ensure your subject is selected (not inverted). In the Layers panel, click the Add Layer Mask button at the bottom. This will create a mask based on your selection, effectively “cropping” the image by hiding the areas outside the path, without permanently deleting them. You can always edit the mask later.
6. Save Your Cropped Image
Finally, save your cropped image. If you removed the background and want to maintain transparency, save it as a PNG file. If you performed a direct crop or used a layer mask and don’t need transparency, JPEG is a suitable format.
Tips for Efficient Pen Tool Cropping
- Practice Makes Perfect: The Pen Tool takes practice. Don’t be discouraged if your first attempts aren’t perfect. The more you use it, the more comfortable and proficient you will become.
- Zoom In: Work zoomed in (200-300%) for detailed path creation and refinement, especially around complex edges.
- Short Segments: For curves, use shorter path segments with more anchor points for smoother, more accurate curves.
- Save Paths: If you anticipate needing to re-crop or reuse the path, save it in the Paths panel (double-click “Work Path” and give it a name).
- Keyboard Shortcuts: Learn and use Pen Tool keyboard shortcuts to speed up your workflow (e.g., Spacebar for panning, Ctrl/Cmd + Z for undo).
When to Use the Pen Tool for Cropping
The Pen Tool is particularly advantageous in scenarios like:
- Product Photography: Cropping products for e-commerce to ensure clean, precise edges against a white or transparent background.
- Portrait Retouching: Selecting and isolating subjects from backgrounds, especially when dealing with flyaway hair.
- Graphic Design: Creating cutouts for composites, collages, and design elements where accuracy is paramount.
- Logos and Icons: Precisely cropping vector logos or rasterized icons for web and print use.
Conclusion
While Photoshop offers numerous tools for background removal and cropping, the Pen Tool remains the ultimate choice for achieving professional-level precision. Mastering the Pen Tool may require an initial time investment, but the control and quality it provides are unmatched, making it an essential skill for anyone serious about image editing and manipulation. By following these steps and practicing diligently, you can confidently use the Photoshop Pen Tool to achieve flawless crops for any project.