Window tinting can significantly enhance your car’s aesthetics and comfort, but the third brake light often poses a challenge, especially when it’s embedded in the rear deck. Many DIYers and even professionals find themselves struggling with how to navigate around this obstacle. The solution? Removing the rear deck. While it might sound daunting, with the right tools and a bit of know-how, it’s a manageable task. Among the essential tools for this job, a seemingly simple car window tint removing tool that looks like a screwdriver plays a crucial role. This guide will walk you through the process of safely removing your car’s rear deck to facilitate seamless window tinting, emphasizing the use of that screwdriver-like tool and other necessities.
Tools You’ll Need for Rear Deck Removal
Before diving into the removal process, gather these essential tools:
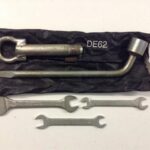
- Small Flat-Tip Screwdriver (or Interior Trim Pry Tool): This is your “Car Window Tint Removing Tool That Looks Like Screw Driver”. While technically a screwdriver, its flat tip is invaluable for carefully prying and loosening interior panels and, most importantly, popping out those stubborn black clips without causing damage. Many specialized interior trim tools resemble screwdrivers, and these are even better for the job.
- 10mm Socket Wrench: A 10mm socket is needed to remove bolts that secure panels. A deep well socket or a socket on a screwdriver handle can be particularly helpful in tight spaces.
- Interior Panel Clip Remover Tool: This tool is specifically designed to remove interior panel clips without breaking them or damaging the surrounding plastic. It’s a worthwhile investment for any DIY car enthusiast.
- 12mm Socket Wrench (Potentially): If you find it necessary to remove the seat back for more clearance, a 12mm socket will be required for the bolts attaching it to the hinges.
Safety First: Before you begin any work, it’s crucial to disconnect your car battery. This is especially important because you’ll be working near the C-pillar airbag unit, and disconnecting the battery minimizes the risk of accidental airbag deployment.
Step-by-Step Guide to Removing the Rear Deck
Follow these steps carefully to safely remove your car’s rear deck:
1) Loosening the C-Pillar Panel
The first step is to loosen the panel over the C-pillar, which houses the airbag. This is your starting point to access the rear deck fixings.
-
Locate the Attack Point: Identify the edge of the C-pillar panel where you can begin to pry it loose.
-
Create a Finger Hold: Use your flat-tip screwdriver (car window tint removing tool) or trim pry tool to gently create a gap between the panel and the car frame. Be careful not to scratch or damage the surrounding surfaces.
-
Pry and Loosen: Once you have a finger hold, carefully pull the panel outwards. You’ll feel clips releasing as you gently pull. Work your way around the edges to loosen all the clips.
-
Panel Clip and Strap Inspection: Once loosened, you’ll notice the panel is still attached by blue straps. These are airbag safety straps and should not be removed. Observe the clips along the bottom and top edges of the panel. Also, note the prongs at the front edge that clip under the ceiling fabric panel.
-
Hanging Panel: With the clips loosened, the panel will hang by the blue straps. Carefully maneuver the prongs at the front edge out from under the ceiling fabric panel. Wiggle and pull the panel towards the rear of the car to fully detach it while letting it hang loosely by the straps.
-
Result: You should now have the C-pillar panel loosened and hanging, providing access to the next steps.
2) Removing the Triangle-Shaped Panel and Trunk Liner Clips
Next, you’ll remove the smaller, triangle-shaped panel at the bottom of the C-pillar and detach the trunk liner from the interior panel.
-
Locate and Remove the Screw: Use your 10mm socket wrench to remove the screw securing the triangle-shaped panel. Be aware that this screw can be very tight from the factory. Apply firm, steady pressure to avoid stripping the screw head.
-
Remove Trunk Liner Clips: Locate the clips holding the trunk liner to the interior panel. Use your interior panel clip remover tool to pop these clips out. Removing the trunk floor panel and carpet can provide more room to maneuver.
-
Loosen Top of Interior Side Panel: This is a crucial and potentially tricky step. Gently pull the interior side panel loose at the top, near where the seatbelt emerges. This panel clips into the rear deck panel you are trying to remove. Be extremely gentle to avoid breaking the clips or damaging the panel. Apply pressure strategically, as shown in the image, to support the panel while releasing the clip.
-
Remove Remaining Clips: Use your panel clip remover to pop out the final clips holding the triangle panel in place. Typically, there’s one clip at the top and another at the bottom of this panel.
-
Panel Backside and Clip Locations: Once these clips are removed, the triangle-shaped panel can be taken out. Familiarize yourself with the backside of the panel to understand the clip locations for reassembly later.
Repeat Steps 1 and 2 for the Opposite Side of the Car. Before proceeding, ensure you have loosened and removed the panels on both sides of the vehicle.
3) Removing the Rear Deck Panel
With both sides loosened, you can now focus on removing the rear deck panel itself.
-
Remove Front Black Clips: Locate the black clips at the front edge of the rear deck panel. Use your flat-tip screwdriver (car window tint removing tool) or trim tool to pop these clips out.
-
Identify White Clips: Take note of the positions of the white clips underneath the rear deck panel. These clips secure the deck to the car frame. You can usually see them by looking up from inside the trunk area.
-
Pop White Clips: Using your panel clip remover, carefully slide it up and under the rear deck panel from the front. Feel around to locate the white clips and then pop them out one by one. Be aware that the first clip might try to re-engage due to panel tension. Once you release the second clip, the remaining two should be easier.
-
Disconnect Third Brake Light Wire: Reach under the deck panel and disconnect the wiring harness for the third brake light.
-
Remove Rear Deck: Once all clips and the wire are disconnected, push or pull the rear deck panel forward and remove it from the car.
-
Clear Access: With the rear deck removed, the third brake light is no longer obstructing your access, providing a clear and unobstructed rear window for window tinting!
Conclusion
Removing the rear deck might seem like an extensive step for window tinting, but it’s often the most effective way to achieve a clean, professional finish, especially around the third brake light. By carefully following these steps and utilizing the right tools, including your trusty screwdriver-like trim tool and panel clip remover, you can safely remove the rear deck and gain full access to the rear window for tinting. Remember to take your time, be gentle with the panels, and always prioritize safety by disconnecting the battery before starting. With the rear deck out of the way, you’re set to achieve a flawless window tint job.