Flashing your Qualcomm Android device can be essential for installing official stock firmware, which can help in unbricking your device, resolving software issues, or upgrading to a newer (or older) version of Android. This process typically involves using specialized tools, and for Qualcomm devices, the eMMC DL Tool is a common and effective option. This guide will provide a step-by-step walkthrough on how to use the eMMC DL Tool to flash stock firmware onto your Qualcomm-based smartphone or tablet.
Caution: Before proceeding, it’s crucial to understand that flashing stock firmware will erase all personal data, settings, and applications from your device. Therefore, creating a complete backup of your important data is highly recommended before you begin this process.
Step-by-Step Guide to Flashing Firmware with eMMC DL Tool
Follow these detailed steps to successfully flash stock firmware on your Qualcomm device using the eMMC DL Tool:
1. Download and Extract eMMC DL Tool:
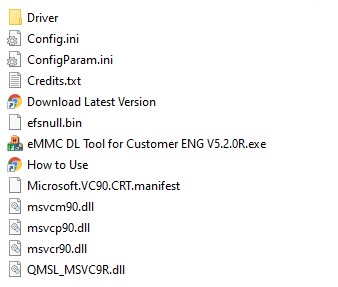
First, you need to download the eMMC DL Tool to your computer. You can typically find this tool from trusted sources online, often related to Android development or device flashing. Once downloaded, extract the contents of the ZIP file to a convenient location on your computer. After extraction, you should see a folder containing various files, including the tool’s executable and necessary drivers.
2. Install USB Drivers:
For your computer to properly communicate with your Qualcomm device in flashing mode, you need to install the correct USB drivers. The eMMC DL Tool package usually includes these drivers. Locate and run the driver installer file (often a .exe file) and follow the on-screen instructions to install the Qualcomm USB drivers on your computer. This step is crucial for device recognition.
3. Power Off Your Qualcomm Device:
Ensure your Android device is completely powered off before proceeding. A full power off is necessary to enter the correct flashing mode.
4. Download Stock Firmware for Your Device:
You’ll need the stock firmware specifically designed for your Qualcomm device model. You can usually find this firmware from the manufacturer’s official website or reputable firmware repositories online. Websites like FirmwareFile can be valuable resources for locating stock ROMs. Make sure to download the correct firmware version that matches your device model number to avoid compatibility issues.
5. Launch eMMC Download Tool:
Navigate to the extracted eMMC DL Tool folder and open the eMMC Download Tool application. This will launch the tool interface on your computer, ready for the firmware flashing process.
6. Load Firmware Folder into the Tool:
In the eMMC DL Tool interface, you will typically find a button, often labeled with […] or “…”, to browse for the firmware. Click this button and locate the folder where you extracted the stock firmware you downloaded in Step 4. Select the firmware folder to load it into the eMMC DL Tool.
7. Verify Firmware Loading:
After selecting the firmware folder, the eMMC DL Tool should process and load the firmware files. Ensure that the tool indicates successful loading of the firmware before moving to the next step.
8. Connect Your Qualcomm Device in EDL Mode:
This step involves connecting your powered-off Qualcomm device to your computer in Emergency Download (EDL) mode. The method to enter EDL mode can vary slightly depending on your device model, but a common method is to press and hold the Volume Up and Volume Down buttons simultaneously while connecting the device to your computer via a USB cable.
9. Identify Device Port Number:
Once your device is connected in EDL mode, you need to identify the COM port it’s assigned to. Open Device Manager on your computer (Right-click on “This PC” or “Computer,” select “Manage,” then “Device Manager”). Look for the “Ports (COM & LPT)” section. You should see a Qualcomm HS-USB QDLoader port listed. Note the COM port number assigned to your device; you will need this for the eMMC DL Tool.
10. Enter Port Number in eMMC DL Tool:
In the eMMC DL Tool, locate the field to enter the port number. Type in the COM port number you identified in Device Manager in the previous step. This tells the tool how to communicate with your connected device.
11. Initiate Flashing Process:
With the firmware loaded and the port number entered, click the DL1 button in the eMMC DL Tool to begin the firmware flashing process. This command will instruct the tool to start writing the stock firmware to your Qualcomm device’s eMMC storage.
12. Wait for Flashing to Complete:
The flashing process will take some time, depending on the size of the firmware and the speed of the connection. The eMMC DL Tool will display a progress bar indicating the status of the flashing process. Do not interrupt the process or disconnect your device during flashing.
13. Flashing Success Confirmation:
Once the flashing process is successfully completed, the eMMC DL Tool will display a “Pass” status, often indicated by a green color. This confirms that the firmware has been successfully flashed to your Qualcomm device.
14. Finish and Disconnect:
After seeing the “Pass” message, you can close the eMMC DL Tool and safely disconnect your Qualcomm device from the computer.
Congratulations! Your Qualcomm Android device should now be running the stock firmware you just flashed. You can now power on your device. The first boot after flashing might take a bit longer than usual as the device sets up the new firmware.
Important Notes:
- This guide is applicable for flashing stock firmware on most Qualcomm devices using the eMMC DL Tool.
- Always back up your data before flashing as the process will wipe your device’s internal storage.
- The eMMC DL Tool is developed and distributed by Foneric, Inc. Credits for the tool go to them.
This comprehensive guide should help you effectively use the eMMC DL Tool to flash stock firmware onto your Qualcomm device. Remember to proceed with caution and ensure you have the correct firmware for your specific device model.