
The Pen Tool in Adobe Photoshop is a powerful and versatile tool used for creating precise paths and selections. Unlike raster-based selection tools, the Pen Tool creates vector paths, which can be scaled and modified without losing quality. This makes it indispensable for tasks ranging from intricate selections to creating custom shapes and illustrations. Understanding how to effectively use the Pen Tool is a fundamental skill for any Photoshop user aiming for professional-level precision in their work.
Understanding the Different Pen Tools in Photoshop
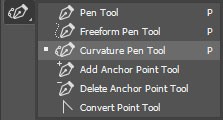
Photoshop offers a suite of Pen Tools, each designed for specific workflows and user preferences. Knowing the differences will help you choose the right tool for the job and optimize your efficiency.
-
Curvature Pen Tool: This tool is designed for intuitively drawing curves and straight segments. It simplifies the process of creating smooth, natural curves, making it ideal for organic shapes and flowing designs. The Curvature Pen Tool excels at creating paths with minimal anchor points, resulting in cleaner and more easily editable curves.
-
Standard Pen Tool: Often referred to as simply the “Pen Tool,” this is the classic and most versatile option. It allows for the creation of straight and curved segments with a high degree of precision. The Standard Pen Tool provides manual control over anchor points and direction lines, allowing for meticulous path construction.
-
Freeform Pen Tool: This tool mimics drawing with a pencil on paper. As you drag the Freeform Pen Tool, Photoshop automatically places anchor points along your path. It’s best suited for creating quick, gestural paths and is less about precision and more about freehand drawing. The path can be refined after creation.
-
Magnetic Pen Tool (Option): This option within the Freeform Pen Tool helps paths snap to the edges of defined areas in an image. It’s useful for making selections based on contrast edges, automatically adhering the path to the boundaries as you draw. You can adjust the snapping range and sensitivity.
-
Content-Aware Tracing Tool: Introduced in more recent versions of Photoshop, this tool leverages Adobe Sensei AI to automate image tracing. It simplifies the process of converting raster images into vector paths, making it faster to create selections or vector outlines from existing artwork.
These Pen Tools can also be combined with Shape Tools to create complex vector shapes, offering a flexible and powerful design workflow within Photoshop.
Drawing Straight Lines with the Pen Tool
Creating straight lines with the Pen Tool is straightforward and fundamental to mastering the tool. The Standard Pen Tool is typically used for this purpose due to its precision.
-
Select the Pen Tool: Choose the Standard Pen Tool from the toolbar (it looks like a fountain pen nib).
-
Set the First Anchor Point: Position the Pen Tool where you want the straight line to begin and click once. This sets the first anchor point. Do not drag; just click.
-
Set the Second Anchor Point: Move the Pen Tool to where you want the line to end. Click again to set the second anchor point. Photoshop will automatically connect these two points with a straight line segment.
-
Continue Drawing Straight Segments (Optional): To create a path composed of multiple connected straight line segments, continue clicking at different locations. Each click will add a new anchor point and extend the path with another straight line segment from the previous point.
-
Finishing the Path:
- Closing the Path: To create a closed shape, position the Pen Tool over the very first anchor point you created. A small circle will appear next to the pen cursor indicating you are hovering over the starting point. Click to close the path, connecting the last segment back to the beginning.
- Leaving the Path Open: To leave the path open (not a closed shape), simply deselect the Pen Tool by selecting another tool from the toolbar, or Ctrl-click (Windows) or Command-click (Mac OS) anywhere outside the path.
Drawing straight lines is the foundation for more complex shapes and paths, and mastering this basic technique is crucial.
Drawing Curves with the Pen Tool
Creating curves with the Pen Tool involves a slightly different technique than straight lines, utilizing direction lines to shape the curve. Again, the Standard Pen Tool is commonly used for this.
-
Select the Pen Tool: Ensure the Standard Pen Tool is selected from the toolbar.
-
Set the First Anchor Point and Drag: Position the Pen Tool where you want the curve to begin. Click and hold down the mouse button. As you drag, you’ll see direction lines appear extending from the anchor point. Drag in the direction you want the curve to initially bend and then release the mouse button. The length and direction of these lines determine the shape of the curve.
-
Set the Next Anchor Point and Drag: Position the Pen Tool where you want the curve to end. Click and drag again. This time, you are shaping the curve segment between the first and second anchor points. Drag to adjust the curve to your desired shape and release the mouse button.
-
Continue Drawing Curves (Optional): To create a series of connected curves, continue placing anchor points and dragging to shape each segment. Remember to place anchor points at the points where the curve changes direction, not at the apex of the curve. Using fewer anchor points generally results in smoother curves.
-
Understanding Curve Types:
- C-Curves: To create a C-shaped curve, after setting the first anchor point and direction line, drag the direction line of the next anchor point in the opposite direction of the previous direction line.
- S-Curves: To create an S-shaped curve, drag the direction line of the next anchor point in the same direction as the previous direction line.
-
Finishing the Path: Close the path for a shape or leave it open as described in the straight lines section.
Drawing curves effectively takes practice. Experiment with the length and direction of direction lines to understand how they influence the curve shape. Remember that fewer anchor points often lead to smoother, more manageable curves.
Conclusion
The Pen Tool is a cornerstone of precise path creation in Photoshop CC. Whether you need to make intricate selections, design vector graphics, or refine image compositions, mastering the Pen Tool is essential. By understanding the different types of Pen Tools and practicing the techniques for drawing straight lines and curves, you’ll unlock a powerful capability for detailed and professional image editing and design work in Photoshop. Start experimenting and practicing with the Pen Tool today to elevate your Photoshop skills.