
Concept mapping is a powerful technique for visualizing and organizing information. Whether you’re a student brainstorming ideas, a professional planning a project, or anyone looking to structure their thoughts, Cmap Tools offers a user-friendly platform to create insightful concept maps. But what exactly is Cmap Tools, and how do you use it?
Cmap Tools, short for Concept Mapping Tools, is a software application designed to help users build and share concept maps. It allows you to visually represent relationships between concepts, ideas, or information in a hierarchical or radial format. This visual approach makes complex topics easier to understand, remember, and communicate.
This guide will walk you through the fundamental steps of using Cmap Tools to create your own concept maps, making it accessible even for first-time users.
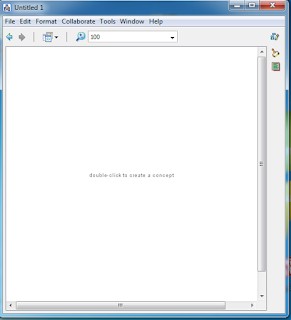
To begin your journey into concept mapping with Cmap Tools, you’ll first need to launch the application on your computer. Once installed, locate the Cmap Tools icon and initiate the program. Be patient as it loads, as the initial startup may take a moment. Upon opening, Cmap Tools presents a dual-window interface. The “View” window appears on the left, while the main workspace, labeled “Untitled 1,” is on the right. Your concept map creation will primarily take place in this “Untitled 1” workspace.
Alt text: Cmap Tools application interface showing the View window on the left and the Untitled 1 workspace on the right, ready for creating a new concept map.
To initiate your concept map, navigate to the “Untitled 1” workspace and double-click anywhere within it. This action will generate a box, which serves as your initial concept node. This box is where you’ll input your central idea or topic, forming the foundation of your concept map. Consider this first box as the starting point from which all other related concepts will branch out.
Alt text: Screenshot of Cmap Tools workspace with a newly created concept node box, prompting the user to enter a topic or concept for their map.
Once you’ve created your initial concept box and started typing your topic, you’ll notice the “Styles” window appearing on the right side of your screen. This panel is your control center for customizing the visual appearance of your concept map. The Styles window is divided into tabs that allow you to modify various aspects of your map’s design. These tabs include options for:
- Font: Adjust the typeface, size, style, and color of the text within your concept nodes and linking phrases.
- Object: Customize the appearance of the concept nodes themselves, including their shape, color, fill, and shadow effects.
- Line: Control the style, color, thickness, and arrowheads of the lines that connect concepts, representing the relationships between them.
- CMap: Manage overall Cmap settings and styles, affecting the background and general layout.
Alt text: The Styles window in Cmap Tools, highlighting tabs for Font, Object, Line, and CMap, used to customize the visual elements of a concept map.
While the Styles window offers extensive customization, it’s important to use these features thoughtfully. Click on a concept box in your workspace and then explore the “Object” tab. Here, you can experiment with changing the color of your boxes by clicking the “Color” option, adding depth with “Shadow,” or altering the “Shape” to suit your preferences. For a personalized touch, you can even use an image as a “Background Image” for your concept nodes.
Remember to maintain consistency in your styling choices to visually categorize topics. For instance, use the same color, shadow, and shape for concept boxes belonging to a specific category. Avoid randomly applying different styles without a clear purpose, as this can make your concept map visually confusing and less effective.
This introduction covers the basic steps to get started with Cmap Tools. By following these instructions, you can begin creating your own concept maps and explore the software’s capabilities further. Experiment with the different features, and you’ll discover how Cmap Tools can become an invaluable tool for learning, brainstorming, and organizing your thoughts visually.
If you have any questions or encounter difficulties while using Cmap Tools, feel free to seek out further online resources and tutorials for more in-depth guidance.