Cast iron is a durable and reliable material prized for its use in tools, from woodworking equipment to automotive parts. However, its susceptibility to rust is a well-known drawback. If you own tools with cast iron components, understanding proper care and maintenance is crucial to prolong their lifespan and maintain optimal performance. Rust is the nemesis of cast iron, but with the right techniques, you can effectively remove it and implement preventative measures to keep your tools in top condition.
This guide provides a step-by-step approach to Cast Iron Tool Care, focusing on rust removal and long-term protection. We’ll cover everything from identifying rust to applying protective coatings, ensuring your valuable tools remain rust-free and ready for any task.
Identifying Rust and Assessing the Damage
Before diving into rust removal, it’s important to understand the extent of the rust damage on your cast iron tool. Rust typically appears as a reddish-brown discoloration on the surface of the metal. In its early stages, it might just be surface rust, easily removable without causing significant damage. However, if left unattended, surface rust can develop into pitting, which is more severe and can compromise the integrity of the tool surface.
Let’s examine a common scenario: a cast iron table saw top. Often, rust can appear in various forms, from minor surface spots to more noticeable patches. Grease or fingerprints left on the surface can sometimes initiate rust formation, as they trap moisture against the iron. Similarly, moisture trapped under objects left on the cast iron, like wooden boards, can also lead to rust, especially in humid environments.
Identifying a greasy handprint causing rust on a cast iron table saw wing, indicating the need for immediate rust removal and preventative care.
A close inspection will reveal the severity. Surface rust will appear as a flaky layer on the surface, while pitting will present as small indentations or holes in the metal. Early intervention is key to prevent surface rust from escalating into pitting and causing lasting damage.
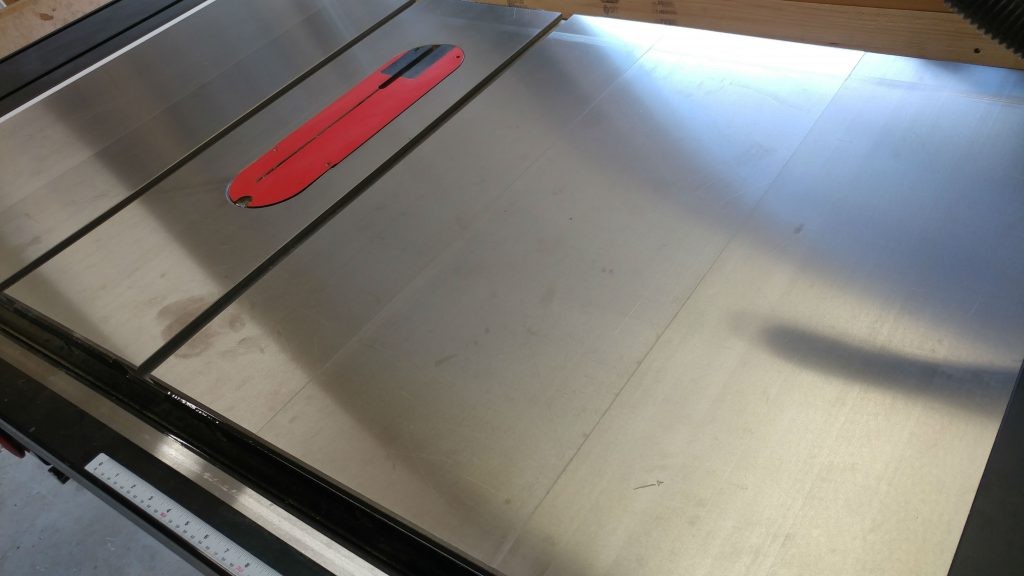
Close-up view of a handprint rust stain on cast iron, showing surface rust without pitting, suggesting effective removal is possible without permanent damage.
In some cases, rust might appear in patterns, such as bands or spots. These patterns can sometimes indicate the source of moisture exposure, like areas where objects were resting on the cast iron surface. Understanding these patterns can help you prevent future rust formation by addressing the underlying causes.
Rust bands on a cast iron surface, likely caused by moisture trapped under objects, highlighting the importance of avoiding prolonged contact of materials with cast iron.
Effective Rust Removal Techniques
Once you’ve assessed the rust, the next step is removal. Several methods exist, but for light to moderate surface rust, a combination of a non-abrasive abrasive pad and a lubricant works effectively.
For removing rust, some people recommend fine steel wool, specifically 0000 grade. However, an excellent alternative, and often preferred by professionals, is the grey Scotch-Brite 7448 pad. These pads offer similar abrasive properties to 0000 steel wool but with several advantages. They are less likely to leave behind fine metal fragments, and when used with a sanding block, they provide a more even pressure distribution across the surface. Ensure you are using the grey Scotch-Brite pads and not the green scouring pads intended for kitchen use, as these are too abrasive.
Grey Scotch-Brite pads, a recommended tool for gentle yet effective rust removal from cast iron surfaces, shown ready for use.
To enhance the rust removal process, a lubricant is highly recommended. WD-40 is a popular and effective choice. It penetrates the rust, helping to loosen it and making it easier to scrub away. When applying WD-40, be generous and allow it to sit for a period of time, ideally 15 minutes or longer, to allow it to work its way into the rust. For heavier rust, letting it soak for an hour or more can significantly improve the removal process.
Before applying WD-40, it’s wise to protect surrounding areas, especially if working on a tool with wooden components or finishes. WD-40 can splatter, and while it cleans up, preventing messes saves time. Painter’s tape and shop towels are ideal for masking off areas you want to protect from overspray.
Protecting a wooden extension table with blue shop towels and painter’s tape before applying WD-40 for rust removal, demonstrating preparation for a cleaner work process.
Once the WD-40 has soaked, use the grey Scotch-Brite pad and begin scrubbing the rusted areas. Apply firm, even pressure, and use a consistent back-and-forth motion to work across the entire surface. Avoid focusing on one spot, as this can create unevenness in the finish. Continue scrubbing until you see a dark slurry forming, indicating the rust is being lifted. For more stubborn rust, you may need to scrub more vigorously.
Scrubbing a cast iron tabletop with a grey Scotch-Brite pad and WD-40, illustrating the method for removing rust and restoring the surface.
After scrubbing the entire affected area, wipe away the slurry and excess WD-40 with clean shop towels. The cast iron surface should now show a significant improvement, with the rust largely removed. However, it’s important to note that deep or long-standing rust may leave behind some discoloration or staining of the cast iron. This staining is typically cosmetic and doesn’t affect the tool’s functionality.
Cast iron tabletop after initial rust removal with Scotch-Brite and WD-40, showing significant improvement but potential for slight staining, emphasizing functional restoration.
For a truly clean surface, and to remove any residual WD-40, denatured alcohol can be used. WD-40, while excellent for rust removal, can leave a slightly greasy film. Denatured alcohol effectively cuts through this film, leaving the cast iron clean and ready for protection. Apply denatured alcohol liberally and wipe it away with a clean shop towel. While the image of pouring alcohol directly may look concerning, denatured alcohol will not cause rust on cast iron.
Cleaning a cast iron surface with denatured alcohol after WD-40 treatment, demonstrating the step to remove any greasy residue and prepare for protective coating.
Protecting Your Cast Iron Tools from Future Rust
With the rust removed and the surface cleaned, the final crucial step is protection. Leaving bare cast iron exposed will quickly lead to new rust formation, especially in humid conditions. Applying a protective coating is essential for long-term cast iron tool care.
Several excellent protective products are available. BoeShield T-9 and GlideCote are popular choices known for their rust-inhibiting properties and ability to reduce friction on tool surfaces. However, for many users, furniture waxes offer a readily available and effective solution.
Paste waxes, such as Johnson Paste Wax, MinWax Paste Finishing Wax, and Renaissance Wax, are all suitable for cast iron tool protection. Johnson Paste Wax is often favored for its ease of application and buffing. Its softer consistency makes it spread easily and buff to a smooth, protective finish with less effort compared to harder waxes like MinWax or Renaissance Wax.
Johnson Paste Wax, a preferred product for protecting cast iron tools, shown with rags for application, highlighting a user-friendly protective solution.
To apply paste wax, use a clean cloth rag. Scoop a generous amount of wax onto the rag and apply it evenly over the entire cast iron surface. There’s no need to apply it in a specific pattern, just ensure complete coverage. Allow the wax to sit for about 15 minutes. You’ll know it’s ready for buffing when it develops a slightly cloudy appearance.
Applying paste wax to a cast iron surface with a rag, demonstrating the even coating process for rust prevention and smooth operation.
Buffing the wax is a crucial step. Use a clean, fresh rag and wipe off the excess wax. Initially, the surface might feel slightly “grabby”. Continue buffing with moderate pressure and a back-and-forth motion. The friction generated by buffing will help create a smooth, slippery surface. You’ll know you’ve buffed sufficiently when the cast iron becomes noticeably slick to the touch.
Buffing paste wax on a cast iron surface with a clean rag, illustrating the final step to achieve a smooth, protective, and low-friction finish.
For optimal protection, it’s recommended to apply at least two additional coats of wax, following the same application and buffing process for each coat. This builds up a robust protective barrier against moisture and helps maintain the tool’s smooth operation.
Completed cast iron tabletop after multiple wax coats, showing a restored and protected surface ready for use, emphasizing the effectiveness of regular cast iron tool care.
Maintaining Your Cast Iron Tools
Regular care is key to preventing rust and ensuring your cast iron tools remain in excellent working condition. The frequency of rust removal and re-waxing depends on tool usage and environmental conditions. In humid climates or with frequent use, you might need to repeat this process every few months. In drier climates or with less frequent use, annual maintenance might suffice. Observing your tools for any signs of rust will indicate when it’s time for another treatment.
Don’t forget to also protect other exposed cast iron parts, such as fences and rails on woodworking tools, with paste wax to ensure comprehensive cast iron tool care. By following these steps, you can effectively manage rust and keep your cast iron tools performing optimally for years to come.