
The eMMC DL Tool is a utility designed for flashing stock firmware on Qualcomm-based Android devices. As a crucial tool in phone repair and software restoration, understanding how to properly use the eMMC DL Tool is essential for technicians and advanced users alike. This guide provides a detailed, step-by-step walkthrough on using the eMMC DL Tool to flash firmware, ensuring a smooth and successful process.
Before You Begin: Important Precautions
Flashing firmware will erase all data and settings on your device. It is critical to back up all important data before proceeding. This includes contacts, photos, videos, documents, and any other personal information. Ensure your device is adequately charged to prevent interruptions during the flashing process.
Step-by-Step Guide to Flashing Qualcomm Firmware Using eMMC DL Tool
-
Download and Extract the eMMC DL Tool:
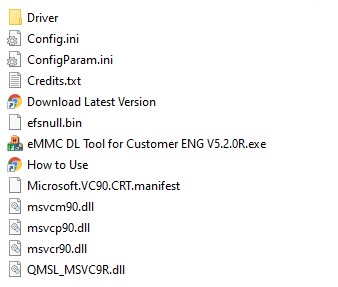
First, you need to download the eMMC DL Tool. You can typically find this tool from reputable sources online, such as developer forums or websites specializing in Android tools. Once downloaded, extract the tool to a convenient location on your computer. After extraction, you should see a set of files necessary for running the tool.
-
Install USB Drivers:
For your computer to communicate with your Qualcomm device in flashing mode, you need to install the correct USB drivers. The eMMC DL Tool package usually includes these drivers. Locate and install the provided USB driver on your computer. This step is crucial for establishing a stable connection between your device and the tool.
-
Power Off Your Android Device:
Completely power off the Qualcomm Android device you intend to flash. Ensure the device is not in charging mode and is fully switched off before proceeding to the next steps.
-
Download Stock Firmware for Your Qualcomm Device:
You will need the stock firmware for your specific Qualcomm device model. If you haven’t already, download the correct firmware. Reputable sources for firmware include manufacturer websites, firmware repositories like FirmwareFile, or trusted Android developer communities. Ensure the firmware you download is compatible with your device model to avoid bricking your device.
-
Launch the eMMC Download Tool:
Navigate to the extracted eMMC DL Tool folder and open the eMMC DL Tool application. Run the executable file to launch the tool on your computer.
-
Load the Firmware Folder:
Once the eMMC DL Tool is open, click on the […] button, typically located near the firmware path field. This will allow you to browse your computer and locate the folder where you have downloaded and extracted your Qualcomm stock firmware. Select the firmware folder and load it into the tool.
-
Verify Firmware Addition:
After selecting the firmware folder, the eMMC Tool should display the firmware files loaded successfully. Confirm that the tool has recognized the firmware before proceeding.
-
Connect Your Qualcomm Device:
With your device powered off, prepare to connect it to your computer. Typically, for Qualcomm devices, you need to boot into EDL (Emergency Download) mode. This is often achieved by pressing and holding the Volume Up and Volume Down buttons simultaneously while connecting the device to your computer via a USB cable. Refer to your device’s specific instructions for EDL mode entry if this method does not work.
-
Identify the Port Number in Device Manager:
Once connected in EDL mode, your computer should recognize your device as a Qualcomm device, often appearing as “Qualcomm HS-USB QDLoader 9008” in Device Manager. To find the port number, right-click on Computer or This PC, select Manage, and then go to Device Manager. Under the Ports (COM & LPT) section, locate the Qualcomm device and note the COM port number assigned to it.
-
Enter the Port Number in eMMC Tool:
In the eMMC Tool interface, locate the Port Number field and enter the COM port number you identified in Device Manager. This step establishes the communication channel between the tool and your device.
-
Start the Flashing Process:
With the firmware loaded and the port number correctly entered, click on the DL1 button in the eMMC Tool to initiate the firmware flashing process.
-
Wait for Flashing to Complete:
The eMMC DL Tool will now begin flashing the stock firmware onto your Qualcomm device. This process may take some time, depending on the size of the firmware and the speed of the connection. Do not interrupt the process.
-
Flashing Success Confirmation:
Once the flashing process is successfully completed, the eMMC DL Tool will display a “Pass” status, often indicated by a green color. This confirms that the firmware has been flashed to your device without errors.
-
Close eMMC Tool and Disconnect Your Device:
After seeing the “Pass” status, you can close the eMMC DL Tool and safely disconnect your Qualcomm device from your computer.
Congratulations! Your Qualcomm Android device should now be running the stock firmware you have flashed. You can now power on your device and proceed with the initial setup.
Important Notes:
- This tutorial is applicable for flashing stock firmware on various Qualcomm devices.
- Flashing firmware will erase all data from your device. Always back up your data beforehand.
- The eMMC DL Tool is developed and distributed by Foneric, Inc. Full credits go to them for providing this tool.
By following these steps carefully, you can effectively use the eMMC DL Tool to flash stock firmware on your Qualcomm devices, restoring them to their original software state or updating to a new firmware version. Always ensure you are using the correct firmware for your device model and proceed with caution.