
Bolts are fundamental fasteners in automotive and mechanical applications, crucial for joining components securely. However, bolts and threaded holes are susceptible to damage, most commonly stripped threads and corrosion, which can compromise the integrity of the connection. Understanding how to address these issues, especially stripped threads, is essential for anyone involved in vehicle maintenance or repair. This article will guide you through using recoil tools, a highly effective method for repairing damaged threads, ensuring a strong and reliable fix.
Understanding Bolt Damage and the Need for Repair
Bolt damage can stem from various factors, including age, over-tightening, incorrect installation, and exposure to harsh environments. Ignoring damaged bolts can lead to serious problems, from loose connections and vibrations to complete failure of components. Identifying the type of damage is the first step toward effective repair.
Common Types of Bolt Damage
- Stripped Threads: This occurs when the threads on a bolt or in a threaded hole are damaged, preventing proper tightening and a secure hold. It’s often caused by over-torqueing, cross-threading, or wear and tear.
- Corrosion: Rust and corrosion weaken the bolt material, making it brittle and prone to breakage. Corrosion can also seize bolts, making removal difficult and further damaging the threads during attempts to loosen them.
Methods for Repairing Damaged Bolt Threads
When faced with stripped threads, several approaches can be taken. While temporary fixes might exist, recoil tools offer a permanent and robust solution, restoring the thread to its original strength or even stronger.
Quick Fixes (Less Reliable)
- Using Glue: In very minor cases of stripped threads on small bolts, applying strong adhesive like epoxy to the bolt threads might provide a temporary hold. However, this is not a reliable long-term solution and is generally unsuitable for critical automotive applications.
- Oversized Bolts: If the threaded hole is severely damaged, one might consider tapping a new, larger thread and using an oversized bolt. This method requires specialized tools and might not always be feasible depending on the application and available space.
The Superior Solution: Utilizing Recoil Tools (Thread Repair Kits)
Recoil tools, often referred to as thread repair kits or helicoil kits, provide a professional and durable method for repairing stripped threads. They work by drilling out the damaged thread, tapping a new thread to accommodate a thread insert (helical coil), and then installing the insert. This insert effectively creates a new, stronger thread within the original hole, ready to accept the original bolt size.
What are Recoil Tools?
Recoil tools are comprehensive kits containing everything needed for thread repair. A typical kit includes:
- Drill Bit: To drill out the damaged thread to the correct size for tapping.
- Tap: A specialized tap to create new threads in the drilled hole, designed to fit the thread insert.
- Insertion Tool: Used to install the thread insert into the newly tapped hole.
- Tang Break-off Tool: To remove the tang (a small part of the insert used for installation) after insertion is complete.
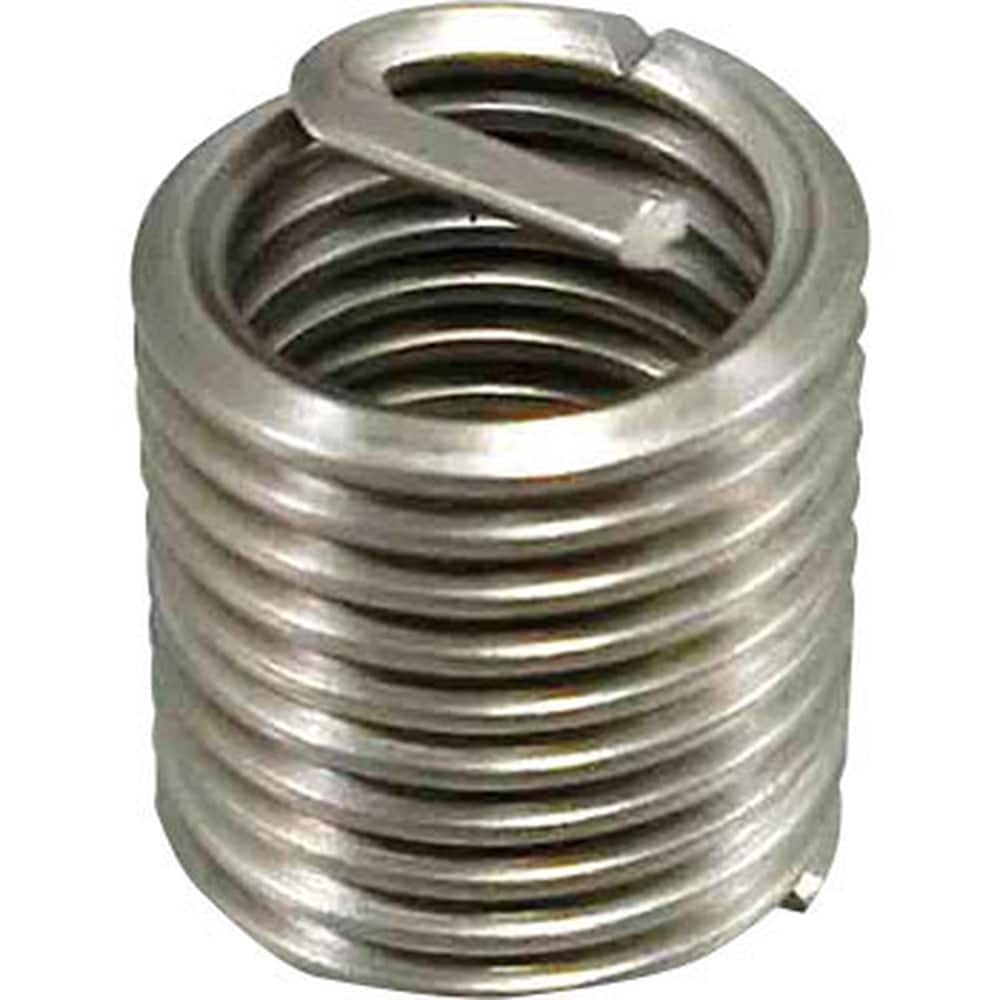
- Thread Inserts (Helicoils): Spiral-shaped wire coils made of stainless steel that form the new thread.
Step-by-Step Guide: How to Use Recoil Tools
-
Identify the Damaged Thread Size: Determine the correct bolt size and thread pitch of the damaged thread. Recoil kits are available in various sizes to match standard bolt dimensions.
-
Prepare the Damaged Hole: Clean the damaged area of any debris, rust, or loose particles. Ensure the bolt hole is accessible and free from obstructions.
-
Drill Out the Damaged Thread: Using the drill bit provided in the recoil kit and a drill, carefully drill out the damaged thread. Drill straight and to the recommended depth as indicated in the kit instructions. Important: Ensure you are using the correct drill bit size for your kit.
-
Tap New Threads: Apply cutting oil or lubricant to the tap. Using the tap and a tap handle or wrench, carefully tap new threads into the drilled hole. Turn the tap clockwise to cut threads, and periodically reverse direction slightly to break chips and prevent binding. Tap to the recommended depth, ensuring the tap is aligned straight.
-
Install the Thread Insert: Place a thread insert onto the insertion tool. Position the insert over the newly tapped hole and wind it in using the insertion tool. Turn the tool clockwise until the insert is fully installed, typically slightly below the surface of the component.
-
Break Off the Tang: After the insert is installed, use the tang break-off tool to remove the tang. Position the tool over the tang and give it a sharp tap with a hammer or use the integrated break-off mechanism of some insertion tools. The tang should snap off cleanly, leaving the thread insert in place.
-
Verify the Repair: Clean the repaired thread and carefully thread in the correct bolt to ensure proper fit and function. The repaired thread should now be stronger than the original thread.
Benefits of Using Recoil Tools
- Durable Repair: Recoil inserts are typically made of stainless steel, providing a stronger and more wear-resistant thread than the original material, especially in softer metals like aluminum.
- Cost-Effective: Repairing threads with recoil tools is often much cheaper than replacing entire components due to damaged threads.
- Versatile: Recoil tools can be used on a wide range of materials and applications, from engine blocks and cylinder heads to machinery and equipment.
- Restores Original Size: Recoil repair allows you to use the original bolt size, maintaining the design integrity of the assembly.
Preventing Bolt Damage in the Future
While recoil tools are an excellent repair solution, preventing bolt damage is always preferable. Here are some key preventative measures:
- Proper Torque: Always use a torque wrench to tighten bolts to the manufacturer’s specified torque values. Over-tightening is a primary cause of stripped threads.
- Correct Installation: Ensure bolts are properly aligned and started straight to avoid cross-threading.
- Lubrication: Use anti-seize lubricant on bolts, especially in areas prone to corrosion or high temperatures. This facilitates proper tightening and prevents seizing.
- Material Selection: Choose bolts made of appropriate materials for the application and environment to prevent corrosion and premature failure.
- Regular Inspection and Maintenance: Periodically inspect bolts for signs of corrosion or damage and address issues promptly.
Conclusion
Damaged bolts, particularly stripped threads, are a common problem in automotive and mechanical maintenance. While various repair methods exist, recoil tools offer a superior, long-lasting solution. By following the correct steps for using recoil tools, you can effectively repair damaged threads, restore component functionality, and ensure the reliability of your repairs. Investing in a recoil tool kit is a worthwhile addition to any mechanic’s or serious DIYer’s toolkit, providing a professional solution for thread repair and saving time and money in the long run. Remember, preventative maintenance and proper installation techniques are crucial to minimize bolt damage and ensure the longevity of your assemblies.