
Any professional field relies on specific tools to execute tasks efficiently and accurately. In architecture, design, and engineering, drafting tools are indispensable. These instruments, whether traditional or modern, empower creators to visualize and communicate their designs with precision. While digital tools have emerged, the fundamentals of manual drafting remain relevant and valuable.
For architects, engineers, designers, and hobbyists alike, understanding the essential drafting tools and instruments is the first step towards mastering technical drawing. Beyond just knowing what tools to use, it’s equally crucial to understand how to care for them. Proper maintenance ensures longevity, accuracy, and consistent performance, ultimately leading to better quality work. Let’s explore the common drafting tools and instruments and learn the best practices for their care.
What are Drafting Tools and Instruments?
Drafting tools and instruments are specialized equipment used to create technical drawings, often referred to as drafts or plans. In architecture and engineering, these drawings are the visual language used to represent structures, systems, and designs in a clear and unambiguous manner. The purpose of a technical drawing is to communicate precise instructions and specifications for construction or manufacturing.
Historically, all drafting was done by hand using a variety of instruments. While Computer-Aided Design (CAD) software has revolutionized the field, offering automated and digital drafting solutions, manual drafting remains a valuable skill. Many professionals find that hand drafting fosters creativity, enhances spatial reasoning, and provides a deeper understanding of design principles. Furthermore, in certain situations or for preliminary sketches, traditional tools offer a tactile and immediate approach.
Technical drafting tools serve multiple purposes:
- Measurement: Ensuring accuracy and scale in drawings.
- Layout and Composition: Creating organized and well-structured plans.
- Speed and Efficiency: Facilitating faster and more consistent drawing processes.
- Precision and Clarity: Producing drawings that are easy to understand and interpret.
Each drafting tool is designed for a specific function, contributing to the overall process of creating detailed and accurate technical drawings.
A Historical Perspective on Drafting Tools
Interestingly, the role of the architect as we know it today evolved over time. In earlier periods, the functions of architecture and engineering were often intertwined with craftsmanship. Artisans, carpenters, and masons often served as both designers and builders. The formalization of architecture as a distinct profession was linked to advancements in mathematics, technology, and the development of specialized drafting tools.
For centuries, materials and tools were quite different from what we use today. Paper, for instance, only became a common drafting material in Europe in the 16th century, with pencils following in the 17th century. However, the concept of drafting tools dates back much further. Archaeological evidence reveals that the earliest architectural drawings were created around 2200 B.C.
Ancient civilizations utilized rudimentary yet effective tools. Wooden corner rulers were used in ancient Egypt for precise measurements. Bronze compasses were developed by the Nuragic civilization of Sardinia. Ancient Greeks employed various rulers, including scale rulers and triangles. Before the widespread use of pencils, scribes relied on styli and quills for drawing. Ruling pens, precursors to modern technical pens, emerged in the 17th century, offering more controlled ink lines.
Throughout history, innovation in drafting tools has been driven by both practical needs and artistic ingenuity. Figures like Leonardo da Vinci and Albrecht Dürer are known not only for their artistic achievements but also for designing and creating their own specialized drafting instruments. The 19th century witnessed a surge in the development of more sophisticated drafting equipment. Finally, the introduction of computer-aided design systems in the 1990s marked a paradigm shift, transforming architectural practice and the tools employed.
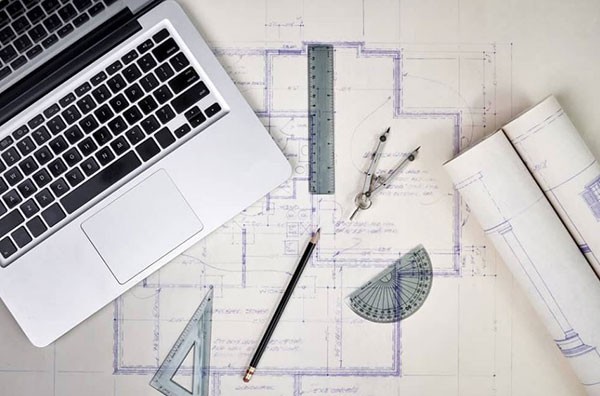
Essential Drafting Tools and Instruments: A Detailed Guide
For both seasoned professionals and those just starting, a solid understanding of essential drafting tools is fundamental. These tools can be categorized based on their primary function in the drafting process.
Drawing Boards and Surfaces
The foundation of manual drafting is a stable and appropriate work surface.
Drawing Board
A drawing board provides a large, flat, and stable surface for creating drawings. Unlike a regular table, a drawing board is designed specifically for drafting, often featuring a smooth, even surface that allows for precise lines and prevents paper damage. Historically, paper was attached using glue or drawing pins. Today, self-adhesive tape is more common, offering easy repositioning and removal. Drawing boards come in various sizes and some are adjustable in height and angle, enhancing ergonomics and comfort during long drafting sessions.
Care: Keep drawing boards clean and free from dust and debris. Wipe them regularly with a soft, dry cloth. Avoid using abrasive cleaners or solvents that could damage the surface. Store boards flat and away from direct sunlight or extreme temperatures to prevent warping.
Straightedges and Line Tools
Accurate straight lines are the backbone of technical drawings.
T-Square
The T-square, named for its T-shape, is used in conjunction with a drawing board to draw precise horizontal lines. The head of the T-square aligns against the edge of the drawing board, allowing the blade to slide smoothly across the paper while maintaining a consistent horizontal orientation. T-squares are available in different lengths to match various drawing board sizes.
Care: Handle T-squares carefully to avoid bending or damaging the blade or head. Store them flat or hung vertically to prevent warping. Clean with a soft cloth to remove pencil or ink marks. Check periodically for squareness of the head and blade to ensure accuracy.
Rulers
Rulers are fundamental for measuring and drawing straight lines of specific lengths. Drafting rulers are typically made from polystyrene, metal, or wood. Plastic rulers often have two types of edges: straight edges for pencil lines and grooved edges designed for use with technical pens to prevent ink smudging. Metal rulers are more durable and offer greater precision for cutting and measuring.
Care: Store rulers flat to prevent bending. Clean plastic rulers with mild soap and water. Metal rulers can be cleaned with a dry cloth or a specialized metal cleaner to prevent rust. Avoid dropping rulers, especially plastic ones, as they can crack or break.
Scale Ruler (Architect’s Scale)
An architect’s scale ruler is a specialized ruler with multiple scales marked on its faces. These scales allow architects to create drawings that are proportionally smaller or larger than the actual object. This is crucial for representing large structures on manageable paper sizes. Common scales include ratios like 1:100, 1:50, 1:20, etc., indicating how measurements on the drawing relate to real-world dimensions. Scale rulers are essential for creating floor plans, elevations, and sections.
Care: Handle scale rulers with care to avoid scratching or damaging the scale markings. Store them in a protective case or pouch to prevent wear and tear. Clean with a soft cloth, avoiding abrasive cleaners that could remove the markings.
Set Squares and Triangles
Set squares, or triangles, are transparent plastic tools used for drawing accurate angles, primarily 30, 45, 60, and 90 degrees. Common sets include a 45-45-90 degree triangle and a 30-60-90 degree triangle. Adjustable triangles are also available, offering a wider range of angles. Used in conjunction with a T-square or ruler, triangles facilitate drawing vertical and angled lines with precision.
Care: Store set squares flat to prevent warping. Clean with a soft cloth or mild soapy water. Avoid scratching the surface, as scratches can affect line accuracy. Handle carefully to prevent breakage, especially at the corners.
French Curves and Splines
French curves are templates with a variety of curves used to draw smooth, non-circular curves. They are helpful when a compass or template is not suitable for the desired curve shape. French curves are made from plastic, metal, or wood. Flat splines, flexible and adjustable curves, offer another way to create smooth curves and are particularly useful for complex shapes.
Care: Store French curves and splines flat or hung to prevent warping. Clean with a soft cloth. Avoid bending splines excessively, as this can damage their flexibility or shape.
Angle Measuring Tools
Precise angles are crucial in technical drawings.
Protractor
A protractor is a semi-circular or circular tool used to measure and draw angles in degrees. Standard protractors are typically made of transparent plastic. Bevel protractors are more advanced, featuring an adjustable pivoted arm for marking and measuring angles with greater accuracy.
Care: Store protractors flat to prevent bending. Clean with a soft cloth. Handle carefully to avoid scratching the surface, which can obscure the angle markings.
Circle and Arc Tools
Circles and arcs are essential geometric elements in many technical drawings.
Compass
A compass is used to draw circles and arcs of varying radii. It consists of two arms hinged together at a pivot point, with one arm holding a point and the other a pencil or pen. Extension accessories can be added to draw larger circles. Different types of compasses include beam compasses for very large circles and scribe compasses for marking distances.
Care: Keep compass points sharp for clean, precise circles. Sharpen points with a fine sharpening stone as needed. Lubricate joints occasionally with a drop of light oil to ensure smooth operation. Store compasses in a case to protect the points and prevent damage.
Templates
Drafting templates are pre-cut shapes made from plastic or metal, used to quickly and repeatedly draw common symbols, geometric shapes (circles, squares, ellipses, etc.), and text. Templates significantly speed up the drafting process by eliminating the need to draw the same shapes manually each time. Various types of templates are available for specific applications, such as architectural symbols, electrical symbols, and lettering.
Care: Store templates flat to prevent bending. Clean with a soft cloth to remove pencil or ink buildup in the cutouts. Avoid forcing pens or pencils into template openings, as this can damage the template edges.
Drawing Instruments
The tools that directly apply lines and marks to the drawing surface.
Pencils
Pencils are fundamental for sketching, linework, and shading in drafting. Both wood-cased graphite pencils and mechanical pencils are used, offering varying lead hardness and thickness. Lead hardness is graded from HB (medium) to 2H (hard) and beyond, affecting the darkness and line weight. Graphite pencils provide a range of options for controlling line darkness and creating tonal variations.
Care: Keep pencils sharpened to a fine point for precise lines. Use a quality pencil sharpener to avoid breaking leads. Store pencils in a pencil case or holder to protect the leads and prevent breakage. For mechanical pencils, refill leads carefully and avoid over-extending the lead.
Lining Pens and Technical Pens
Technical pens and lining pens are used for creating consistent, dark, and permanent lines in ink. Technical pens offer precise line weights and use refillable ink reservoirs or replaceable cartridges. They are available in various tip sizes, allowing for different line thicknesses, essential for creating drawings with varying levels of detail and emphasis.
Care: Clean technical pens regularly to prevent ink from drying and clogging the nibs. Follow manufacturer instructions for cleaning, often involving rinsing with water or specialized cleaning solutions. Store pens horizontally or vertically with the cap tightly sealed to prevent ink drying. Handle nibs carefully, as they are delicate and can be damaged if dropped or mishandled.
Erasing and Correction Tools
Mistakes are part of the process, and effective correction tools are essential.
Erasers
Erasers are used to remove pencil and ink lines from drawings. Various types of erasers are available, including rubber erasers, vinyl erasers (for cleaner erasing), and kneaded erasers (for lifting graphite and creating subtle shading effects). Electric erasers offer precise and efficient erasing for detailed work.
Care: Keep erasers clean to prevent smudging drawings. Trim soiled eraser edges with a blade to expose a clean erasing surface. Store erasers in a clean, dry place.
Eraser Shield
An eraser shield is a thin sheet of metal or plastic with various shaped openings. It is used to selectively erase small areas or fine details without affecting surrounding lines. By placing the shield over the drawing and aligning an opening over the area to be erased, you can achieve precise corrections.
Care: Keep eraser shields clean and free of eraser debris. Store them flat to prevent bending.
Cutting and Measuring Tools
Tools for preparing materials and ensuring accurate dimensions.
Sharpener
A pencil sharpener is essential for maintaining sharp pencil points for precise drafting. Manual sharpeners and electric sharpeners are both available. Choose a sharpener that produces a clean, even point without breaking leads.
Care: Empty pencil sharpeners regularly to prevent buildup of shavings. Keep sharpener blades clean and free from rust for optimal performance.
Cutting Mat
A cutting mat is a self-healing surface used to protect tabletops and provide a smooth, even surface for cutting paper and other materials with knives or blades. Cutting mats often have grid lines printed on them, aiding in accurate measurements and straight cuts.
Care: Keep cutting mats clean and free of debris. Wipe them with a damp cloth if necessary. Avoid exposing cutting mats to extreme heat or direct sunlight, which can cause warping. Store flat.
Paper Trimmer
A paper trimmer is a tool used to cut paper and drafting materials straight and accurately. Paper trimmers are more precise and efficient than scissors, especially for larger sheets of paper. They often feature adjustable guides for cutting to specific dimensions.
Care: Keep paper trimmer blades sharp for clean cuts. Replace blades as needed. Clean the trimmer surface regularly to remove paper dust and debris.
Scale Ruler (Mentioned Previously)
Scale rulers are also used for measuring dimensions when cutting materials to scale.
Drafting Machines
For advanced and efficient manual drafting.
Drafting Machine
A drafting machine is a mechanical arm that attaches to a drawing board and combines the functions of a T-square, protractor, and parallel rule. Invented in 1901 by Charles H. Little, drafting machines allow for quick and accurate drawing of parallel lines, angles, and measurements across the entire drawing surface. While less common now due to CAD, drafting machines are still used in some settings for their efficiency and precision in manual drafting.
Care: Keep drafting machines clean and lubricated according to manufacturer instructions. Regularly check and tighten screws and joints to maintain smooth and accurate operation. Protect from dust and moisture when not in use.
Drafting Materials: Supporting the Tools
Beyond tools, specific materials are essential for drafting.
Drafting Paper
Drafting paper is a smooth, high-quality paper designed specifically for technical drawings. It is often smooth and slightly translucent, suitable for pencil, technical pens, and markers. Drafting paper is available in various weights and sizes.
Care: Store drafting paper flat and in a dry place to prevent wrinkles and moisture damage. Handle with clean hands to avoid transferring oils or dirt to the paper surface.
Tracing Paper
Tracing paper is a semi-transparent paper used for overlay drafting and transferring designs. Its transparency allows architects to trace over existing drawings or sketches to refine designs or create multiple iterations.
Care: Store tracing paper flat and in a dry place. Handle carefully to avoid tearing, as it is thinner than drafting paper.
Tracing Film (Vellum)
Tracing film, often made of polyester (vellum), is a durable and transparent drafting material used for creating archival-quality drawings. It is more stable and less prone to tearing or yellowing than tracing paper. Tracing film is suitable for both pencil and ink and is often used for final, presentation-quality drawings.
Care: Store tracing film flat and in a protective sleeve or folder to prevent scratches and damage. Handle with clean hands.
Drafting Tape
Drafting tape, also known as artist’s tape, is a low-tack adhesive tape used to secure paper to drawing boards or surfaces. It is designed to be easily removable without leaving residue or damaging paper.
Care: Store drafting tape in a cool, dry place. Ensure the roll is protected from dust and debris. Replace tape rolls as needed when adhesion weakens.
The Digital Shift: Computer-Aided Design (CAD)
The advent of Computer-Aided Design (CAD) software has significantly transformed the field of drafting. CAD programs offer digital tools for creating precise 2D and 3D drawings, streamlining the design process and enhancing efficiency. Software like Rhino and Grasshopper are industry standards, providing powerful capabilities for architectural modeling and design.
While CAD has become dominant, understanding traditional drafting tools and techniques remains valuable. Manual drafting skills enhance spatial reasoning, problem-solving, and a tactile understanding of design principles. Furthermore, in many educational settings and for conceptual sketching, traditional tools continue to play a crucial role.
Conclusion: Mastering Tools for Design Excellence
Whether you are working with traditional instruments or digital software, the principles of accurate and clear technical drawing remain paramount. Understanding the purpose, proper use, and care of common drafting tools and instruments is essential for anyone in architecture, engineering, or design. By investing in quality tools and practicing diligent maintenance, you ensure accuracy, longevity, and ultimately, the highest quality in your design work. Mastering these tools, both traditional and modern, empowers you to bring your creative visions to life with precision and clarity.