
Modern cars have significantly reduced the need for frequent tune-ups, thanks to sophisticated electronic systems. However, classic cars, with their mechanical systems, still require regular attention to maintain peak performance and reliability. For enthusiasts and owners dedicated to preserving these vintage machines, mastering the art of a classic car tune-up is essential. This guide will walk you through the process, highlighting the Classic Car Tuning Tools you’ll need to keep your beloved vehicle running smoothly. From ignition components to carburetor adjustments, understanding these steps and utilizing the right tools will ensure your classic car remains a joy to drive.
Step 1: Replacing Spark Plugs with Precision Tools
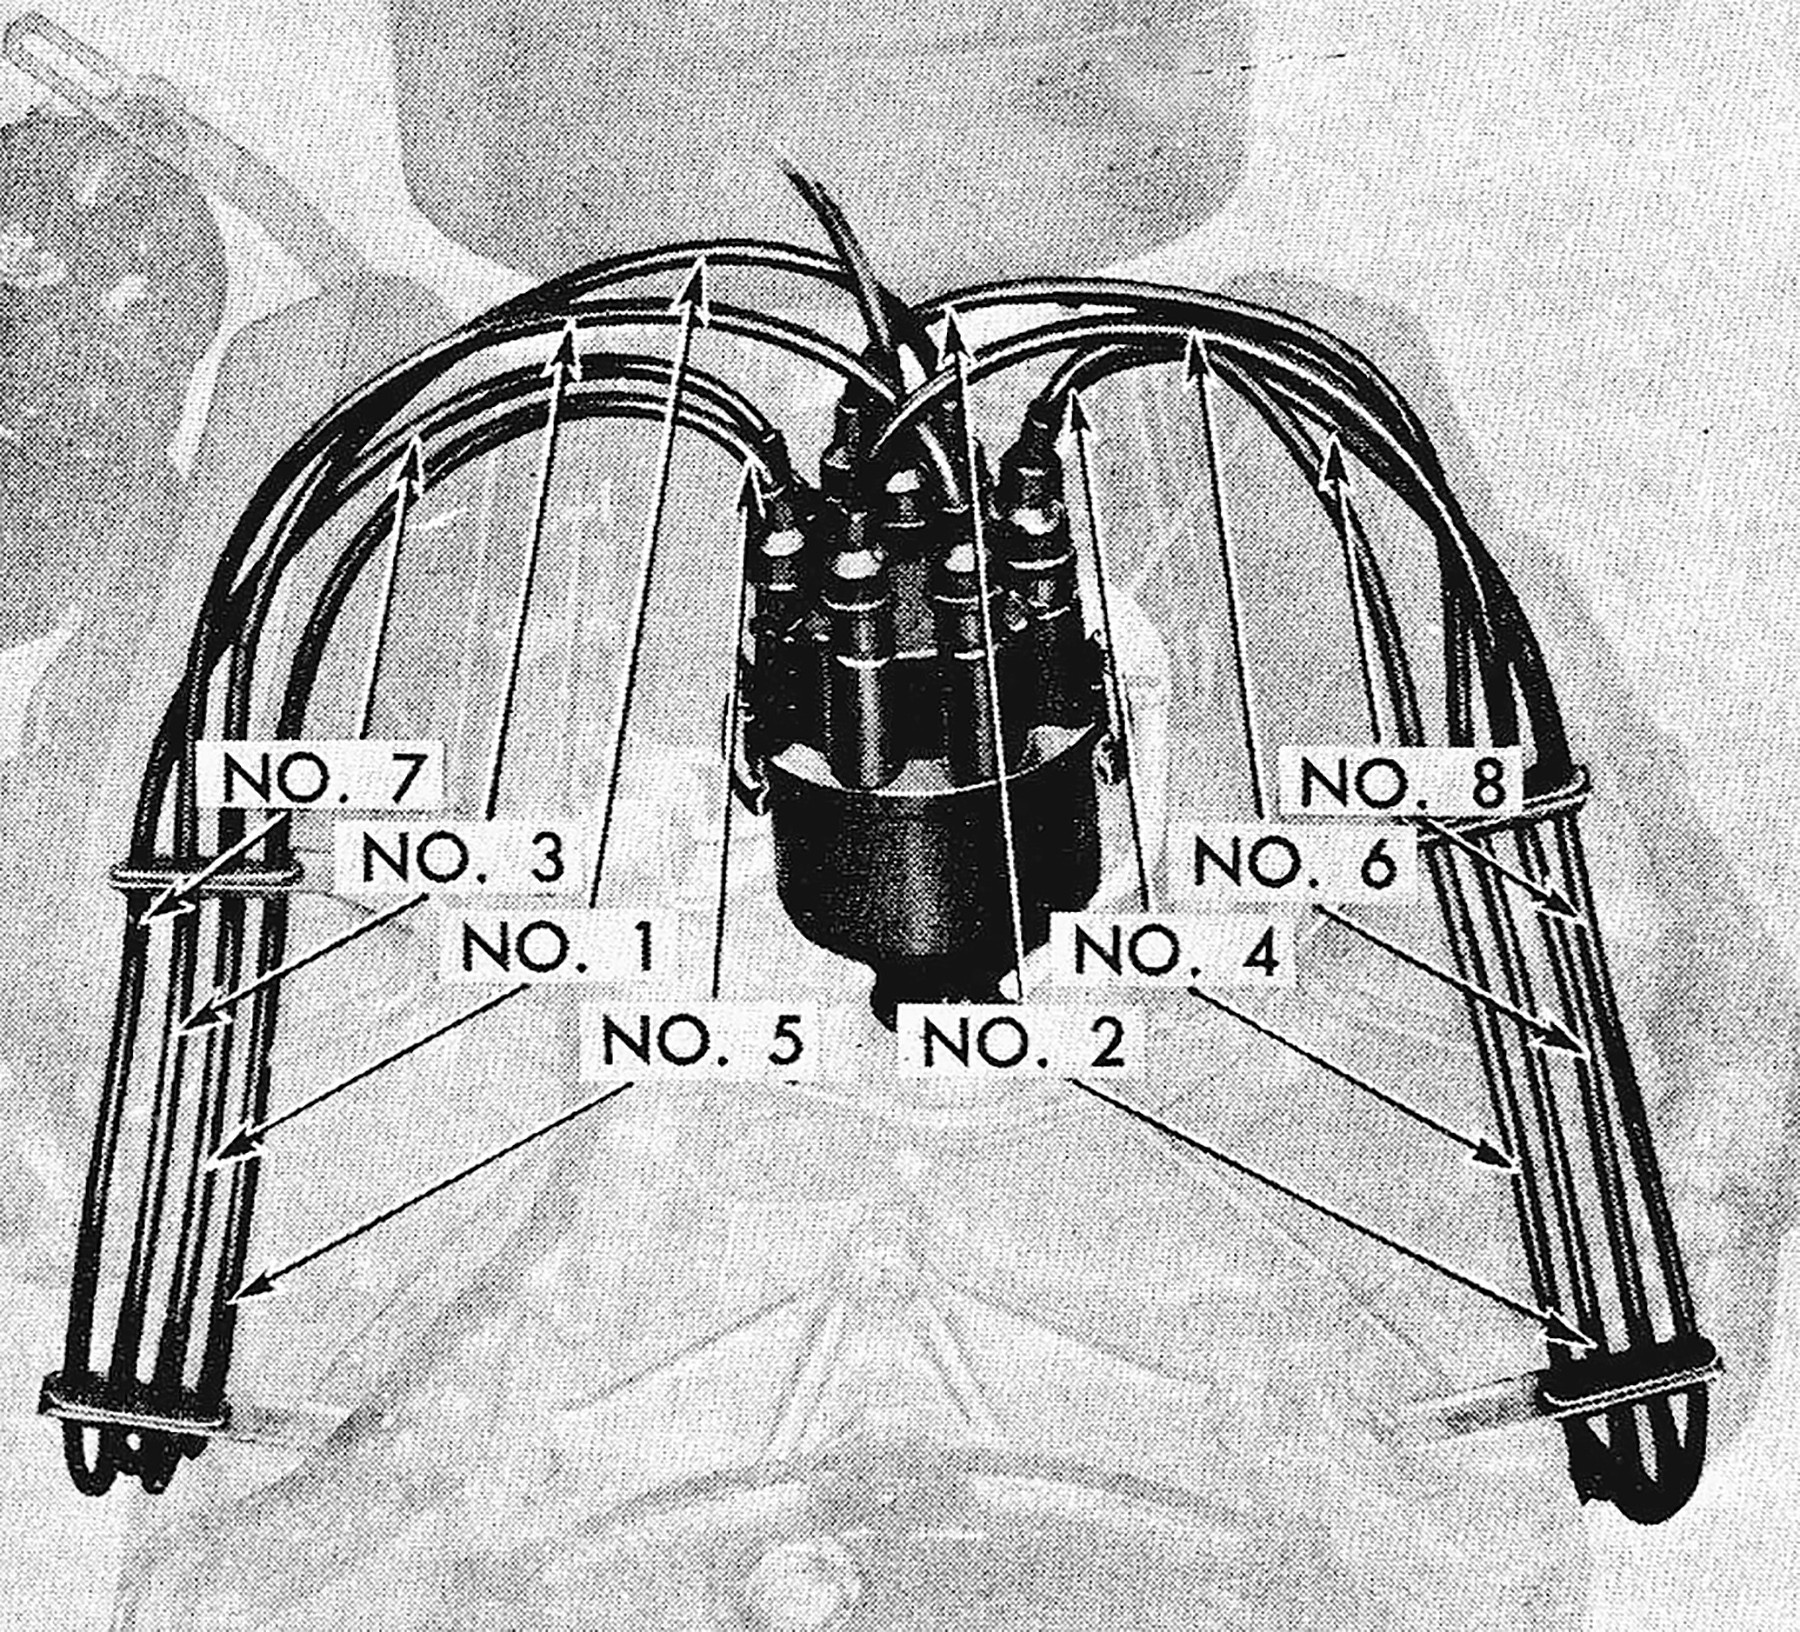
The first step in a classic car tune-up often involves replacing the spark plugs. To begin, carefully disconnect the spark plug wires by gently pulling on their insulating boots. If you’re unsure about the wire order, it’s wise to tag each wire to ensure correct reconnection. Inspect the wires for any signs of wear, such as cracked insulation or corroded terminals. Replacement is advisable if deterioration is evident.
To remove the spark plugs themselves, you’ll need a few specialized classic car tuning tools. A 3/8-inch drive ratchet and a spark plug socket are fundamental. Often, a short extension will improve accessibility. Consider a flex-head ratchet for added versatility in tight spaces. Spark plug socket sizes vary; while 5/8-inch or 16-mm sockets are common, some classic cars, particularly older American models, may require 9/16th-inch, 13/16-inch, or even larger sockets. It’s crucial to identify the correct size for your vehicle to avoid damage. Certain vehicles, like some BMWs, require a thin-wall, 12-point, 14-mm socket, highlighting the importance of having a diverse set of classic car tuning tools.
Once a spark plug is loosened, use the spark plug socket, which usually contains a rubber insert or magnet, to safely extract it. Access can be challenging in some vehicles. For instance, on certain classic V-8 engines, reaching plugs on the left bank might require working from under the car with a wrench, showcasing the need for adaptable classic car tuning tools.
Before installing new spark plugs, meticulously inspect them for damage and then set the spark plug gap. For most older vehicles with coil ignition, a 0.025-inch gap is typical, while magneto ignitions often require a 0.020-inch gap. Accurate gapping is crucial for optimal ignition performance. A feeler gauge is a standard classic car tuning tool for this purpose, but a round wire gauge or a ramp-style gapping tool can offer more precise measurements.
If gap adjustment is needed, carefully bend the outer electrode using needle-nose pliers or the dedicated slot on your gapping tool. Avoid tapping the plug against hard surfaces, as this can damage the insulator. Apply a small amount of dielectric grease to the new plug threads before installation and tighten them to the manufacturer’s specified torque, ideally around 25 pounds if accessible with a torque wrench. If a torque wrench isn’t usable, hand-tighten until seated, then give an additional half-turn with a wrench. Starting plugs by hand is critical to prevent cross-threading – a common pitfall when working without the right classic car tuning tools and careful technique.
Step 2: Servicing the Distributor with Specialized Tools
Servicing the distributor is the next vital step in tuning a classic car. The distributor’s location varies, but accessibility can be a challenge, especially in some older models where it’s positioned at the rear of the engine bay.
Begin by removing the distributor cap. While some caps can be removed with wires attached, in many classic cars, especially those with wires routed tightly, it’s necessary to detach the wires. Before removal, mark the position of the number one cylinder wire on the cap for correct reinstallation. Gently pull each wire from the cap, wiggling slightly to avoid terminal damage. Knowing the engine’s firing order and distributor rotation (clockwise or counterclockwise) is essential for correct wire re-installation. Tagging each wire with its corresponding cylinder number using masking tape is a helpful practice, particularly when wires are difficult to trace.
Inspect the inside of the distributor cap for corrosion on the contacts, which distribute voltage to the spark plugs. Mild corrosion can be cleaned with a small knife or specialized contact cleaner, a useful addition to your classic car tuning tools. Replace the cap if contacts are severely corroded or the cap is damaged.
Remove the rotor and inspect its conductor for corrosion. Light corrosion can be cleaned with an emery cloth or small file. Significant corrosion or pitting necessitates rotor replacement.
Inside the distributor, you’ll find breaker points and a condenser. Although older manuals might suggest cleaning and readjusting points, replacement is often preferable during a tune-up for enhanced reliability. Many distributor parts for classic cars remain readily available and are relatively inexpensive. Classic car tuning tools for distributor service include screwdrivers for removing and adjusting points, and feeler gauges for setting the point gap.
To replace the points and condenser, carefully remove the retaining screws. Be cautious, as these screws are small and easily dropped. The condenser is typically wired to the points via a screw terminal. Apply a small amount of dielectric grease to the distributor shaft cam before installing new points and condenser.
Set the breaker point air gap using a feeler gauge. Crank the engine until the points’ cam follower is on the peak of the distributor cam. Adjust the gap to 0.015 inches by moving the point assembly. Some distributors, particularly in 1957-1974 GM cars, feature an Allen screw adjustment for fine-tuning dwell angle, accessible with a 1/8-inch Allen wrench, a valuable classic car tuning tool.
After reassembling the distributor (rotor, cap, wires), use a dwell meter to check the dwell angle. Connect the meter according to its instructions. For V-8 engines, aim for around 30 degrees dwell. Adjust points if necessary to achieve the correct dwell. If dwell fluctuates excessively, it may indicate worn distributor shaft bearings, suggesting distributor replacement.
Step 3: Checking Ignition Timing with Timing Light
After distributor service, checking and adjusting ignition timing is crucial. A timing light is an indispensable classic car tuning tool for this step. Connect the timing light’s inductive lead to the number one spark plug wire and power leads to the battery. Disconnect and plug the vacuum advance line.
Locate the timing marks on the harmonic balancer and the degree scale on the engine. With the engine running and timing light aimed at these marks, the flashing light will indicate the ignition timing. Compare this reading to your vehicle’s specification. For example, 8 degrees before top dead center (BTDC) might be specified, but adjustments might be made based on fuel octane. Adjust the distributor position to achieve the correct timing, then tighten the distributor hold-down bolt.
Step 4: Replacing Filters – Essential Maintenance
Filter replacement is a fundamental part of a classic car tune-up. At a minimum, classic cars typically have air, oil, and fuel filters. Oil filters should be changed with every oil change, ideally every 2000 miles or two years for infrequently driven classics.
Fuel filter replacement intervals vary, but a good guideline is every 20,000 miles. Air filters, whether paper or synthetic, should also last at least 20,000 miles. Oil bath air filters, found on some older classics, require a different approach. These should be cleaned and refilled with oil at tune-up time, with the oil level checked more frequently. Cleaning involves washing the wire mesh element in solvent, drying it, and re-oiling it with engine oil. Protect surrounding engine areas when servicing oil bath filters to catch drips. While filter replacement doesn’t require highly specialized classic car tuning tools, having the correct wrenches and sockets for filter housings is necessary.
Step 5: Adjusting Idle Mixture with Precision Instruments
For classic cars built before the 1980s, carburetor idle mixture adjustment is a key part of a tune-up. Start by adjusting the idle RPM using the carburetor’s throttle linkage screw. A tachometer, often integrated into dwell meters or available as a separate classic car tuning tool, is essential for setting the correct idle speed. A vacuum gauge is also crucial for precisely adjusting the idle mixture.
Connect the vacuum gauge to a manifold vacuum port. Adjust the idle mixture screw clockwise and counterclockwise to find the point where the vacuum reading and RPM peak. If the RPM becomes too high, readjust the idle speed screw and recheck the mixture. If no change is detected, suspect a vacuum leak or carburetor issue. While experienced mechanics might adjust idle mixture by ear, using a vacuum gauge and tachometer provides a more accurate and reliable method for optimal engine performance.
***
Regular tune-ups using the right classic car tuning tools are essential for maintaining the performance and longevity of classic cars. By following these steps and properly utilizing these tools, you can ensure your classic car continues to provide driving pleasure for years to come.