
The Clone Stamp Tool in Photoshop is a powerful asset for photo editors, particularly when it comes to retouching and manipulating images. As the name suggests, this tool allows you to clone parts of an image and “stamp” them onto another area, or even onto a different image entirely. This capability is invaluable for tasks ranging from removing blemishes and unwanted objects to duplicating elements within a scene. If you’re new to Photoshop or looking to understand this versatile tool, this guide will walk you through the essentials of using the Clone Stamp Tool effectively.
Understanding the Function of the Clone Stamp Tool
At its core, the Clone Stamp Tool works by sampling pixels from one area of your image and replicating them in another area wherever you paint with the tool. It essentially copies texture, color, and shading from a source point to a target point. This cloning process is dynamic; as you paint, the source point moves in relation to your brush strokes, allowing you to seamlessly blend cloned areas with their surroundings. This makes it ideal for a variety of tasks, including:
- Retouching imperfections: Removing blemishes, wrinkles, dust spots, or any unwanted marks on a photograph.
- Object removal: Eliminating distracting elements from a scene, such as power lines, trash, or unwanted people.
- Duplicating objects: Creating copies of objects within an image to enhance visual interest or correct composition.
- Texture repair: Seamlessly repairing damaged or missing textures in areas like skin, fabric, or landscapes.
Step-by-Step Guide: How to Use the Clone Stamp Tool
The Clone Stamp Tool is available in all versions of Photoshop, from older CS versions to the latest Creative Cloud (CC). This tutorial will use Photoshop CS3 for demonstration, but the steps are largely similar across different versions.
-
Open Your Image in Photoshop: Begin by launching Photoshop and opening the image you wish to edit. Navigate to
File > Openand select your desired image. -
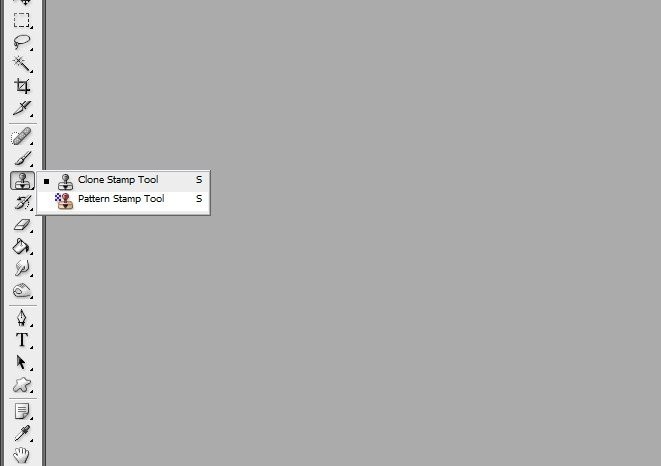
Select the Clone Stamp Tool: Locate the Clone Stamp Tool in the toolbar, typically found on the left side of your Photoshop interface. It is represented by an icon that resembles a rubber stamp. Click on the icon to activate the tool.
- Set the Source Point: This is a crucial step. Before you can clone, you need to define the source area – the part of the image you want to copy. To do this, position your cursor over the area you want to sample, press and hold the
Altkey (Option key on Mac), and then click with your mouse. Your cursor will change to a target symbol when you pressAlt, indicating you are setting the source point.
- Begin Cloning: Release the
Altkey and move your cursor to the area where you want to apply the cloned pixels. Click and drag your mouse to start painting with the cloned source. You will see a crosshair (+) appear next to your brush cursor. This crosshair indicates the source point, and it will move as you paint, cloning the area relative to your brush strokes.
-
Adjust Brush Settings (Optional but Recommended): For more control and refined results, explore the options bar at the top of the Photoshop interface when the Clone Stamp Tool is selected. Key settings to consider include:
- Brush Size: Adjust the brush size to match the area you are working on. Smaller brushes are better for detailed work, while larger brushes cover more area quickly.
- Hardness: Brush hardness controls the edge of the brush. A softer brush (lower hardness) creates feathered edges for smoother blending, while a harder brush creates sharp, defined edges. For most retouching tasks, a softer brush is preferable.
- Opacity: Opacity determines the transparency of the cloned pixels. Lower opacity allows you to build up the cloned effect gradually for a more natural look.
- Mode: Experiment with different blending modes in the Mode dropdown menu to achieve specific effects or blend cloned areas seamlessly. “Normal” mode is typically used for standard cloning tasks.
- Aligned: The “Aligned” option in the options bar is important. When checked (default), the source point moves relative to your brush strokes each time you lift and re-apply the brush. When unchecked, the source point resets to the initial sampling point every time you start a new stroke. For most cloning tasks, keeping “Aligned” checked is recommended for seamless and continuous cloning.
Tips for Effective Clone Stamping
- Frequent Source Point Adjustment: Continuously resample your source point as you clone, especially when working on areas with varying textures, colors, or lighting. This ensures that the cloned pixels blend naturally with the target area.
- Use a Soft Brush: Employing a soft brush with low hardness helps to blend cloned areas seamlessly and avoid harsh edges.
- Work in Layers: Always work non-destructively by cloning on a separate layer. This allows you to adjust or undo your cloning edits without affecting the original image layer. Create a new layer (
Layer > New > Layer) and ensure “Sample Layers” in the Clone Stamp Tool options bar is set to “Current & Below” or “All Layers” to sample from all visible layers. - Practice and Experiment: The best way to master the Clone Stamp Tool is through practice. Experiment with different settings, source points, and techniques to understand its nuances and capabilities.
By understanding the function and practicing the techniques outlined in this guide, you can effectively utilize the Photoshop Clone Stamp Tool to enhance your images, remove imperfections, and achieve creative photo manipulations.