
Experiencing trouble connecting your OBD-II scanner to your 2006 Pontiac G6? You’re not alone. A frustrating issue many car owners encounter is the dreaded “link error” message, preventing you from accessing vital diagnostic information from your vehicle’s computer system. When your OBD-II scanner fails to communicate with your Pontiac G6, diagnosing car problems becomes significantly more challenging. This guide, drawing from real-world experiences, will walk you through troubleshooting steps to resolve this communication breakdown and get you back on the road to diagnosing and fixing your car issues.
Understanding OBD-II Communication Issues in Your Pontiac G6
The On-Board Diagnostics II (OBD-II) system is a crucial component of modern vehicles like the 2006 Pontiac G6. It allows mechanics and car owners to access the vehicle’s computer, diagnose problems, and monitor performance. When your OBD-II scanner cannot establish a connection, it means you’re locked out of this valuable diagnostic gateway. This lack of communication can stem from various sources, ranging from simple fuse problems to more complex module malfunctions.
Common symptoms accompanying an OBD-II communication failure in your Pontiac G6 often include the check engine light being illuminated, potentially coupled with sluggish engine performance. The inability to read diagnostic trouble codes (DTCs) further complicates pinpointing the root cause of any performance issues your vehicle might be exhibiting.
Initial Checks: Starting with Fuses and Power Supply
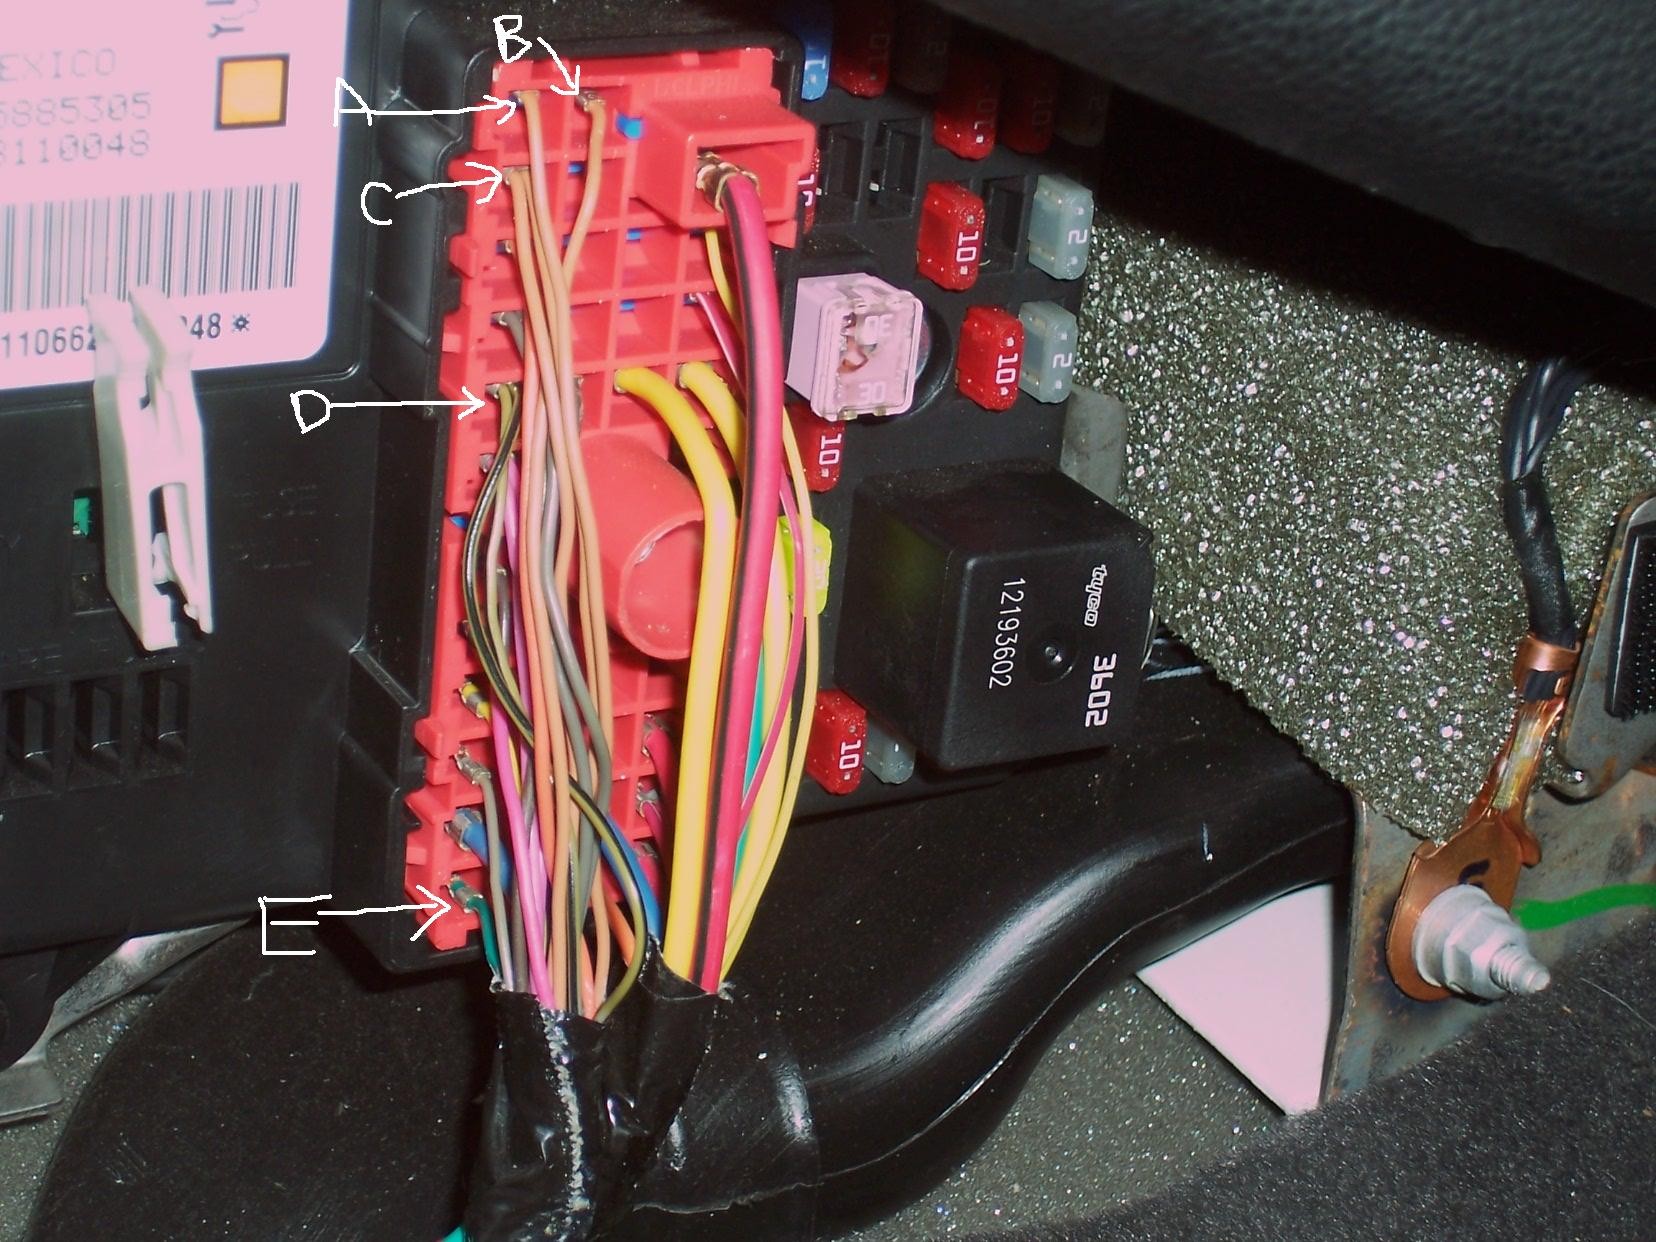
The first and simplest step in diagnosing an OBD-II communication problem is to check the fuses related to the OBD-II system and the car’s computer modules. For the Pontiac G6, a crucial fuse to inspect is the HVAC CTRL BATT fuse, typically located in the BCM (Body Control Module) fuse box, often situated under the dashboard to the right of the center console. This fuse often provides power to systems necessary for OBD-II communication.
Another potential fuse location sometimes labeled “ECM BATT” might be found under the hood. Interestingly, as one user discovered, location #51 in their Pontiac G6 fuse box was marked for “ECM BATT” but lacked the actual fuse components, suggesting it might be a spare or unused slot in some configurations. However, always double-check your specific vehicle’s fuse box diagrams, often found on the fuse box cover or in the owner’s manual, to confirm the correct fuse locations for your 2006 Pontiac G6 model.
If a fuse is blown, replace it with a fuse of the same amperage and attempt to connect your OBD-II scanner again. If the fuse blows again immediately, it indicates a potential short circuit in the system that requires further investigation.
Inspecting the Data Link Connector (DLC) and Wiring
If the fuses are intact, the next step is to examine the Data Link Connector (DLC), also known as the OBD-II port, typically located under the steering wheel column. Visually inspect the DLC for any signs of damage, corrosion, or bent pins. A bent pin can prevent proper contact between the scanner and the vehicle’s communication system, directly causing a “link error.”
According to wiring diagrams for the 2006 Pontiac G6, the DLC typically utilizes several wires for operation. These include:
- Power Wire: Usually Red/White, providing 12V power to the scanner.
- Ground Wires: Typically Black, providing ground connections.
- Communication Wires: These are data bus lines, often Tan/Black and Tan wires, responsible for data transmission between the scanner and the vehicle’s computer modules like the BCM and ECM. In some cases, a Green wire might also be present for specific communication protocols.
Use a multimeter to check for proper voltage at the power pin (Red/White wire) of the DLC. You should see approximately 12V with the ignition on. Also, verify good ground connections at the ground pins.
To check the continuity of the communication wires, you may need wiring diagrams specific to your 2006 Pontiac G6. These diagrams will show the exact pin locations and wire colors for the communication lines running from the DLC to the BCM (Body Control Module). Often, the communication wires from the DLC connect directly to the BCM.
Body Control Module (BCM) and ECM Considerations
The Body Control Module (BCM) acts as a central communication hub in modern vehicles, including the 2006 Pontiac G6. The OBD-II port communicates with the BCM, which then relays information to other modules like the Engine Control Module (ECM) and various other computer systems throughout the car.
If you’ve ruled out fuse and wiring issues, a malfunctioning BCM could be the reason for the OBD-II scanner communication failure. While less common than simple wiring problems, BCM issues can prevent the necessary data flow for diagnostics. In some cases, a dealer might suggest a BCM relearn or reprogramming procedure. However, if the BCM is indeed faulty, replacement might be necessary. Note that a new BCM typically requires programming to be properly configured to your specific vehicle.
The Simple Fix: A Bent Pin Revelation
In a real-world scenario, a user troubleshooting a “no communication” issue with their 2008 Pontiac G6 (similar to the 2006 model) went through extensive fuse and wiring checks, even suspecting the BCM. However, the ultimate solution turned out to be surprisingly simple: a bent pin inside the female connector of the Red/White power wire within the DLC.
This bent pin was preventing proper contact with the male pin of the OBD-II scanner plug. By carefully bending the pin back into its correct position, the user restored the connection, and the OBD-II scanner successfully linked to the vehicle’s computer for the first time.
This experience underscores a crucial lesson: always check the simplest and most obvious potential causes first. A visual inspection of the DLC pins, often overlooked, can save significant time and effort in diagnosing OBD-II communication problems.
Confirming Communication and Addressing Underlying Issues
Once the communication issue is resolved, and your OBD-II scanner connects successfully, you can finally read any stored diagnostic trouble codes. In the example case, after fixing the bent pin and connecting the scanner, the user retrieved code P0420 – Catalyst System Efficiency Below Threshold (Bank 1). This code indicates a separate issue related to the catalytic converter system, which was the likely cause of the check engine light and sluggish performance in the first place.
Alt text: Image of an OBD-II scanner displaying diagnostic trouble codes, illustrating the successful communication and retrieval of vehicle fault information after troubleshooting.
Resolving the OBD-II communication problem is just the first step. The real value lies in accessing the diagnostic codes that guide you towards fixing the underlying mechanical or electrical issues causing your vehicle’s problems.
Conclusion: Systematic Troubleshooting for OBD-II Communication Failure
Troubleshooting an OBD-II scanner communication failure on your 2006 Pontiac G6 requires a systematic approach. Start with the easy checks: fuses and visual inspection of the DLC pins. Then, proceed to wiring checks, verifying power and ground at the DLC. While less frequent, consider the BCM as a potential culprit if simpler checks don’t reveal the problem.
The case of the bent pin highlights that even experienced mechanics can sometimes overlook simple mechanical issues. Always ensure a thorough visual inspection of connectors and pins as part of your diagnostic process. By following these steps, you can effectively diagnose and resolve OBD-II communication problems, enabling you to use your scanner to its full potential and keep your 2006 Pontiac G6 running smoothly.
If you’ve encountered similar OBD-II communication issues with your Pontiac G6 or other vehicles, share your experiences and troubleshooting tips in the comments below!
